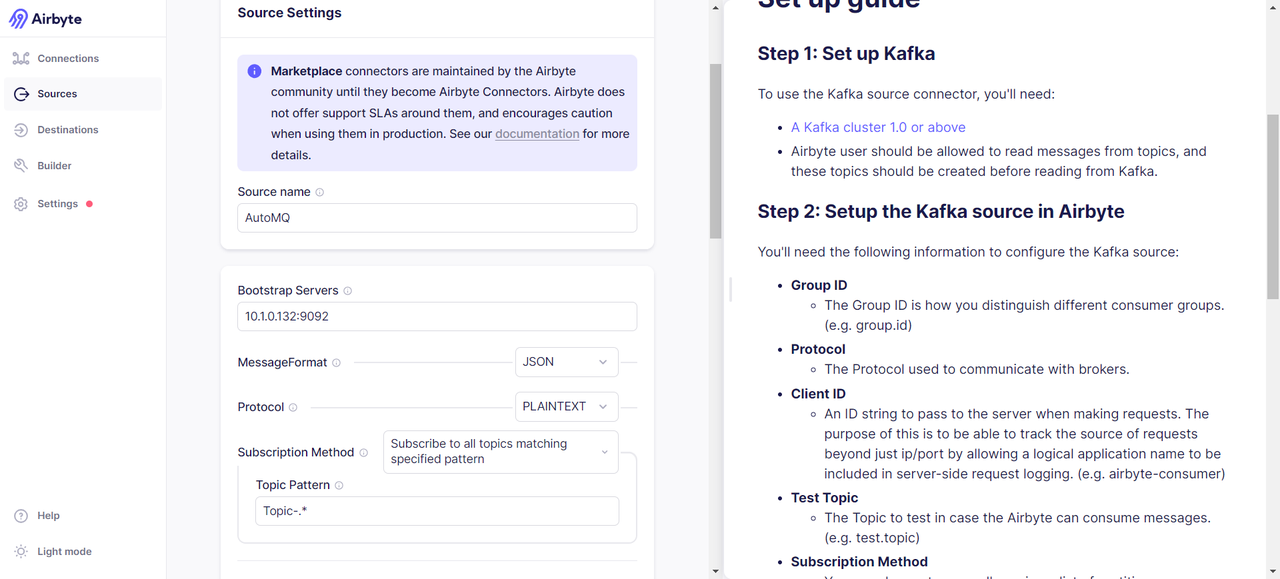
2024-07-29 08:53:33 source > INFO o.a.k.c.c.i.AbstractCoordinator(resetStateAndGeneration):998 [Consumer clientId=consumer-airbyte-consumer-group-1, groupId=airbyte-consumer-group] Resetting generation and member id due to: consumer pro-actively leaving the group
2024-07-29 08:53:33 source > INFO o.a.k.c.c.i.AbstractCoordinator(requestRejoin):1045 [Consumer clientId=consumer-airbyte-consumer-group-1, groupId=airbyte-consumer-group] Request joining group due to: consumer pro-actively leaving the group
2024-07-29 08:53:33 source > INFO o.a.k.c.m.Metrics(close):659 Metrics scheduler closed
2024-07-29 08:53:33 source > INFO o.a.k.c.m.Metrics(close):663 Closing reporter org.apache.kafka.common.metrics.JmxReporter
2024-07-29 08:53:33 source > INFO o.a.k.c.m.Metrics(close):669 Metrics reporters closed
2024-07-29 08:53:33 source > INFO o.a.k.c.u.AppInfoParser(unregisterAppInfo):83 App info kafka.consumer for consumer-airbyte-consumer-group-1 unregistered
2024-07-29 08:53:33 source > INFO i.a.c.i.b.IntegrationRunner(runInternal):231 Completed integration: io.airbyte.integrations.source.kafka.KafkaSource
2024-07-29 08:53:33 source > INFO i.a.i.s.k.KafkaSource(main):62 Completed source: class io.airbyte.integrations.source.kafka.KafkaSource
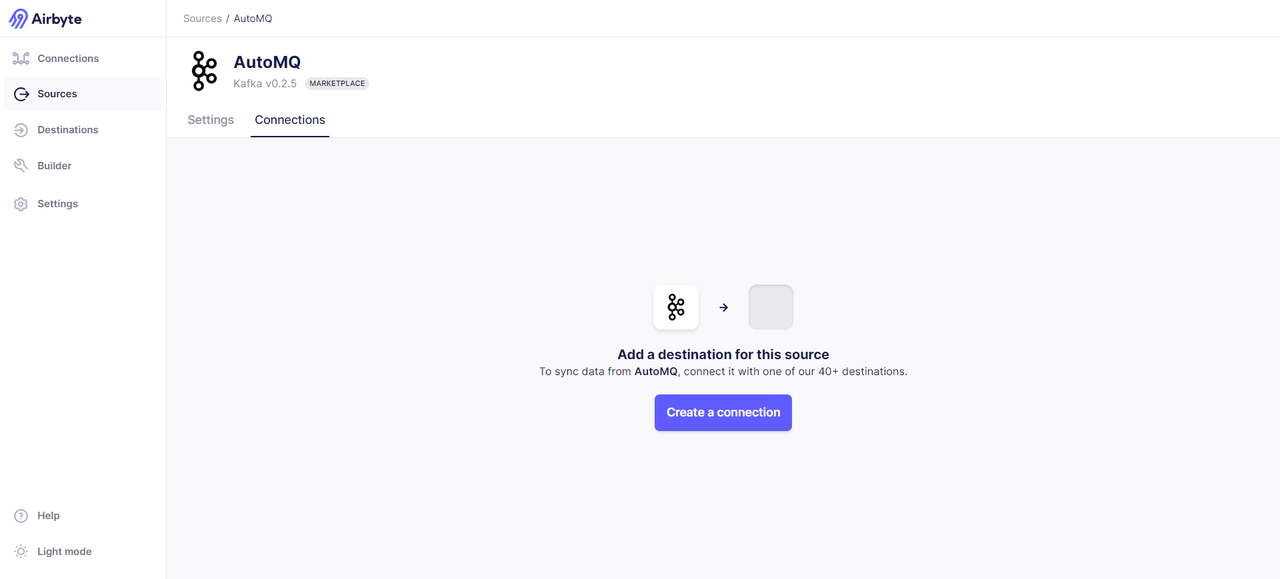
2024-07-29 08:53:33 replication-orchestrator > (pod: airbyte-abctl / source-kafka-read-2-0-pbvbp) - Closed all resources for pod
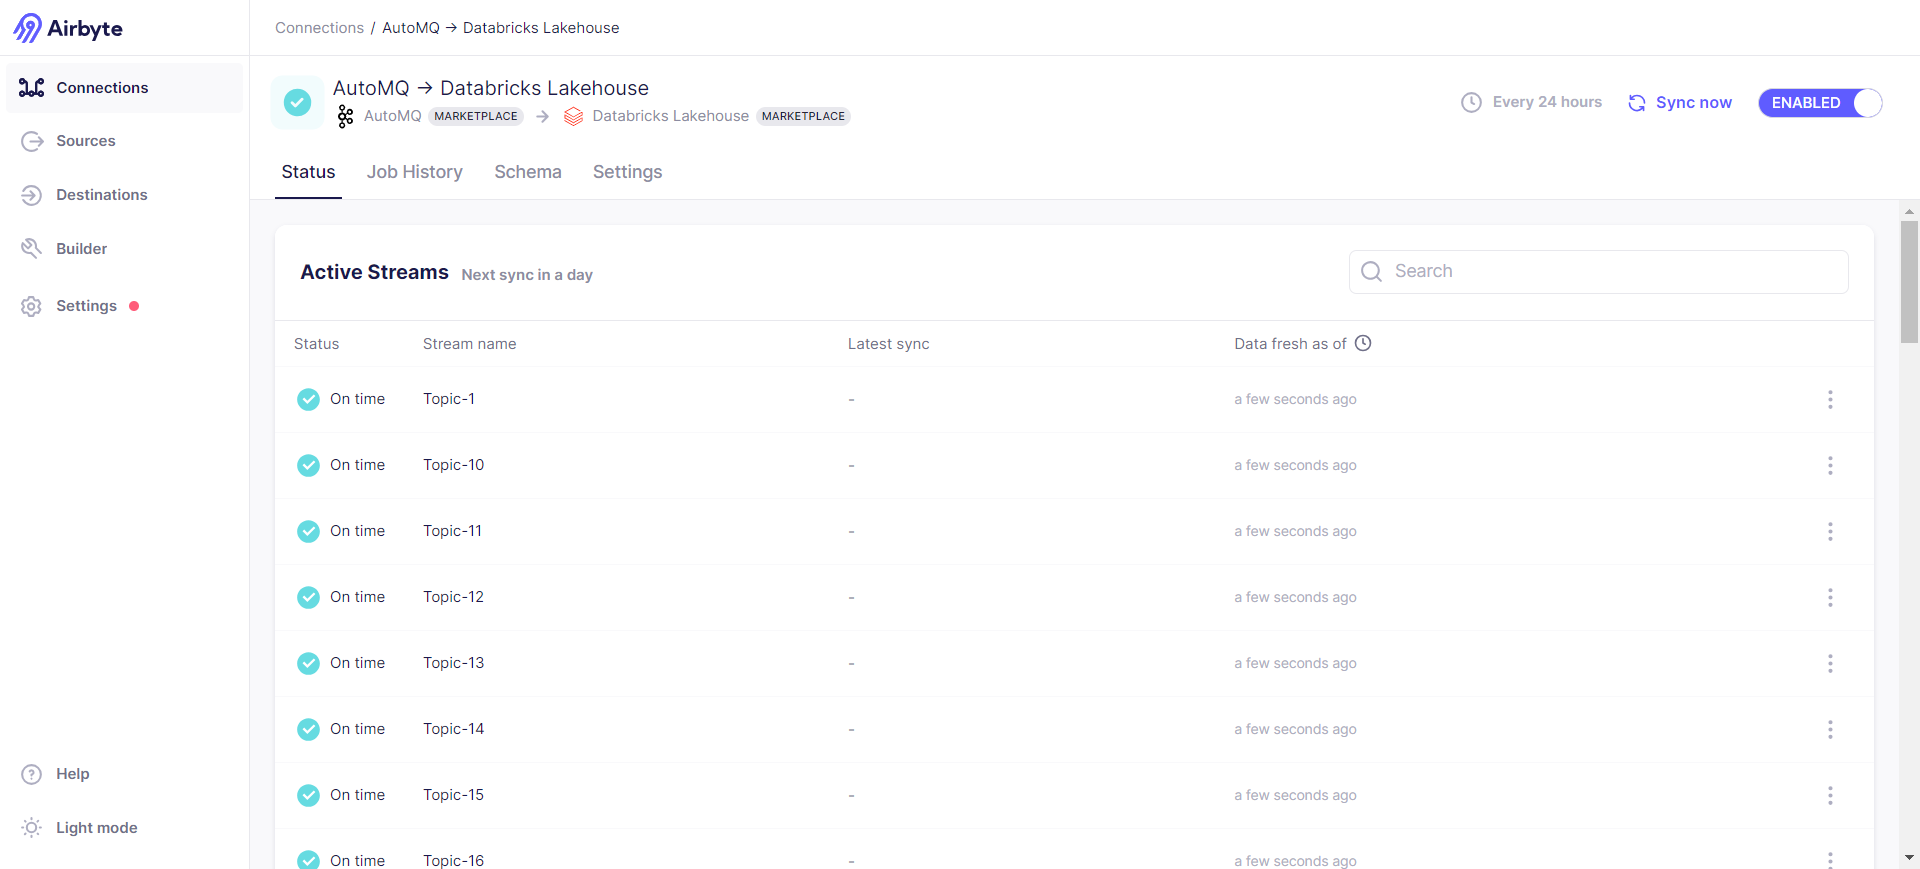
2024-07-29 08:53:33 replication-orchestrator > Total records read: 0 (0 bytes)
2024-07-29 08:53:33 replication-orchestrator > Schema validation was performed to a max of 10 records with errors per stream.
2024-07-29 08:53:33 replication-orchestrator > readFromSource: done. (source.isFinished:true, fromSource.isClosed:false)
2024-07-29 08:53:33 replication-orchestrator > processMessage: done. (fromSource.isDone:true, forDest.isClosed:false)
2024-07-29 08:53:33 replication-orchestrator > thread status... heartbeat thread: false , replication thread: true
2024-07-29 08:53:33 replication-orchestrator > writeToDestination: done. (forDest.isDone:true, isDestRunning:true)
2024-07-29 08:53:33 replication-orchestrator > thread status... timeout thread: false , replication thread: true
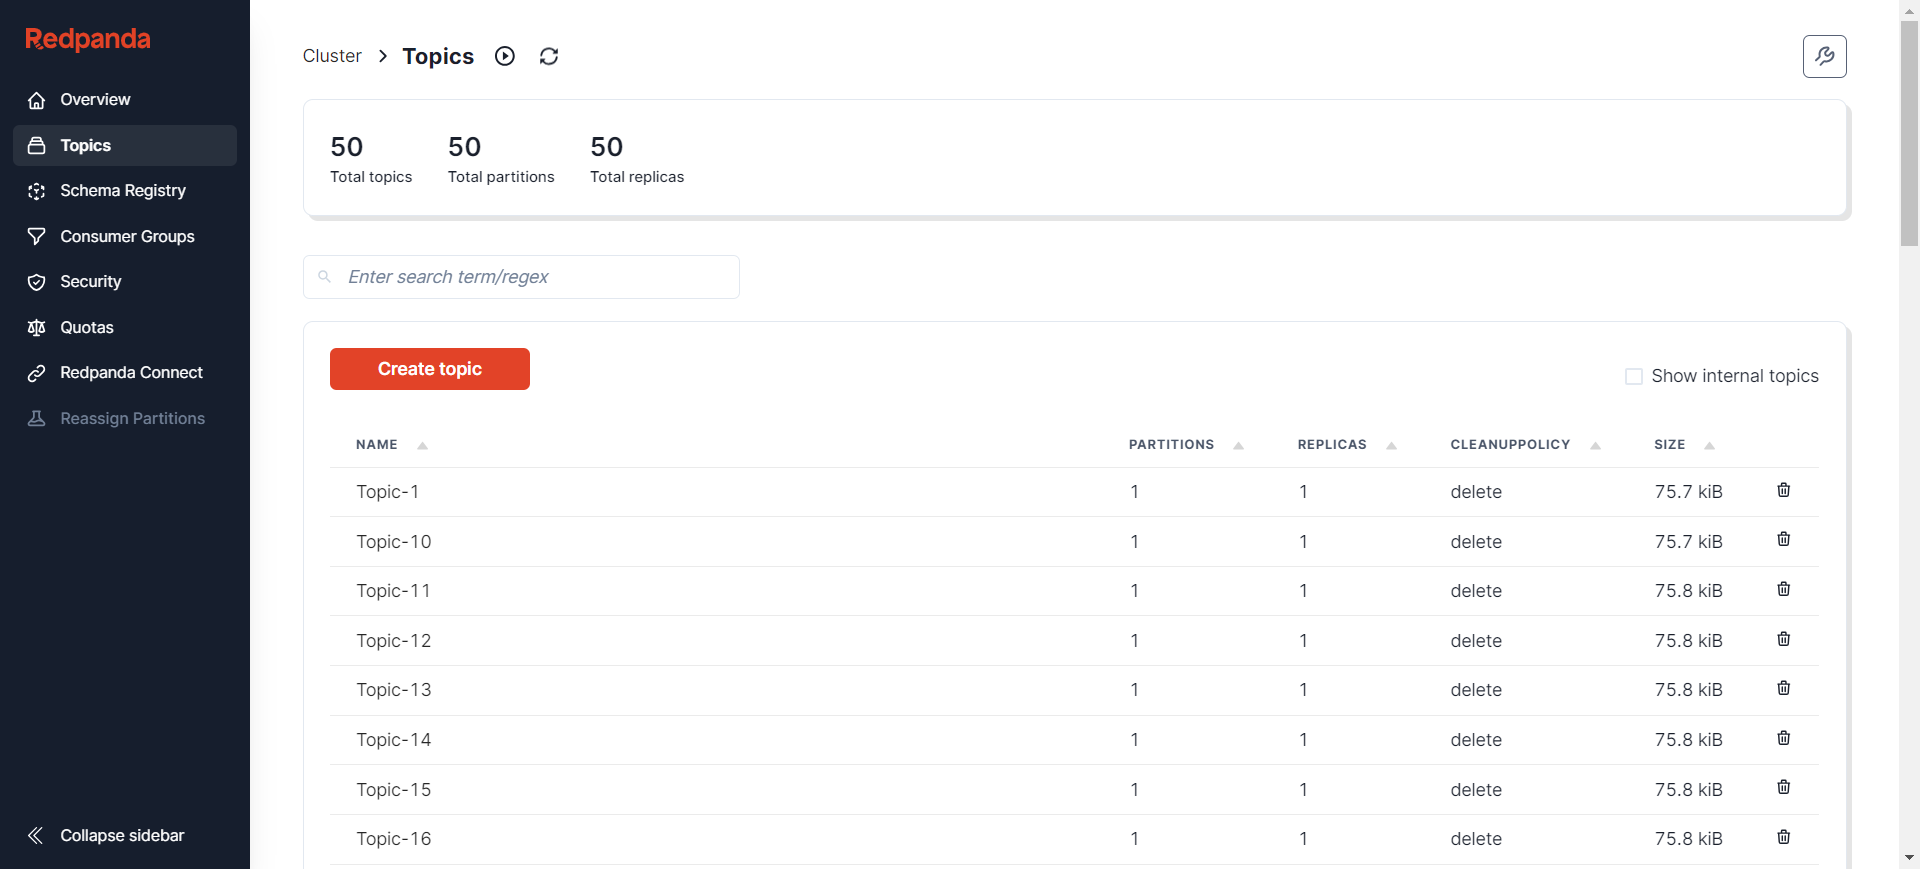
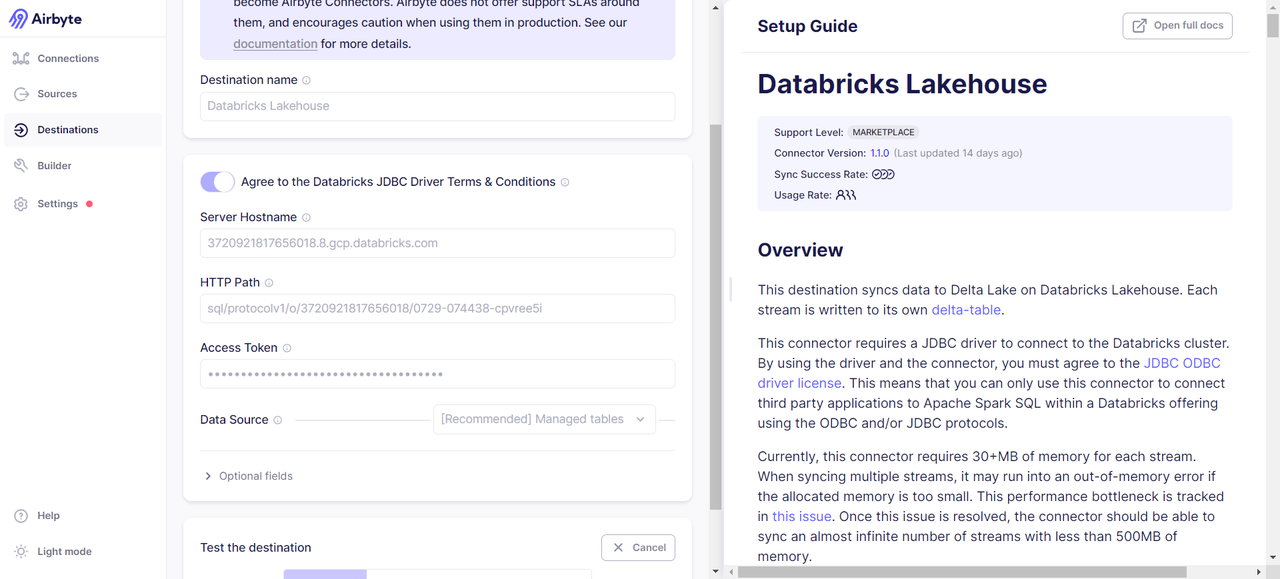
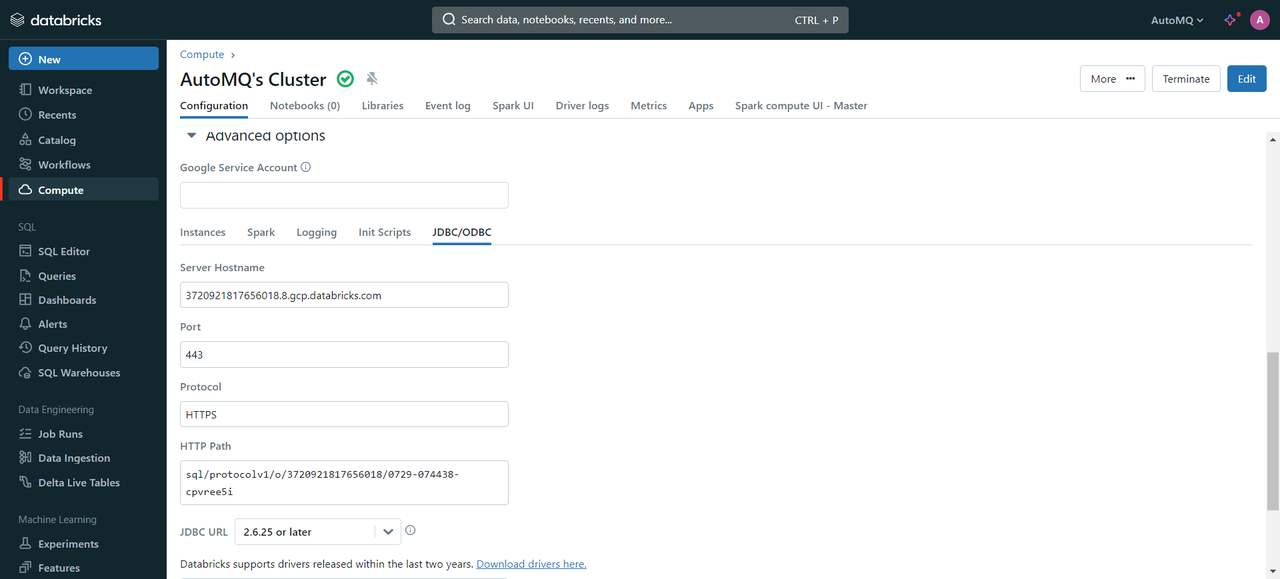
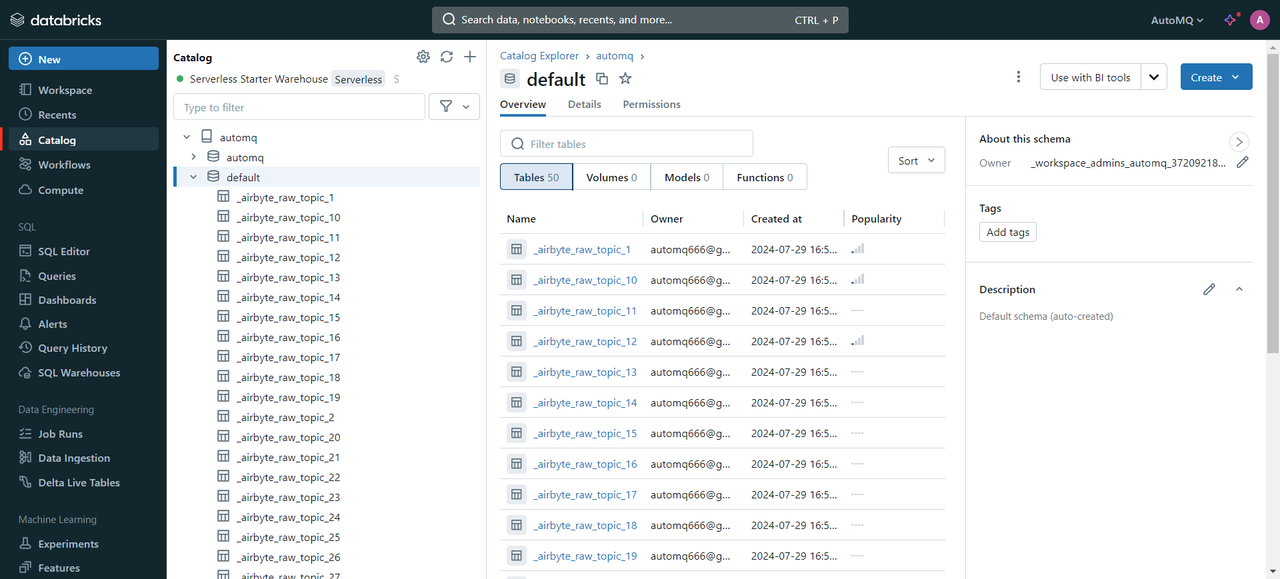
2024-07-29 08:53:35 destination > INFO i.a.i.d.j.JdbcBufferedConsumerFactory(lambda$onStartFunction$1):147 Preparing raw table in destination started for stream Topic-27. schema: default, table name: _airbyte_raw_topic_27
2024-07-29 08:53:40 destination > INFO i.a.i.d.j.JdbcBufferedConsumerFactory(lambda$onStartFunction$1):147 Preparing raw table in destination started for stream Topic-24. schema: default, table name: _airbyte_raw_topic_24
2024-07-29 08:53:45 destination > INFO i.a.i.d.j.JdbcBufferedConsumerFactory(lambda$onStartFunction$1):147 Preparing raw table in destination started for stream Topic-25. schema: default, table name: _airbyte_raw_topic_25
2024-07-29 08:53:50 destination > INFO i.a.i.d.j.JdbcBufferedConsumerFactory(lambda$onStartFunction$1):147 Preparing raw table in destination started for stream Topic-28. schema: default, table name: _airbyte_raw_topic_28
2024-07-29 08:53:55 destination > INFO i.a.i.d.j.JdbcBufferedConsumerFactory(lambda$onStartFunction$1):147 Preparing raw table in destination started for stream Topic-29. schema: default, table name: _airbyte_raw_topic_29
2024-07-29 08:54:01 destination > INFO i.a.i.d.j.JdbcBufferedConsumerFactory(lambda$onStartFunction$1):147 Preparing raw table in destination started for stream Topic-30. schema: default, table name: _airbyte_raw_topic_30
2024-07-29 08:54:06 destination > INFO i.a.i.d.j.JdbcBufferedConsumerFactory(lambda$onStartFunction$1):147 Preparing raw table in destination started for stream Topic-33. schema: default, table name: _airbyte_raw_topic_33
2024-07-29 08:54:10 destination > INFO i.a.i.d.j.JdbcBufferedConsumerFactory(lambda$onStartFunction$1):147 Preparing raw table in destination started for stream Topic-34. schema: default, table name: _airbyte_raw_topic_34
2024-07-29 08:54:15 destination > INFO i.a.i.d.j.JdbcBufferedConsumerFactory(lambda$onStartFunction$1):147 Preparing raw table in destination started for stream Topic-31. schema: default, table name: _airbyte_raw_topic_31
2024-07-29 08:54:19 destination > INFO i.a.i.d.j.JdbcBufferedConsumerFactory(lambda$onStartFunction$1):147 Preparing raw table in destination started for stream Topic-32. schema: default, table name: _airbyte_raw_topic_32