Deploy Single-Node Test Cluster on Docker
This document explains how to set up a single-node AutoMQ cluster in a local development environment by deploying MinIO to provide object storage services. This setup allows users to experience basic functionalities such as message sending and receiving within this development setting.
The single-node deployment solution is intended only for testing and learning purposes and is not recommended for production environments.
Besides the single-node deployment solution, users can refer to the following documents to explore other deployment models designed to verify the features related to the cluster:
Deploying AutoMQ and tuning parameters for production environment loads can be relatively complex. You can reach out to the AutoMQ team through this form to receive necessary assistance and best practices.
Furthermore, if you wish to completely avoid the burden of installation and deployment, you can experience the fully managed cloud services provided by the AutoMQ team via the link below. A free two-week trial is currently offered across various cloud marketplaces.
Prerequisites
-
Linux/Mac/Windows Subsystem for Linux
-
Docker
-
Docker Compose version > 2.22.0
-
Requires a minimum of 8GB of free memory.
Install and Start a Single-node AutoMQ Cluster
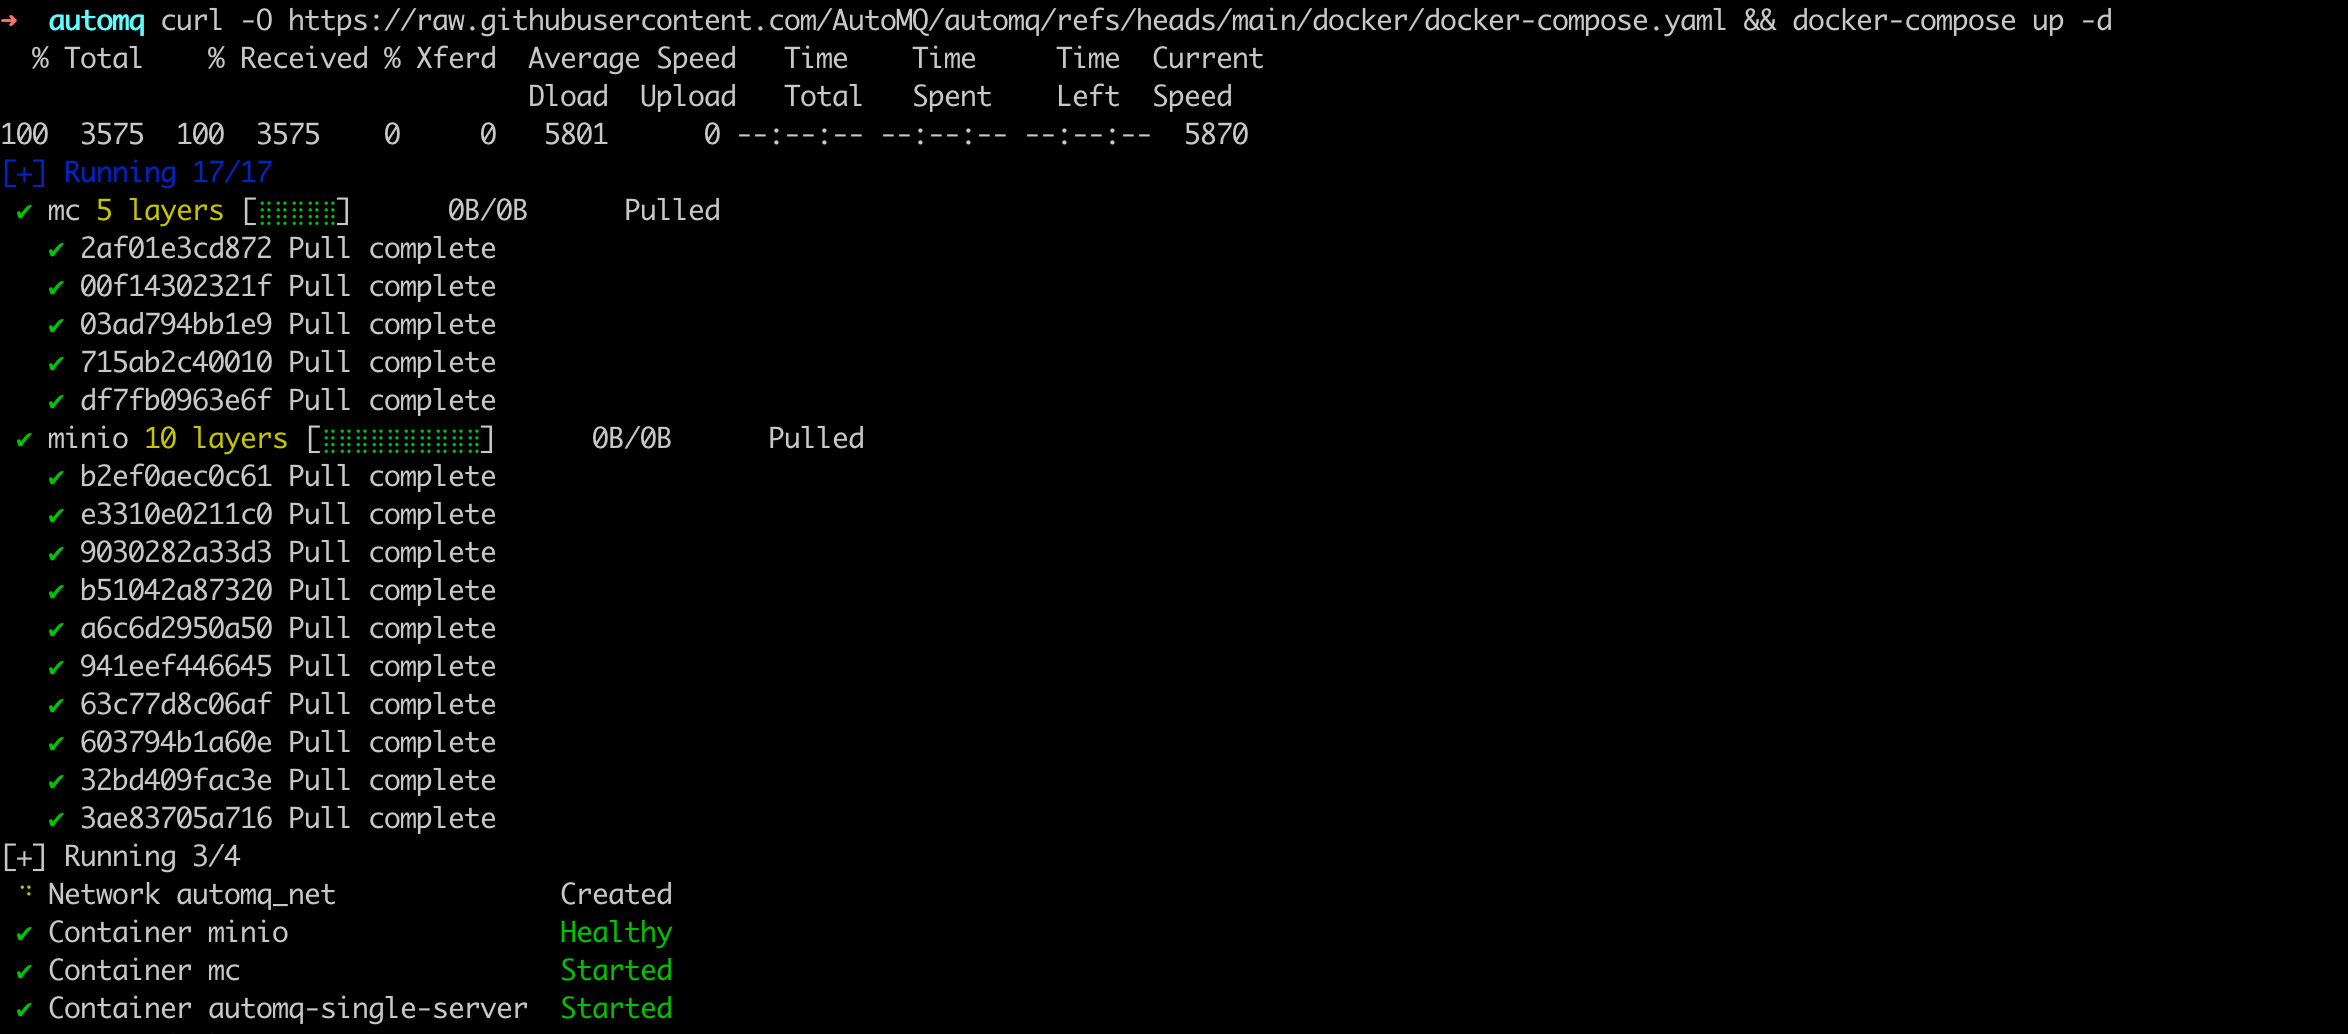
Execute the following command to download the Docker Compose configuration file for single-node deployment. Then, start the single-node AutoMQ cluster using Docker Compose.
curl -O https://raw.githubusercontent.com/AutoMQ/automq/refs/heads/main/docker/docker-compose.yaml && docker-compose up -d
Upon successful startup, the cluster's address will be accessible under the Docker network named automq_net, with the cluster's bootstrap address designated as server1:9092. You can use this address for subsequent connections to the cluster.
Note:
In the aforementioned test environment, AutoMQ employs a Docker network named automq_net. To connect to this cluster, you must configure the --network automq_net option to ensure you connect using the same Docker network.
Test Message Transmission
After setting up and starting the AutoMQ cluster, you can evaluate the message sending and reception by executing the following commands.
- Execute the following command to create a Topic using the Kafka CLI command kafka-topics.sh within the Docker environment.
docker run --network automq_net automqinc/automq:latest /bin/bash -c "/opt/kafka/kafka/bin/kafka-topics.sh --create --topic quickstart-events --bootstrap-server server1:9092"
- Use the following command to send test messages by applying the Kafka CLI command kafka-console-producer.sh in the Docker environment.
docker run -it --network automq_net automqinc/automq:latest /bin/bash -c "/opt/kafka/kafka/bin/kafka-console-producer.sh --topic quickstart-events --bootstrap-server server1:9092"
- Run the command below to consume test messages by utilizing the Kafka CLI command kafka-console-consumer.sh in the Docker environment.
docker run --network automq_net automqinc/automq:latest /bin/bash -c "/opt/kafka/kafka/bin/kafka-console-consumer.sh --topic quickstart-events --from-beginning --bootstrap-server server1:9092"
Stopping and Uninstalling a Single-Node AutoMQ Cluster
After completing the functional tests, please execute the following commands to stop and uninstall the current AutoMQ cluster.
curl -O https://raw.githubusercontent.com/AutoMQ/automq/refs/heads/main/docker/docker-compose.yaml && docker-compose down -v