
In this article, references to AutoMQ product services, AutoMQ services, and AutoMQ specifically refer to AutoMQ HK Limited and its affiliates.
Prerequisites
Condition 1: Cloud Account Operation Permissions
To create a BYOC environment, the operating cloud account must be the primary account or an IAM sub-account with the necessary operation permissions. If you are currently using an IAM sub-account on the AWS console, authorization must be granted before proceeding with service activation.Procedure
Step 1: Prepare VPC
The AutoMQ BYOC environment is deployed within the user’s VPC to ensure data privacy and security. When installing the AutoMQ environment from AWS Marketplace, the following two methods are supported:- Automatically create a new VPC installation environment: Select this option to have Marketplace CloudFormation automatically create the VPC and other resources, eliminating the need for manual configuration. This is recommended for initial POCs and testing.
- VPC Environment Provided by User: Marketplace will not proactively create a VPC network; users must specify an existing VPC network.
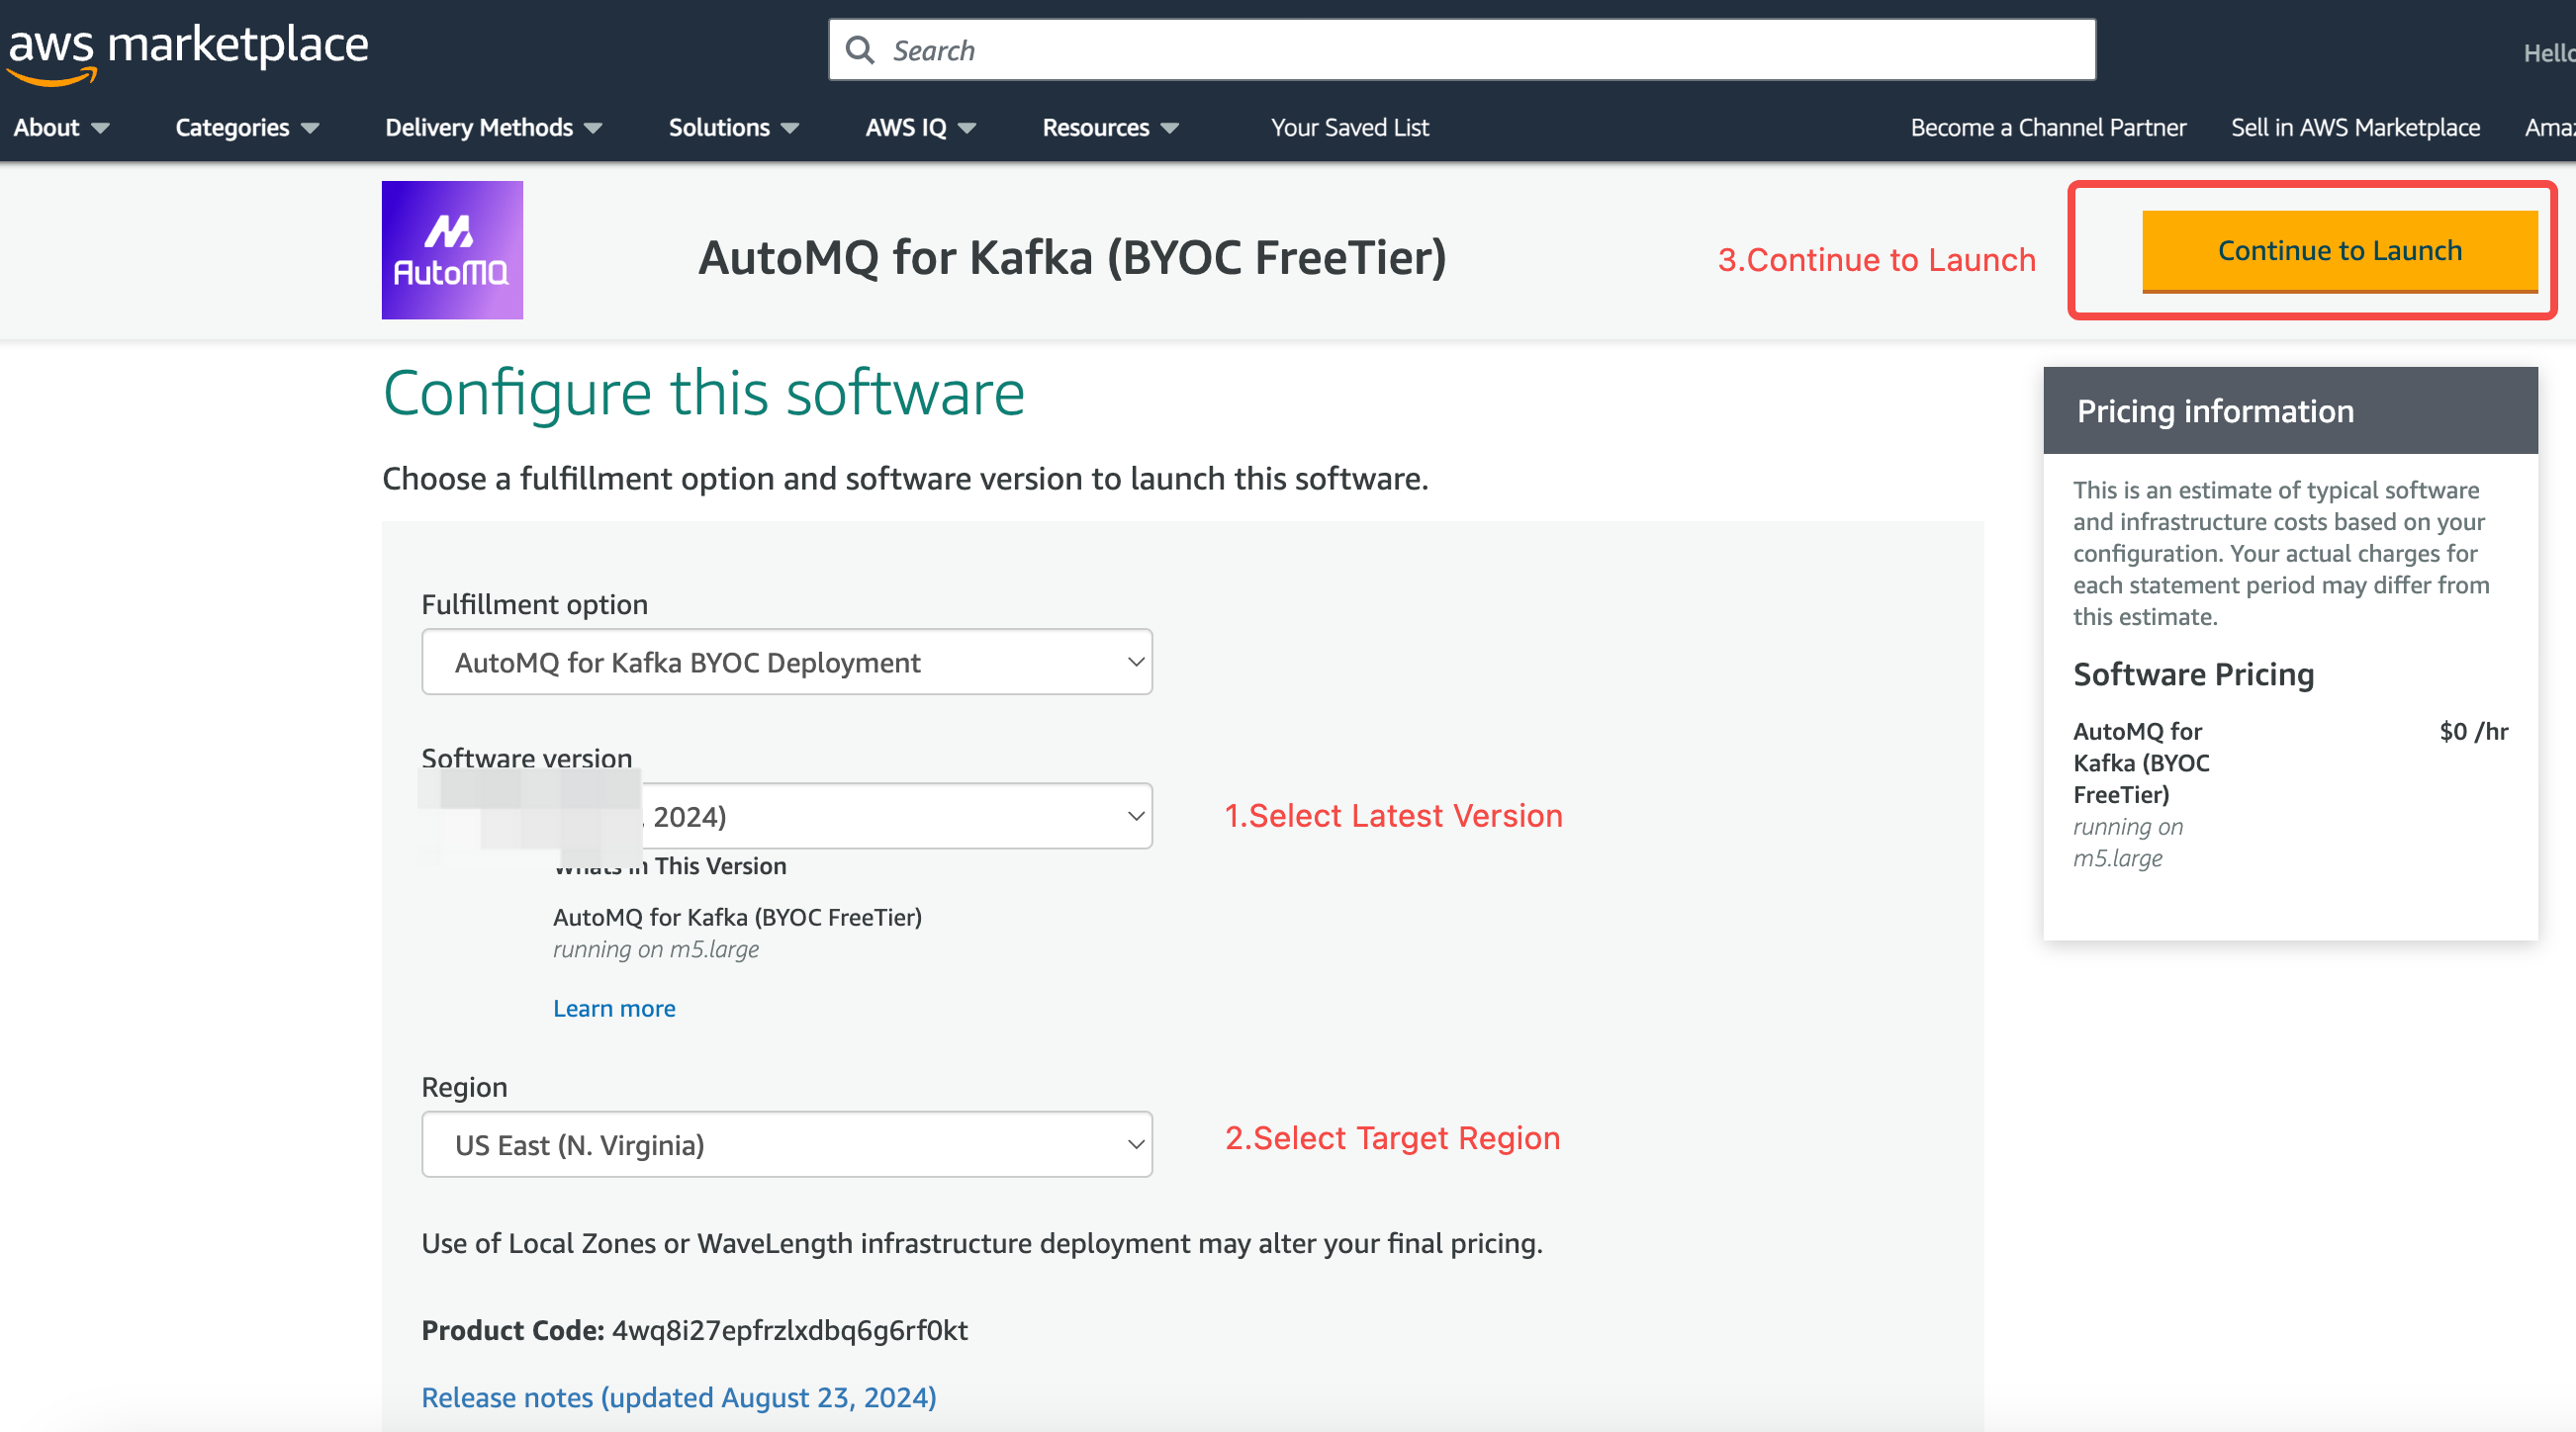
Step 2: Subscribe to AutoMQ from the Marketplace
The AutoMQ Cloud BYOC environment package is distributed on AWS through a Marketplace CloudFormation product, allowing users to subscribe to AutoMQ from the Marketplace. The product link is AutoMQ for Kafka (BYOC Console). Go to AWS Marketplace and visit the product page AutoMQ for Kafka (BYOC Console).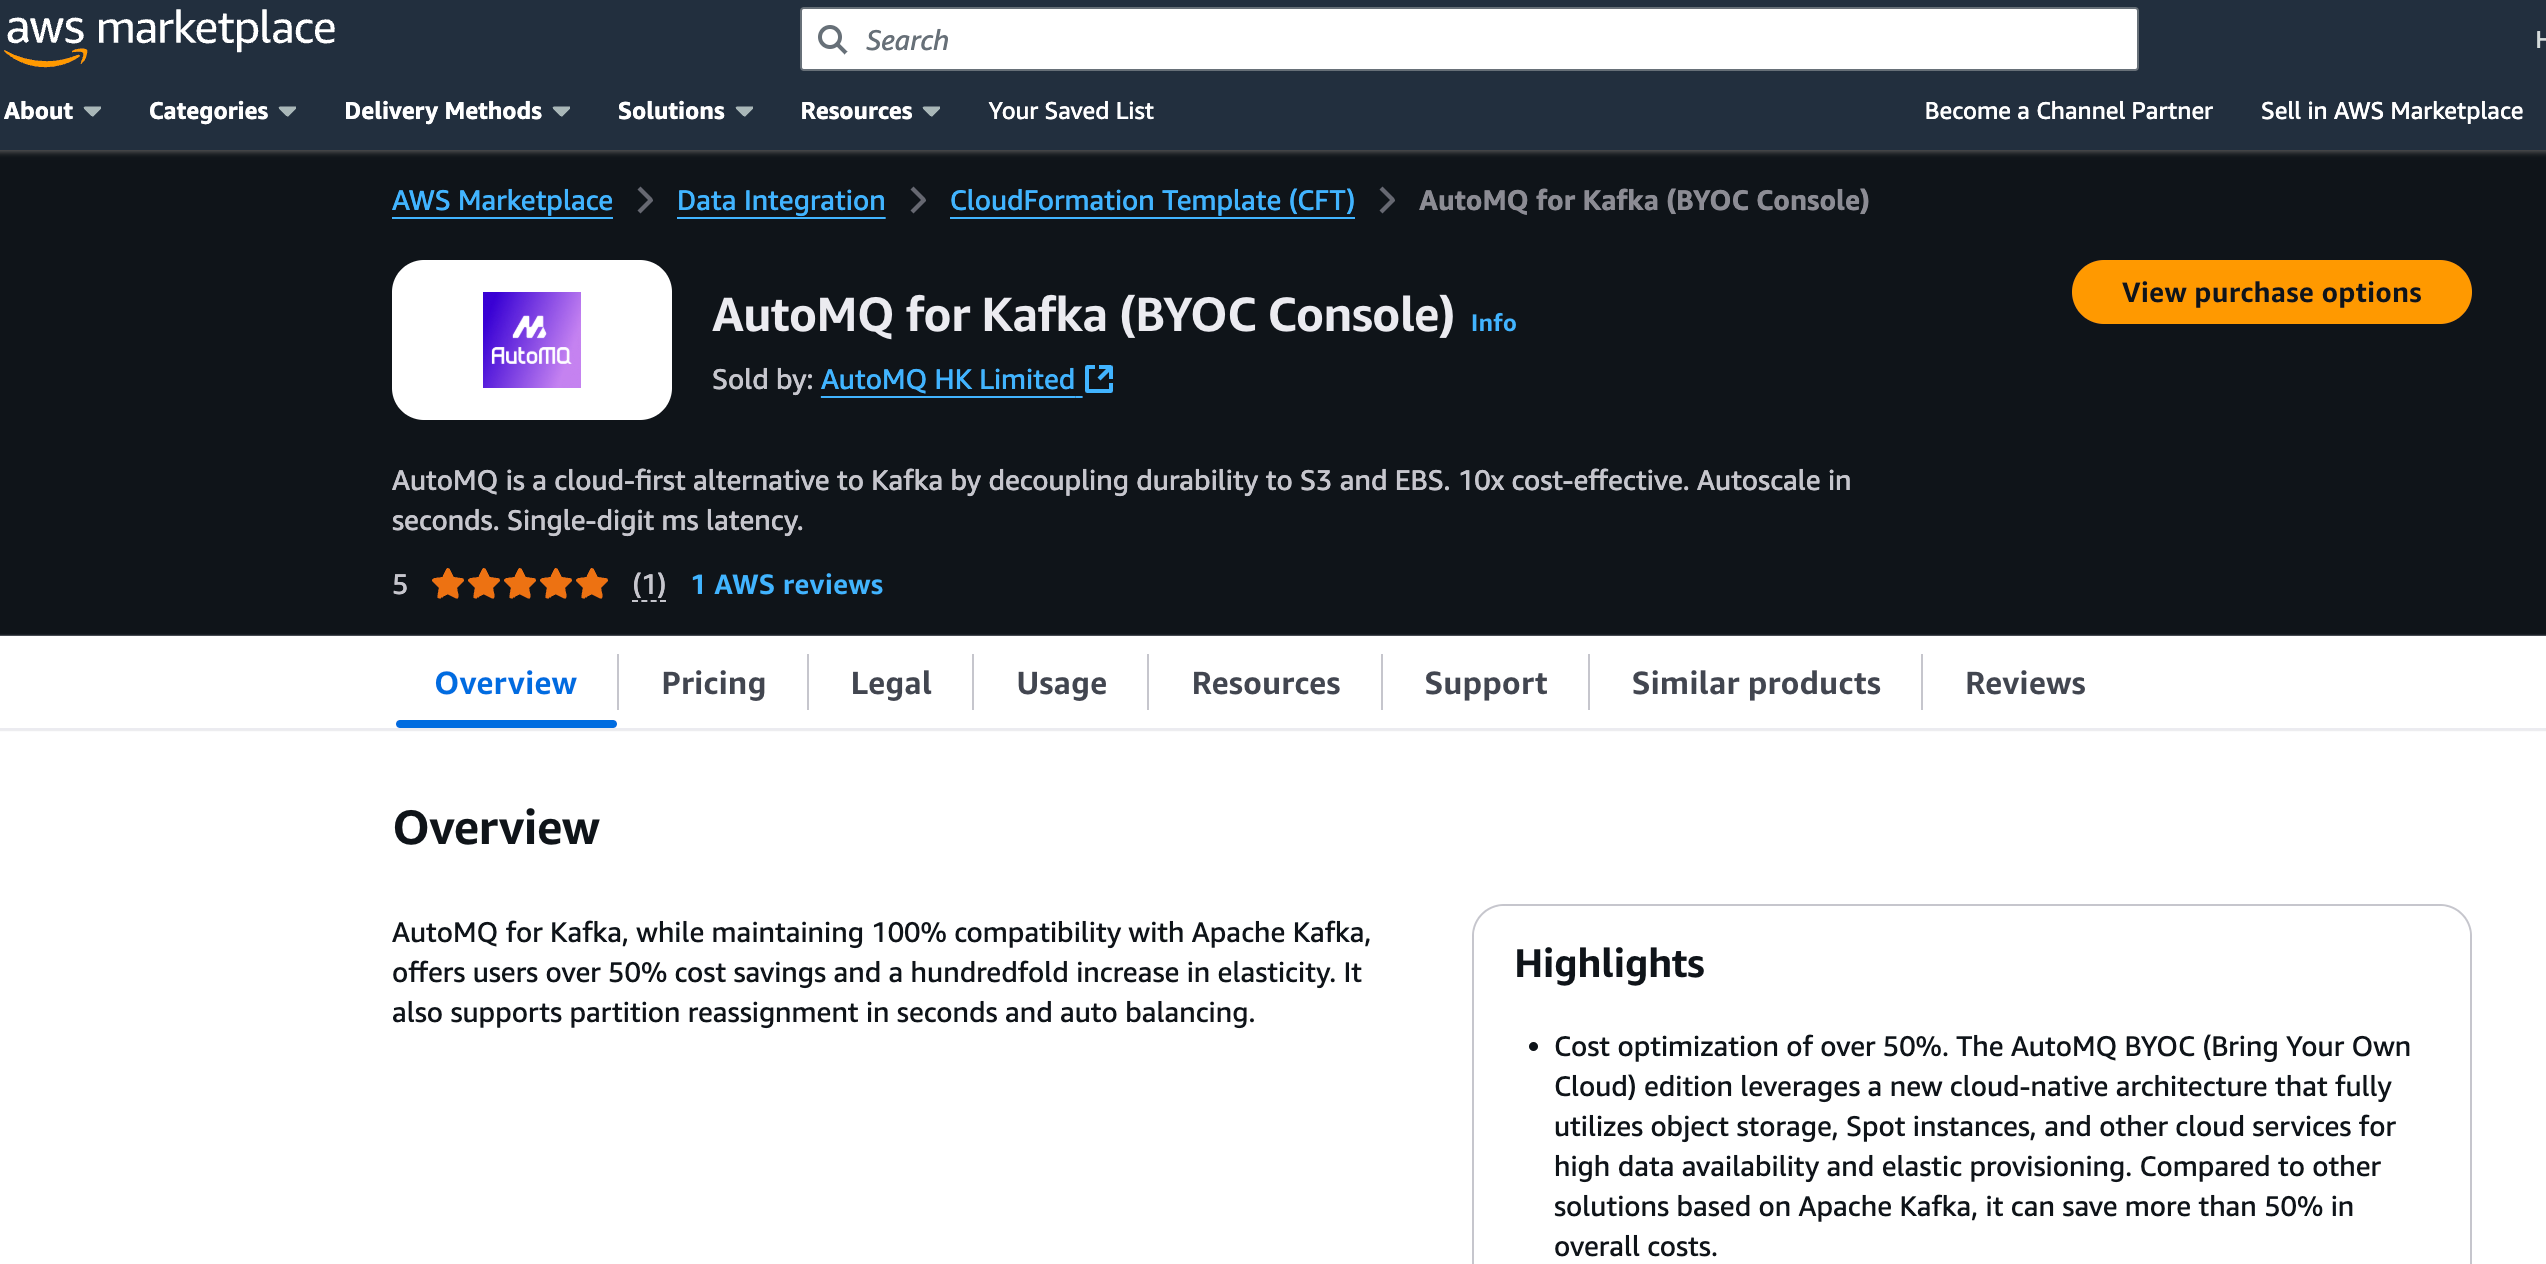
Step 3: Install the Environment Using the CloudFormation Template
In the previous step, after selecting the CloudFormation Template configuration, you will be redirected to the CloudFormation product page to create a new Stack.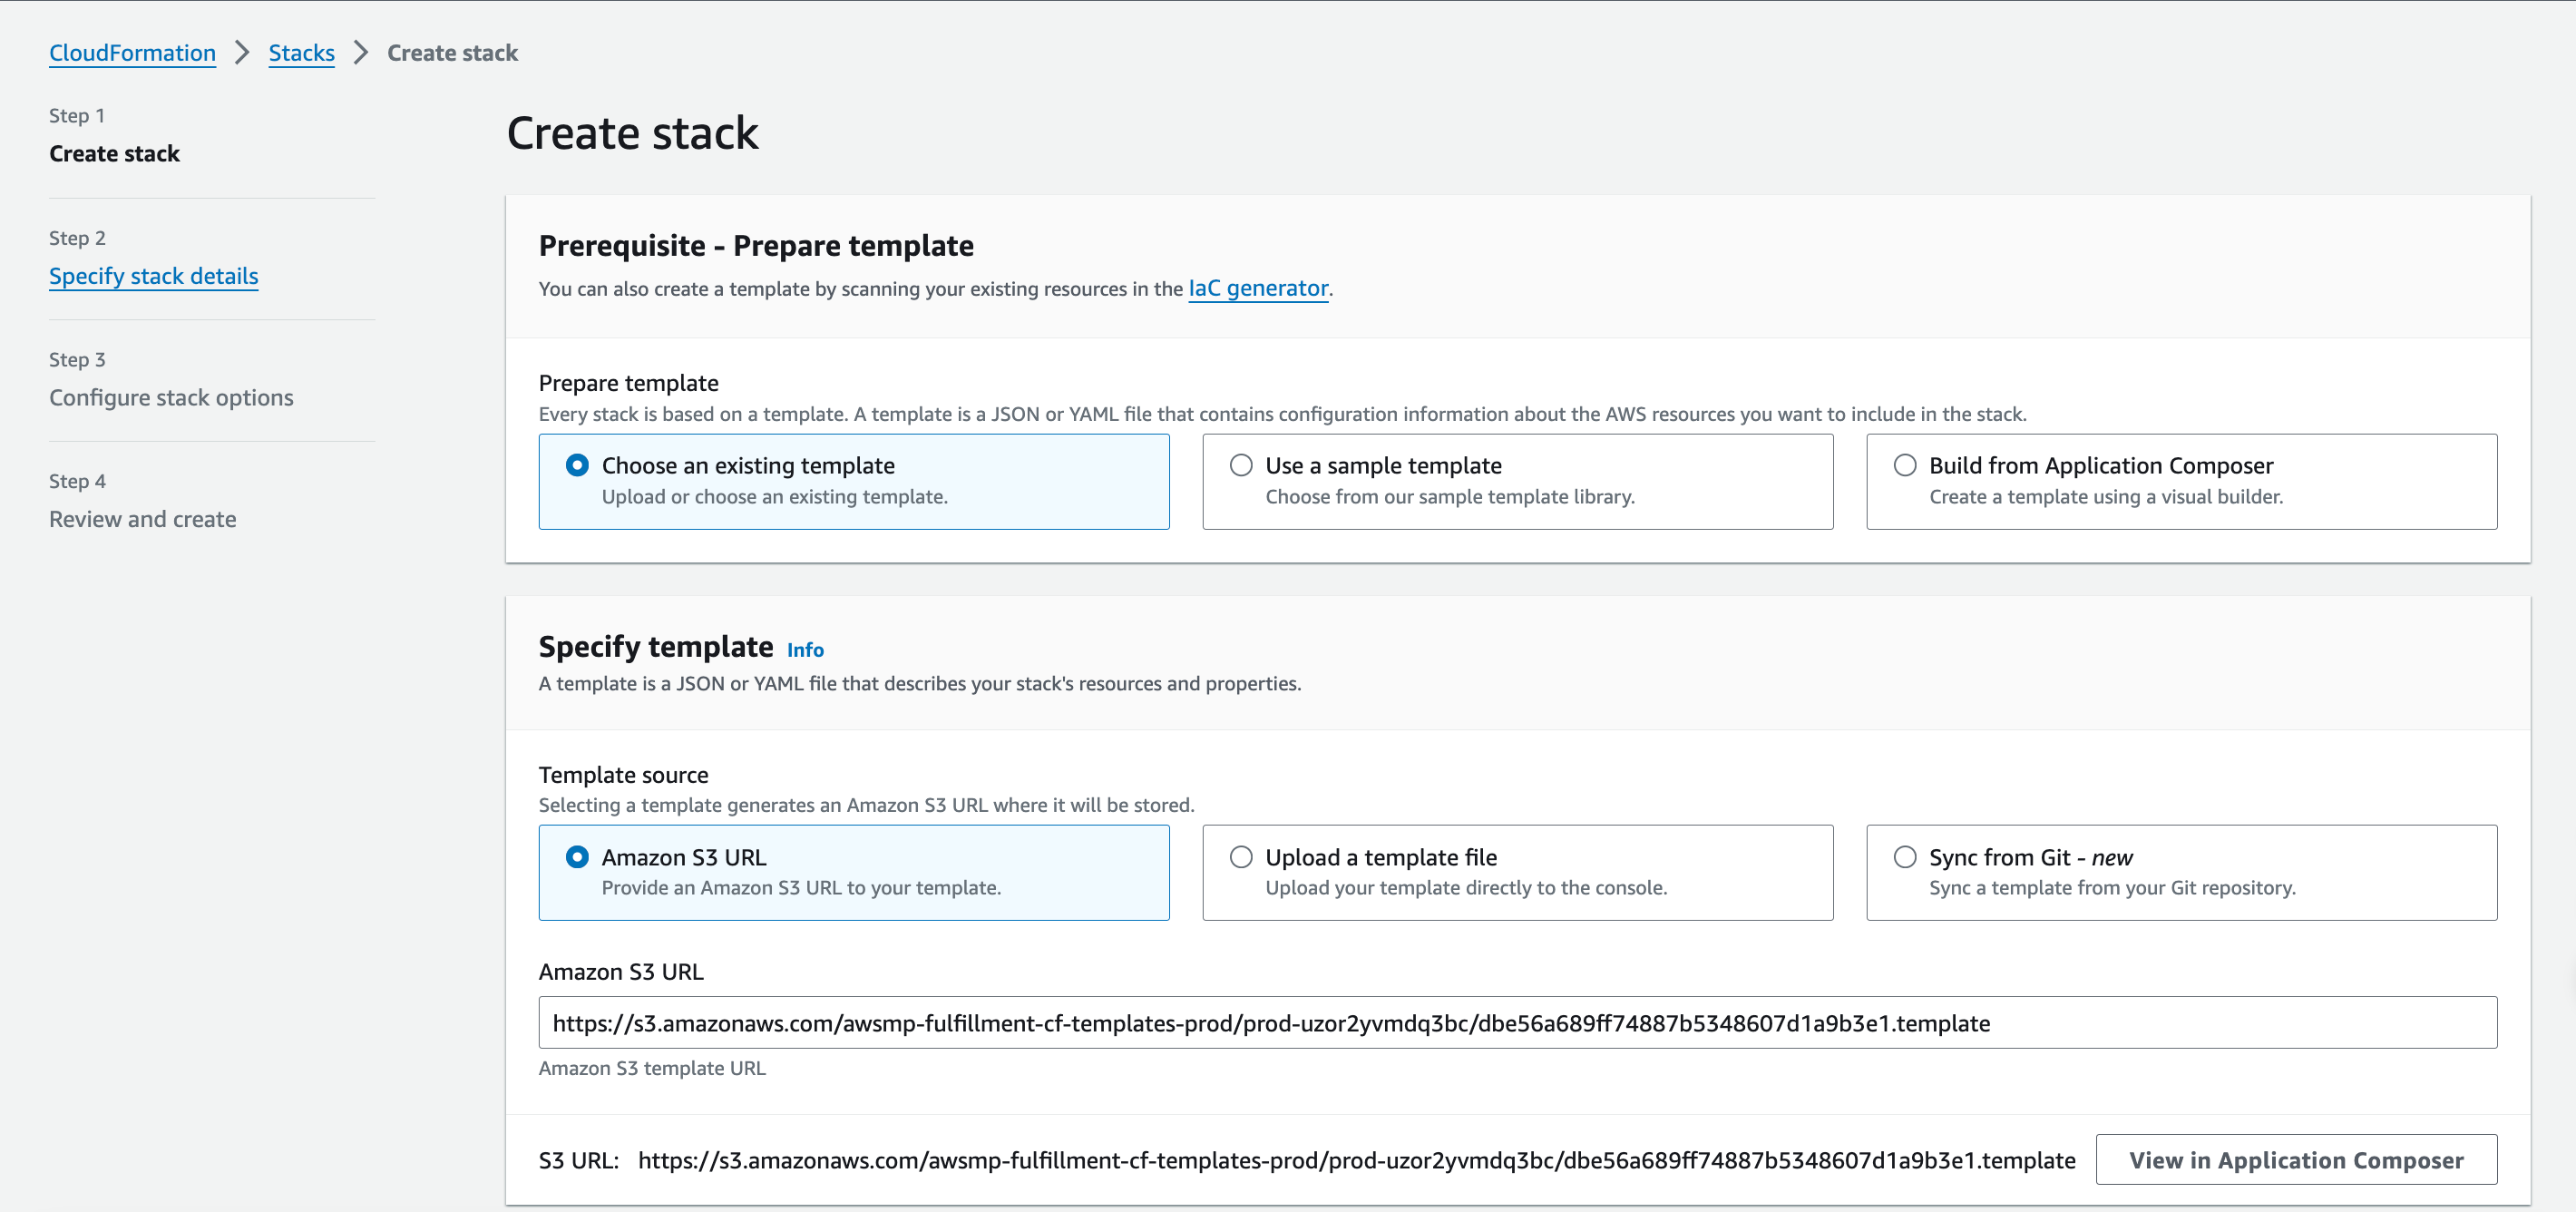
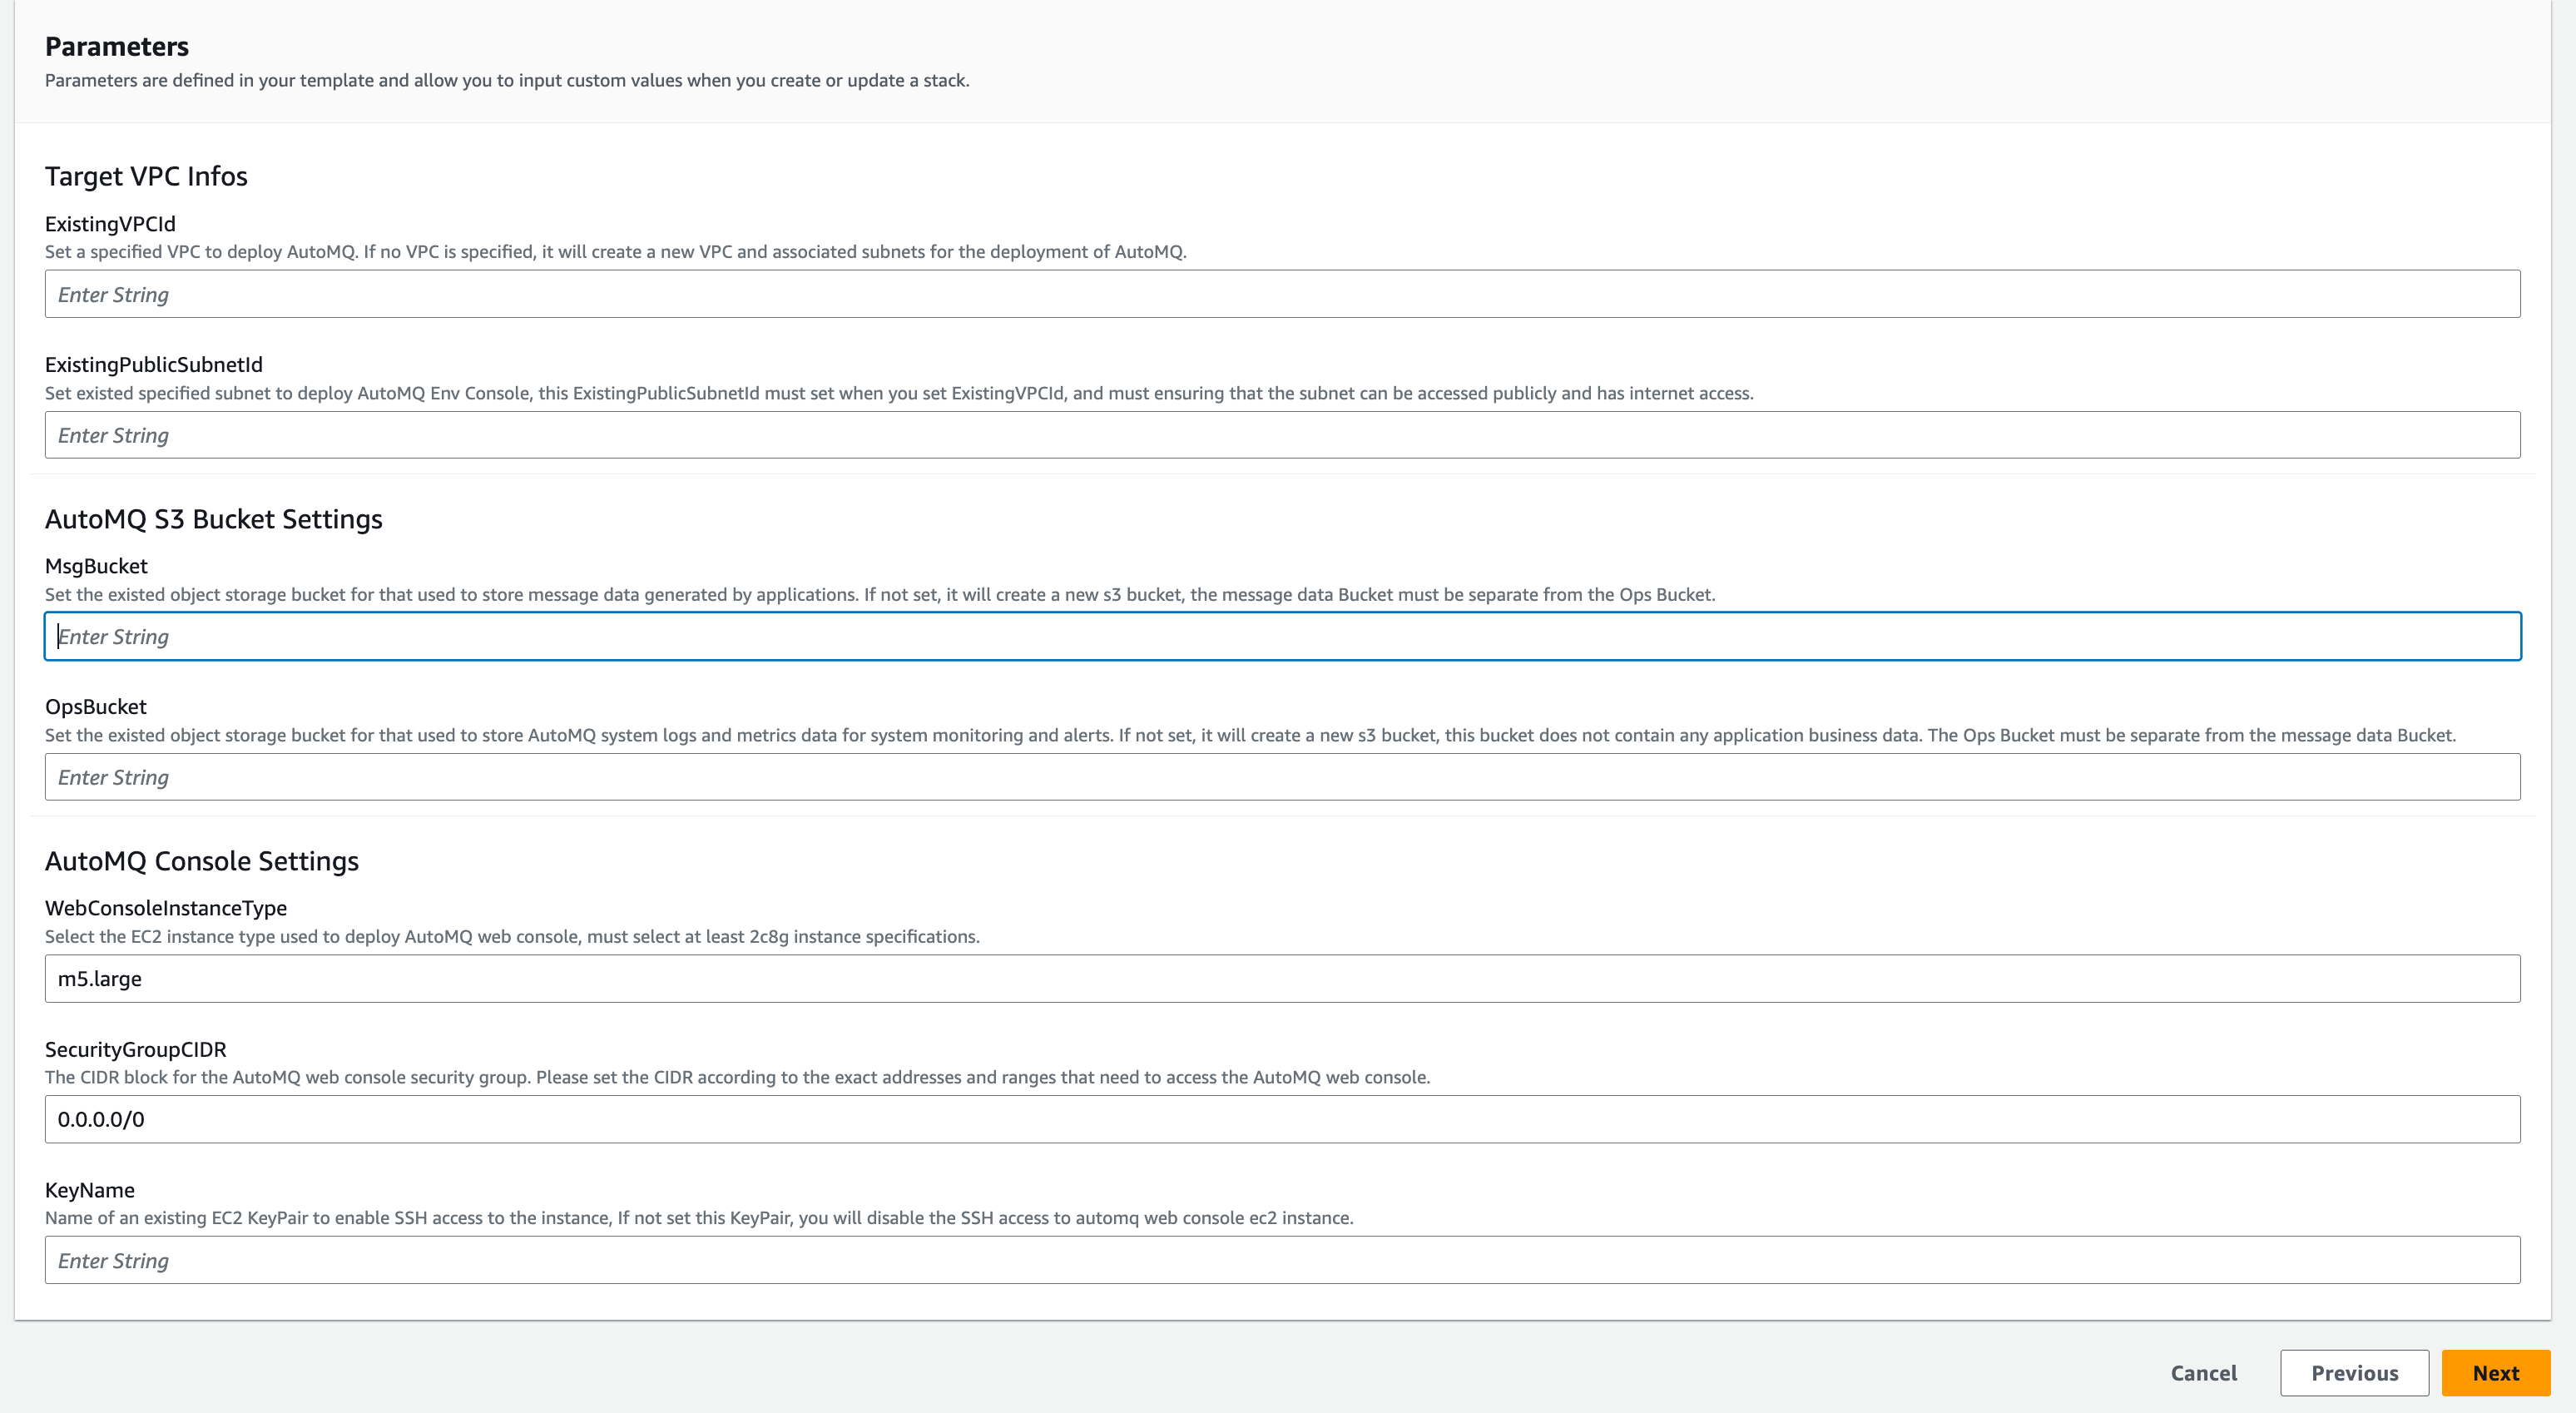
| Parameter Settings | Value Description |
|---|---|
| Stack Name |
|
| ExistingVPCId |
|
| ExistingPublicSubnetId |
|
| ExistingPubliceSubnetAvailabilityZone |
|
| MsgBucket |
|
| OpsBucket |
|
| WebConsoleInstanceType |
|
| SecurityGroupCIDR |
|
| KeyName |
|
Step 4: Retrieve CloudFormation Output and Access Environment
After completing the previous installation, check the current CloudFormation Outputs to retrieve initial information for accessing the environment.| Output Returns | Output Description |
|---|---|
| AutoMQWebConsoleURL |
|
| DefaultUserName |
|
| DefaultPassword |
|
| IAMRoleforAutoMQEnvironmentConsole |
|
Step 5: Complete BYOC Environment Operations Authorization
The BYOC environment is deployed in the user’s VPC, offering benefits like data security and privacy isolation. However, system logs, metrics, and other system data unrelated to business will be generated within the BYOC environment. After the installation is complete, users need to refer to Overview▸ to provide maintenance authorization to the AutoMQ service provider. This facilitates operations like system stability monitoring and self-healing.Next Steps
- Configure EKS (Optional, Required when Deploying AutoMQ Data Plane to EKS): After installing the BYOC environment console, if you intend to deploy the AutoMQ data plane cluster to EKS, you need to prepare the EKS cluster first, then configure it to the AutoMQ console once the environment installation is complete. For the documentation on preparing EKS and completing subsequent deployments, please refer to Deploy to AWS EKS▸.
- Using AutoMQ through WebUI: Access the console address provided in Step 3 using your browser. Enter the initial username and password to log into the environment console, where you can create instances and explore product features. Experience AutoMQ▸
- Using AutoMQ with Terraform: After the environment setup is complete, users can manage and use AutoMQ through the AutoMQ Terraform Provider. For details on using AutoMQ with Terraform, please refer to the documentation.
Uninstall Process
Step 1: Delete AutoMQ Instance Via AutoMQ Console
In the AutoMQ console, delete all created clusters.Before deleting the entire AutoMQ environment, you need to delete the AutoMQ instances. CloudFormation does not recognize the cloud resources of AutoMQ instances, so if you skip the first step and directly delete through CloudFormation, it will only delete the AutoMQ Console, leading to the retention of AutoMQ instance cloud resources.
Step 2: Delete the AutoMQ Environment Console Via CloudFormation
Find the stack created in the AWS CloudFormation service console and delete it. Once the stack is deleted, the AutoMQ environment console will be completely removed.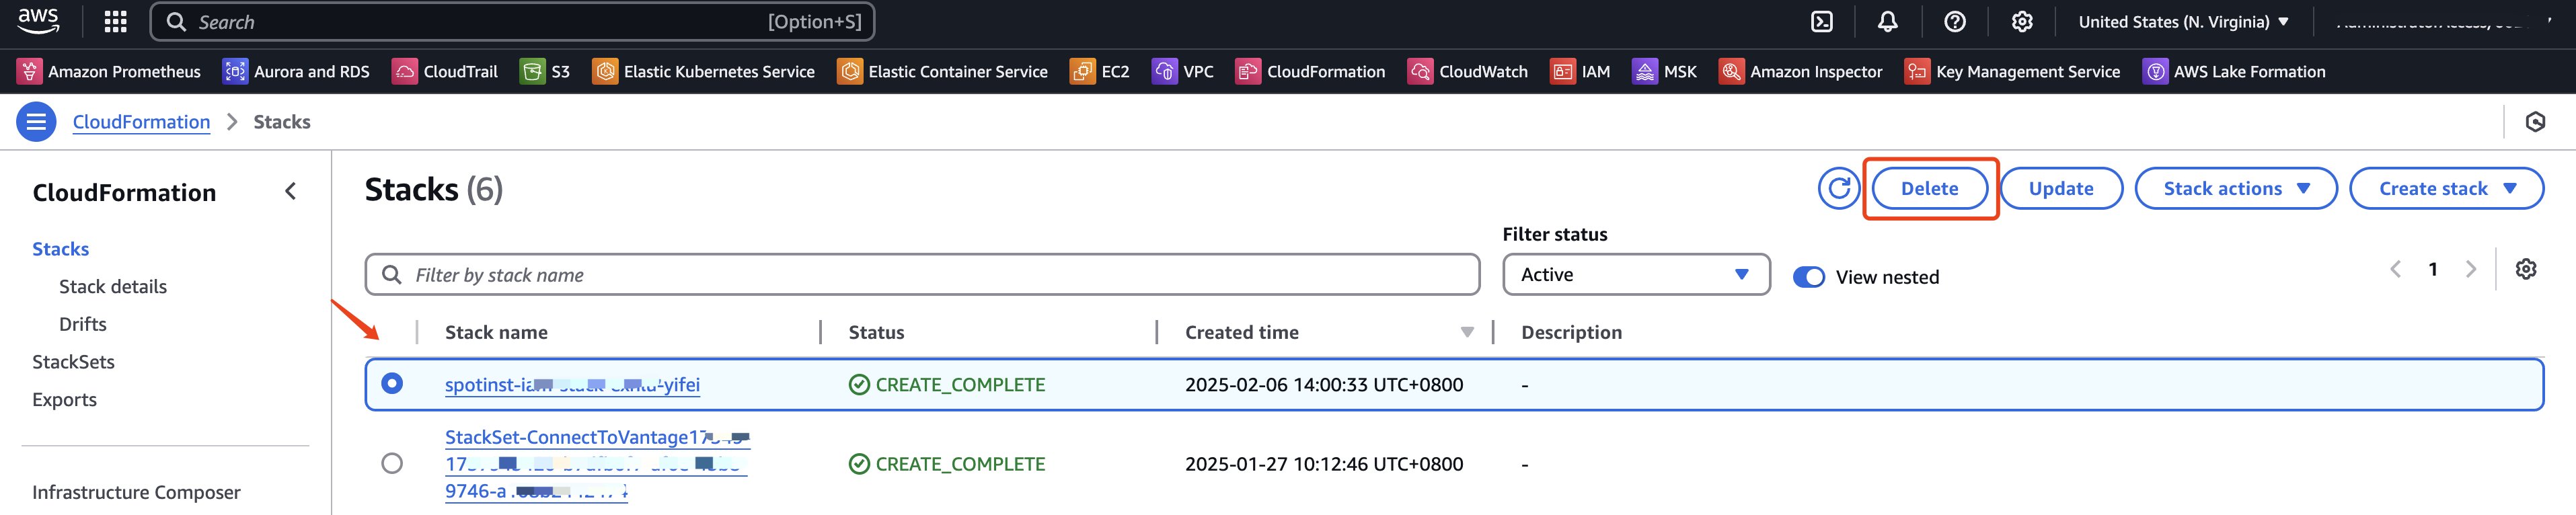
Appendix
- View the list of installed cloud resources and instructions at Cloud Resource List▸
- The overall deployment architecture diagram of AutoMQ on AWS is as follows:
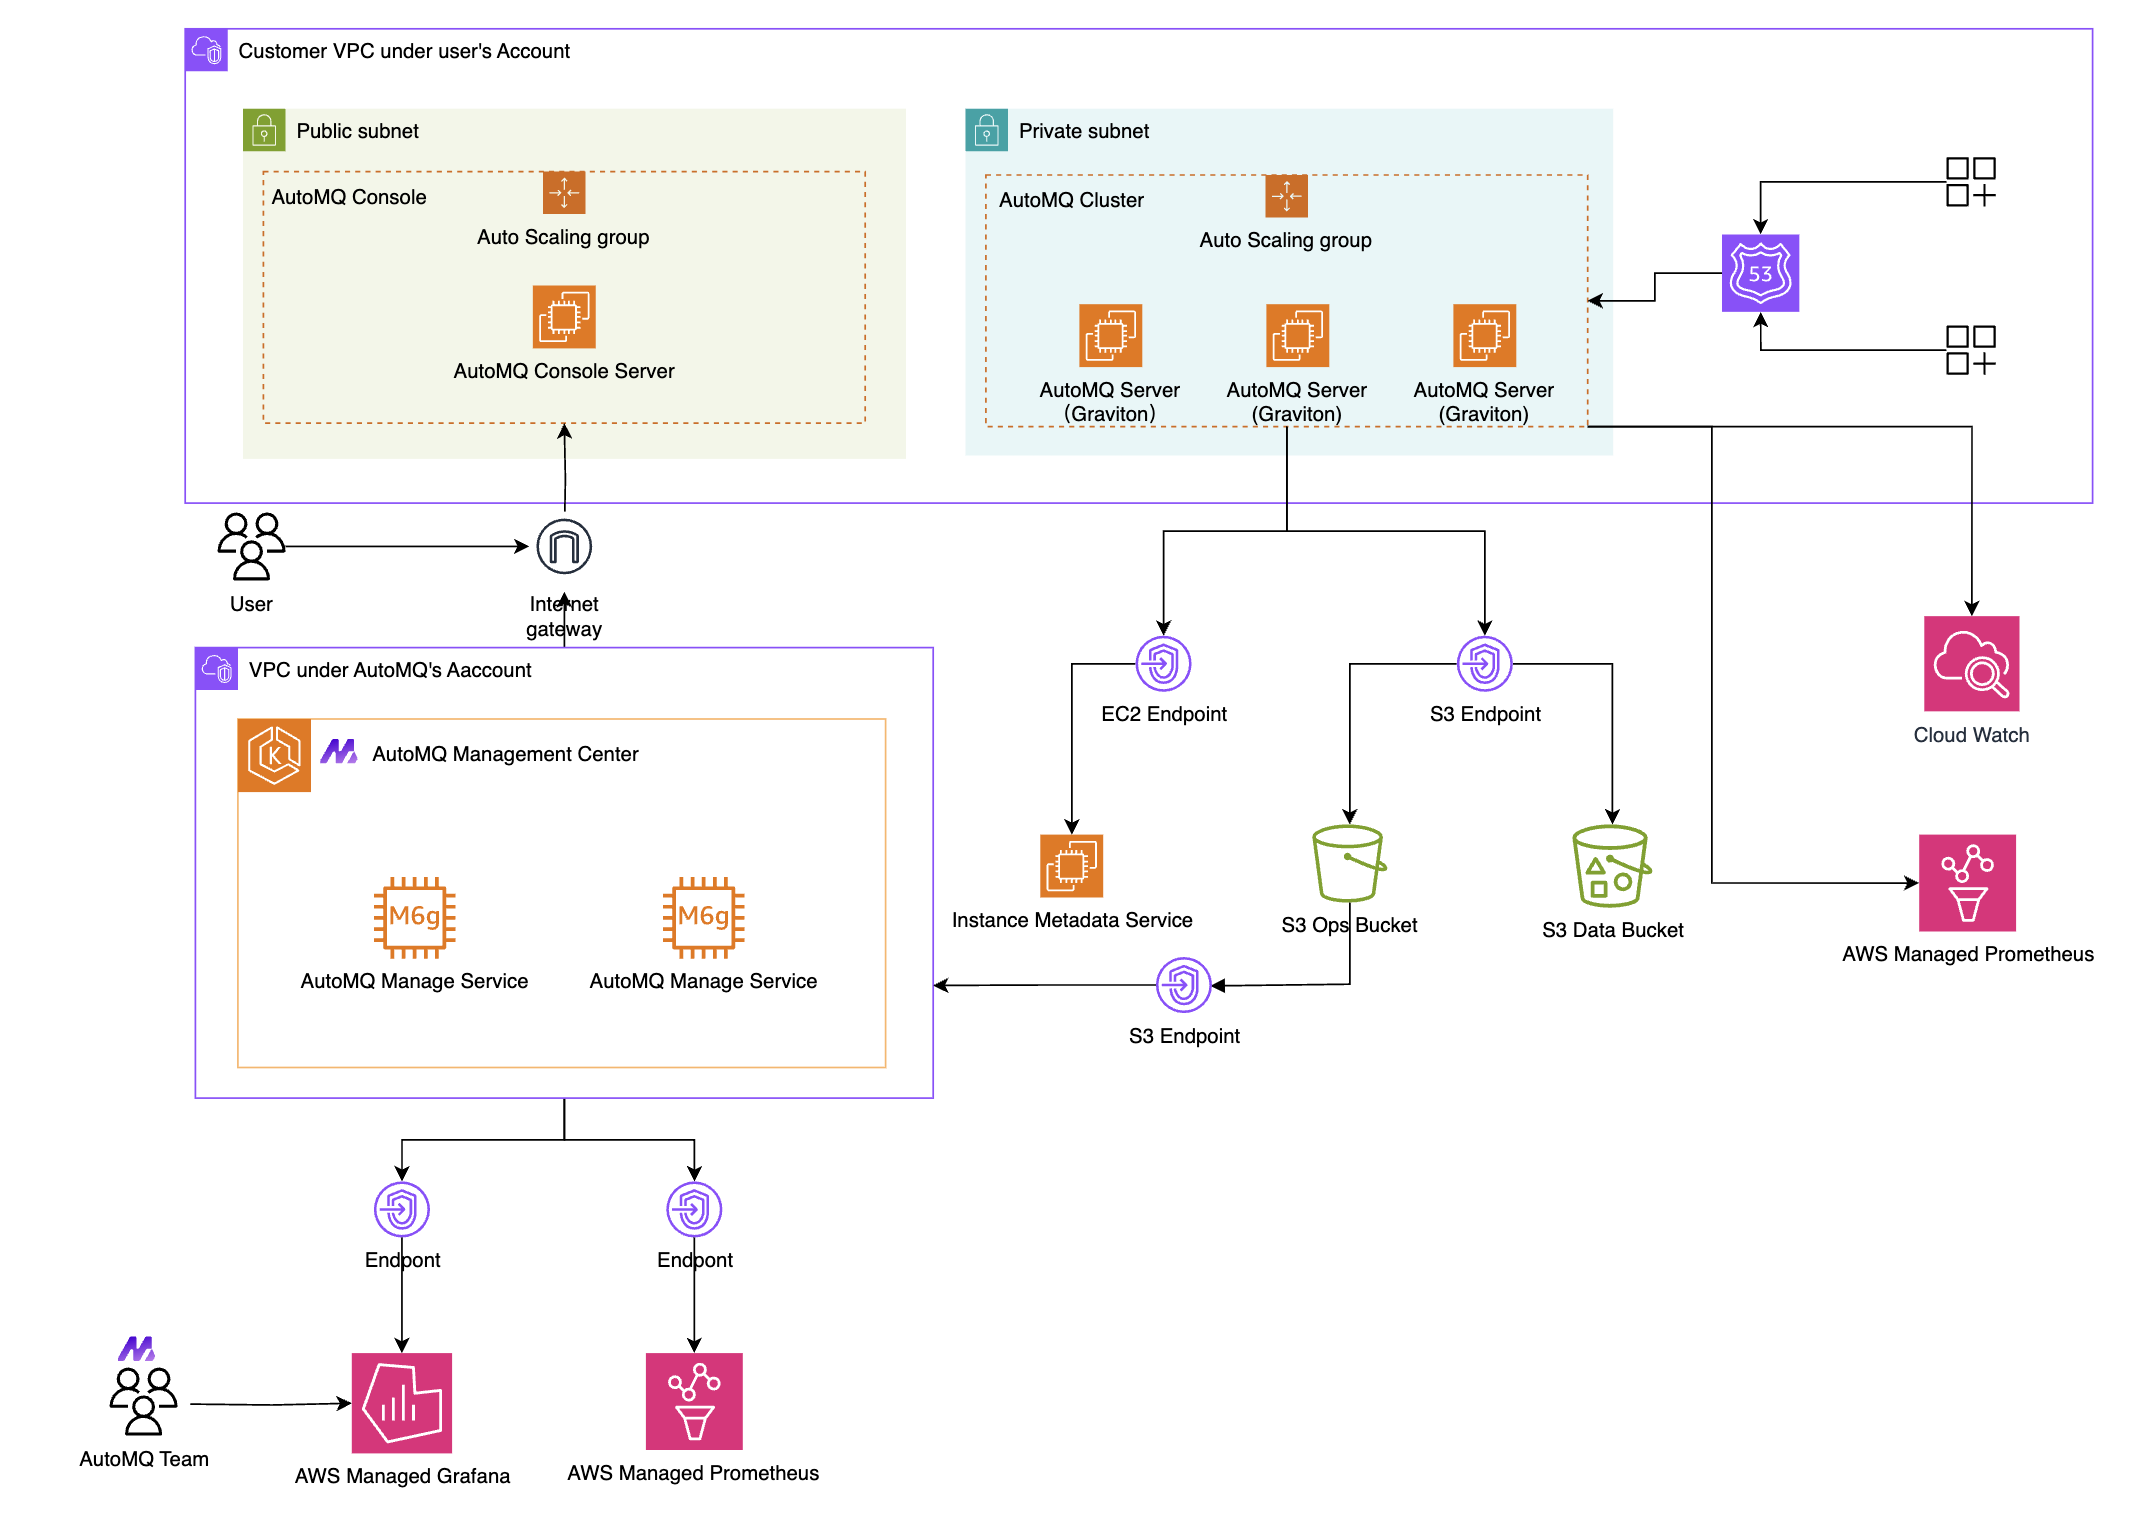
AutoMQ uses Amazon Linux 2 AMI system images to ensure a secure and reliable operating system.