Install Env Via Huawei Marketplace
Refer to the Overview▸, using AutoMQ Cloud requires an initial environment setup. This document outlines how to install the BYOC environment from the Huawei Cloud Marketplace.
In this article, references to AutoMQ Product Services, AutoMQ Services, and AutoMQ specifically refer to AutoMQ HK Limited and its affiliates.
Procedure
Step 1: Prepare VPC
The AutoMQ BYOC environment is deployed within the user's VPC to ensure data privacy and security. When installing the AutoMQ environment via the Cloud Marketplace, the following two methods are supported:
-
Automatically create a new VPC installation environment: Selecting this option allows the installer to automatically create the VPC and other resources without manual configuration, recommended for initial POC and testing.
-
User-Provided VPC Installation Environment: The installer will not proactively create a VPC network. Users must specify the existing VPC network and subnet information.
If you choose User-provided VPC Installation Environment, the VPC must meet the following conditions:
Zone Requirements: Based on business needs, if you need to create a three-zone instance later, you must allocate at least three zones and subnets.
Subnet CIDR Requirements: AutoMQ data plane clusters deploy using user VPCs, consuming VPC subnet IPs. It is recommended to allocate a sufficient number of available IPs in each subnet (each subnet should have no less than 1,000 available IPs) to avoid deployment and scaling issues later.
Public Network Access Requirement: Deploying the AutoMQ data plane cluster necessitates pulling Docker images and Helm Chart artifacts from a public network environment. Therefore, the VPC (Virtual Private Cloud) environment must support outbound internet access via SNAT (Source Network Address Translation) or similar methods. For instructions on configuring public SNAT, please refer to the appendix of this document Install Env via Huawei Marketplace▸.
Step 2: Install AutoMQ from Huawei Cloud Marketplace
- Access the AutoMQ product link. The AutoMQ Cloud BYOC environment is distributed by default through the cloud marketplace product on Huawei Cloud. Users can subscribe to AutoMQ from the cloud marketplace, and the product link is AutoMQ for Kafka BYOC version (console).

- Select the desired target region, and click Buy Now.
Due to the configuration issues of the marketplace product template, the Instance Configuration and Purchase Method parameters on the product page do not need attention and can be set to their default values.
Instance Type: The instance type for deploying the AutoMQ environment console can be customized in the next step deployment template.
Paid Type: Currently, only pay-as-you-go hourly billing is supported. Monthly billing is not supported at this time.
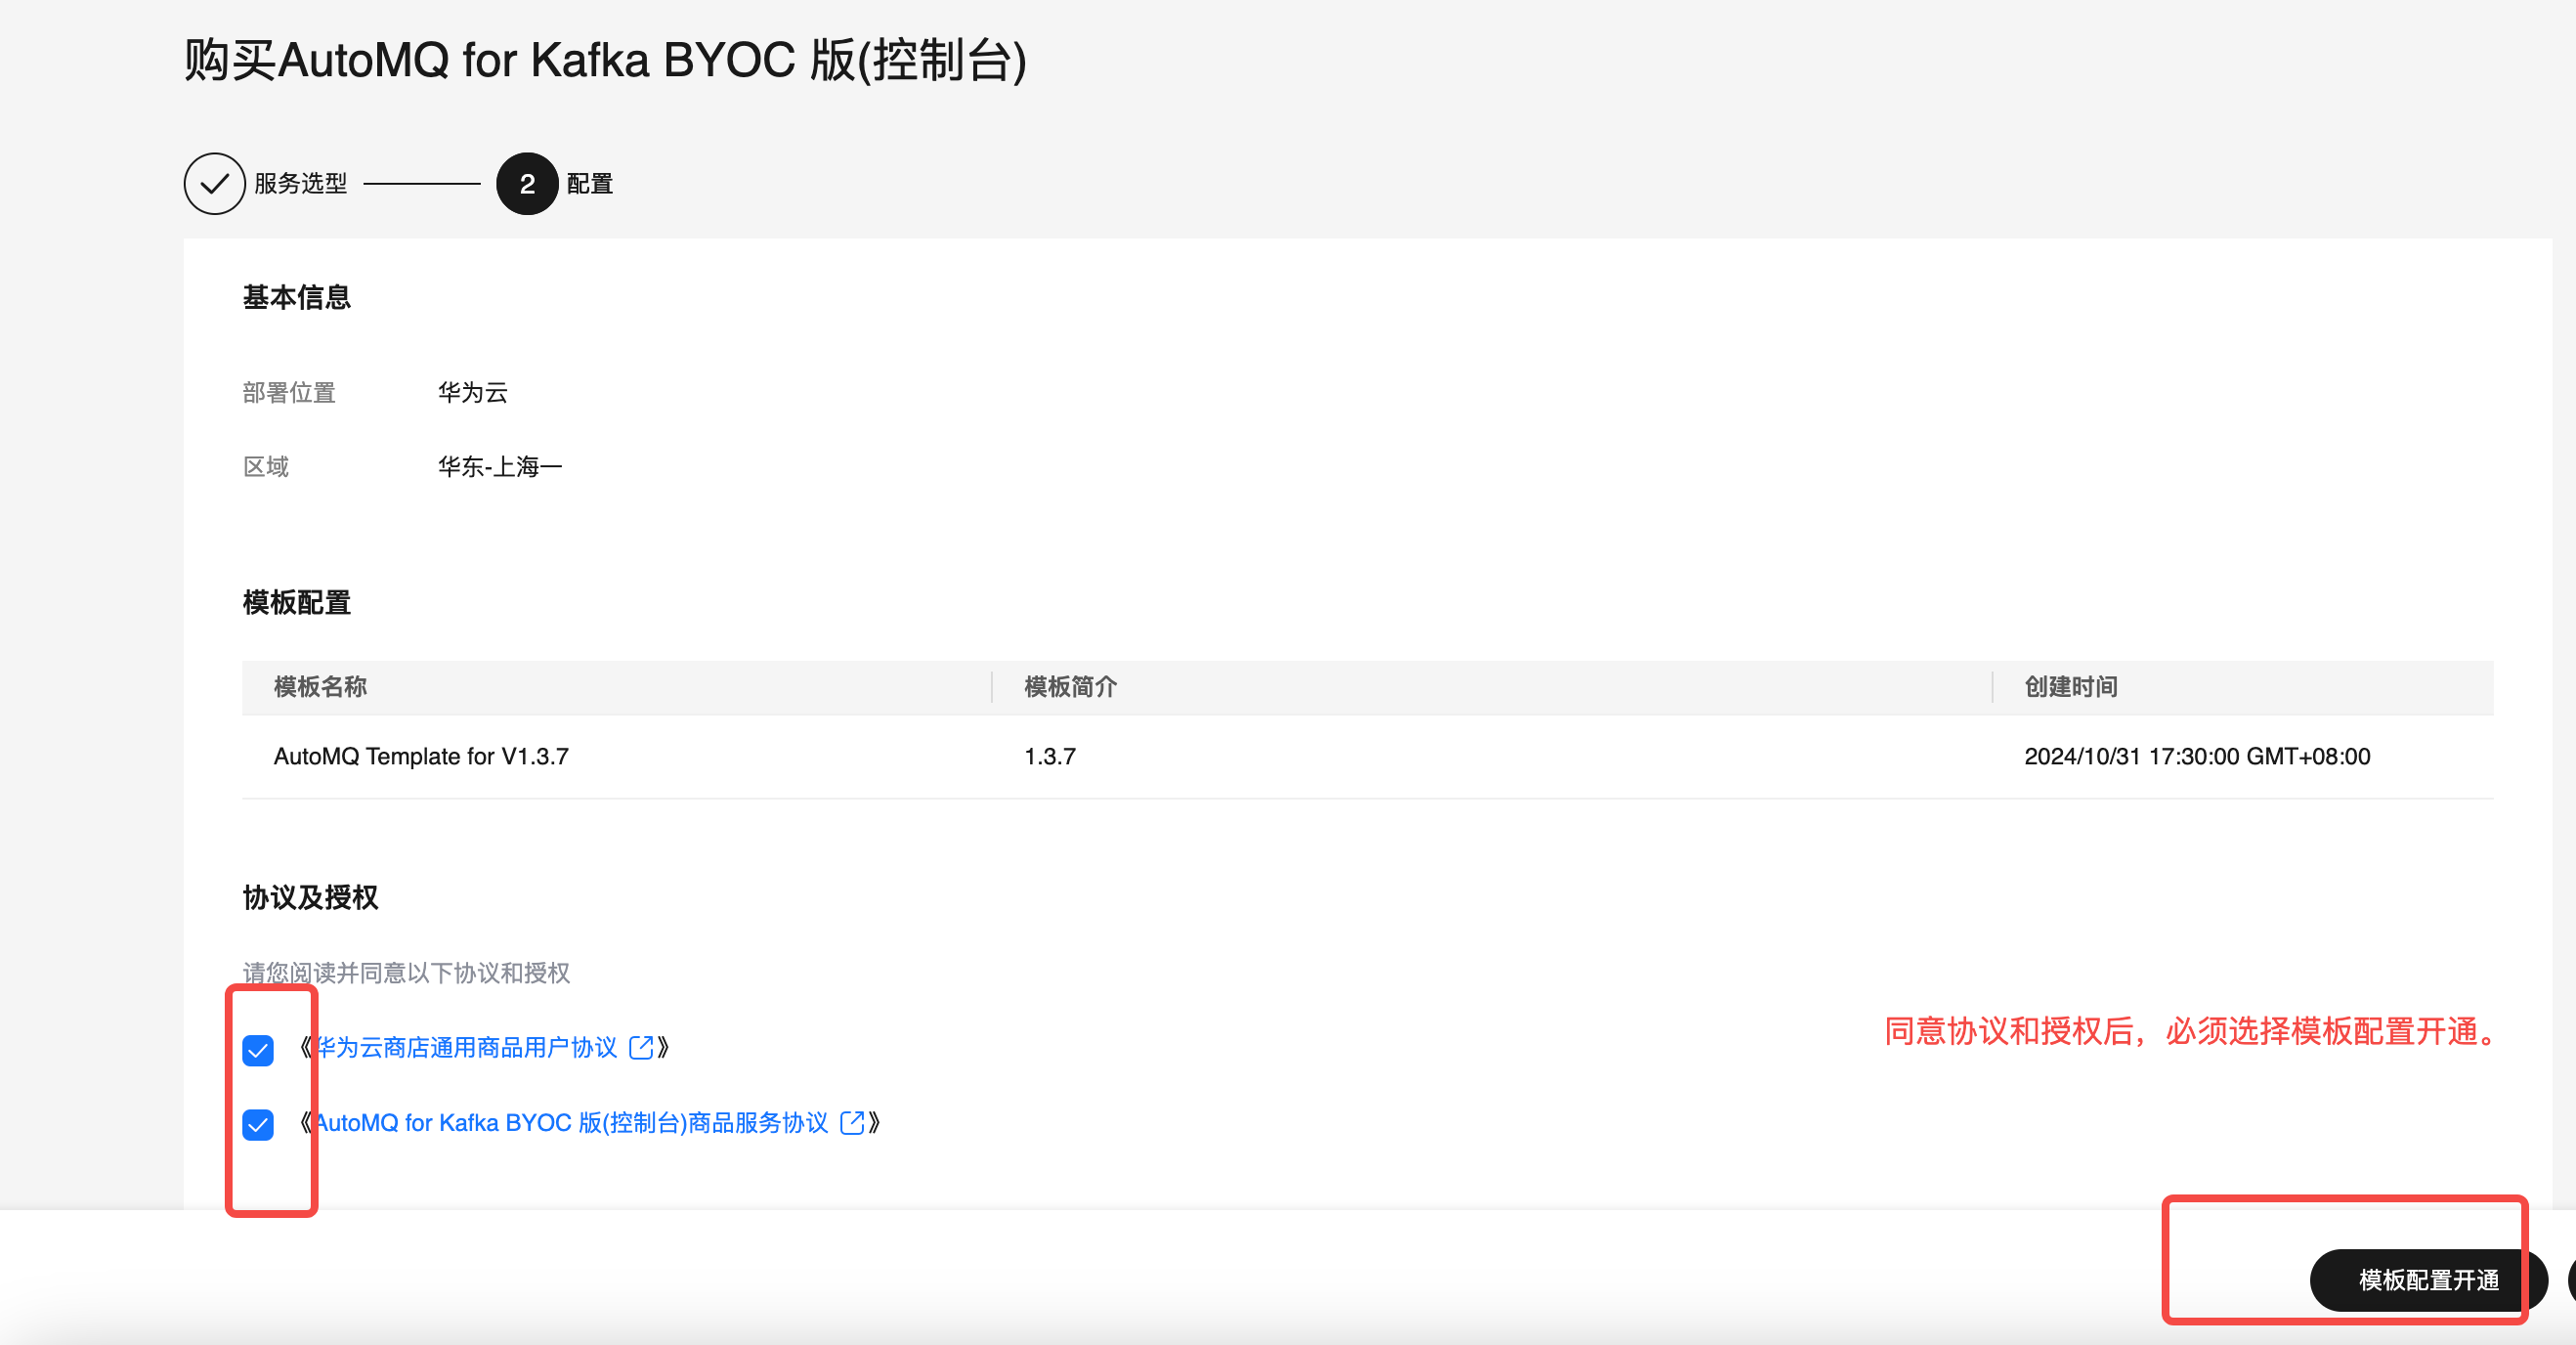
- Follow the instructions to agree to the user agreement and authorization, then click use configuration template to activate.
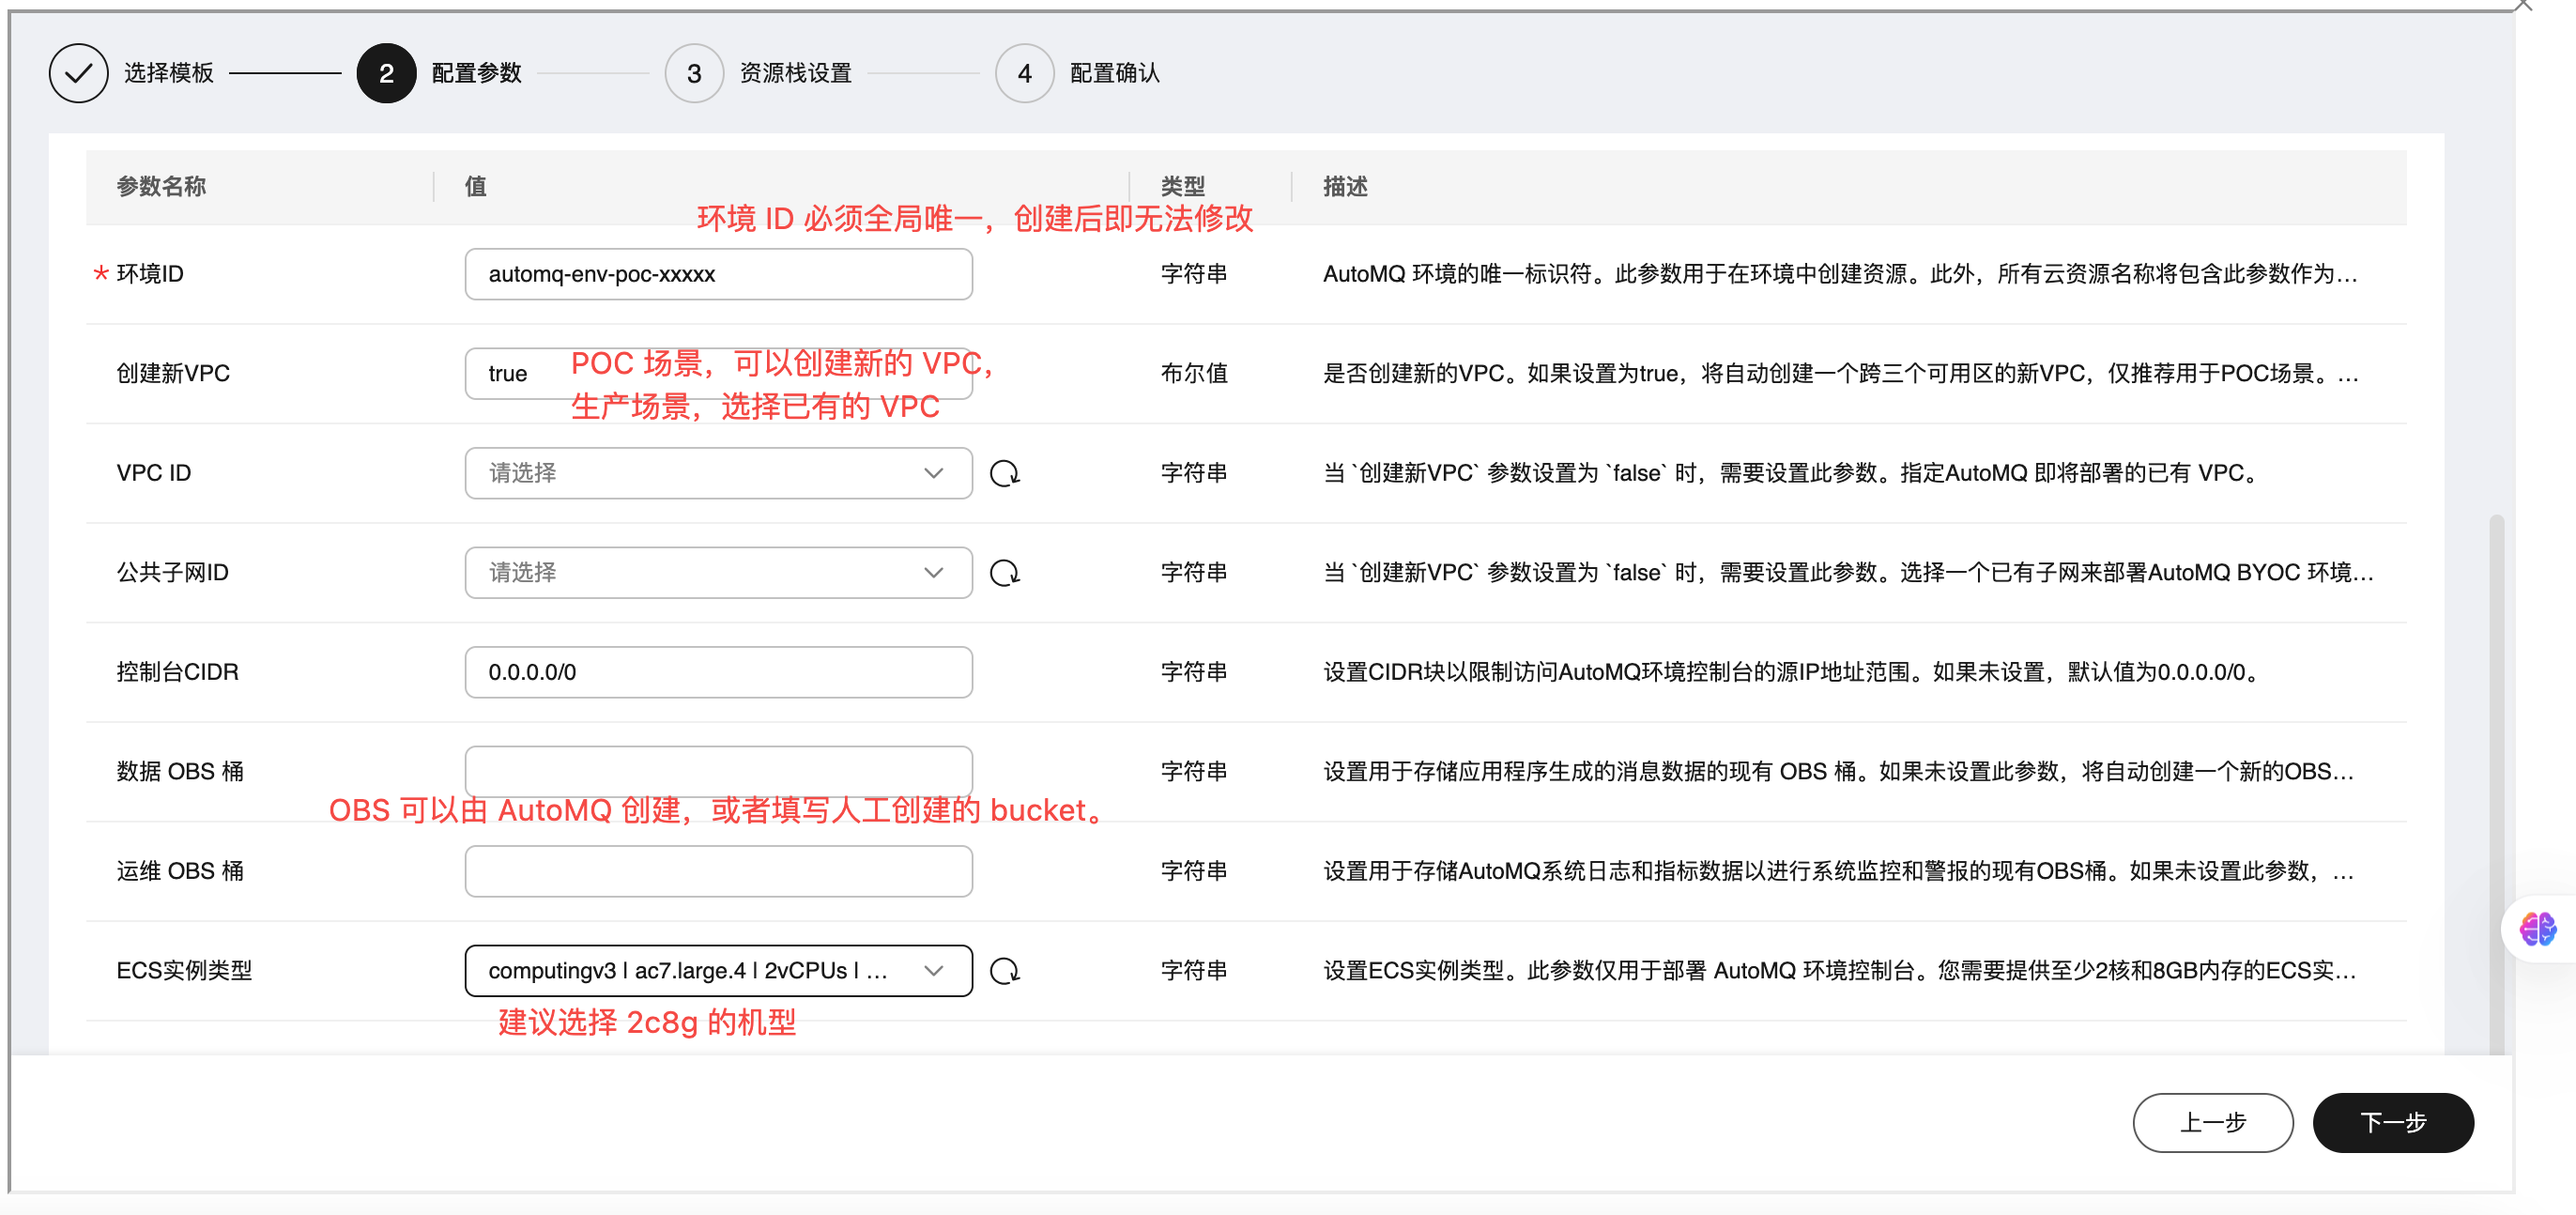
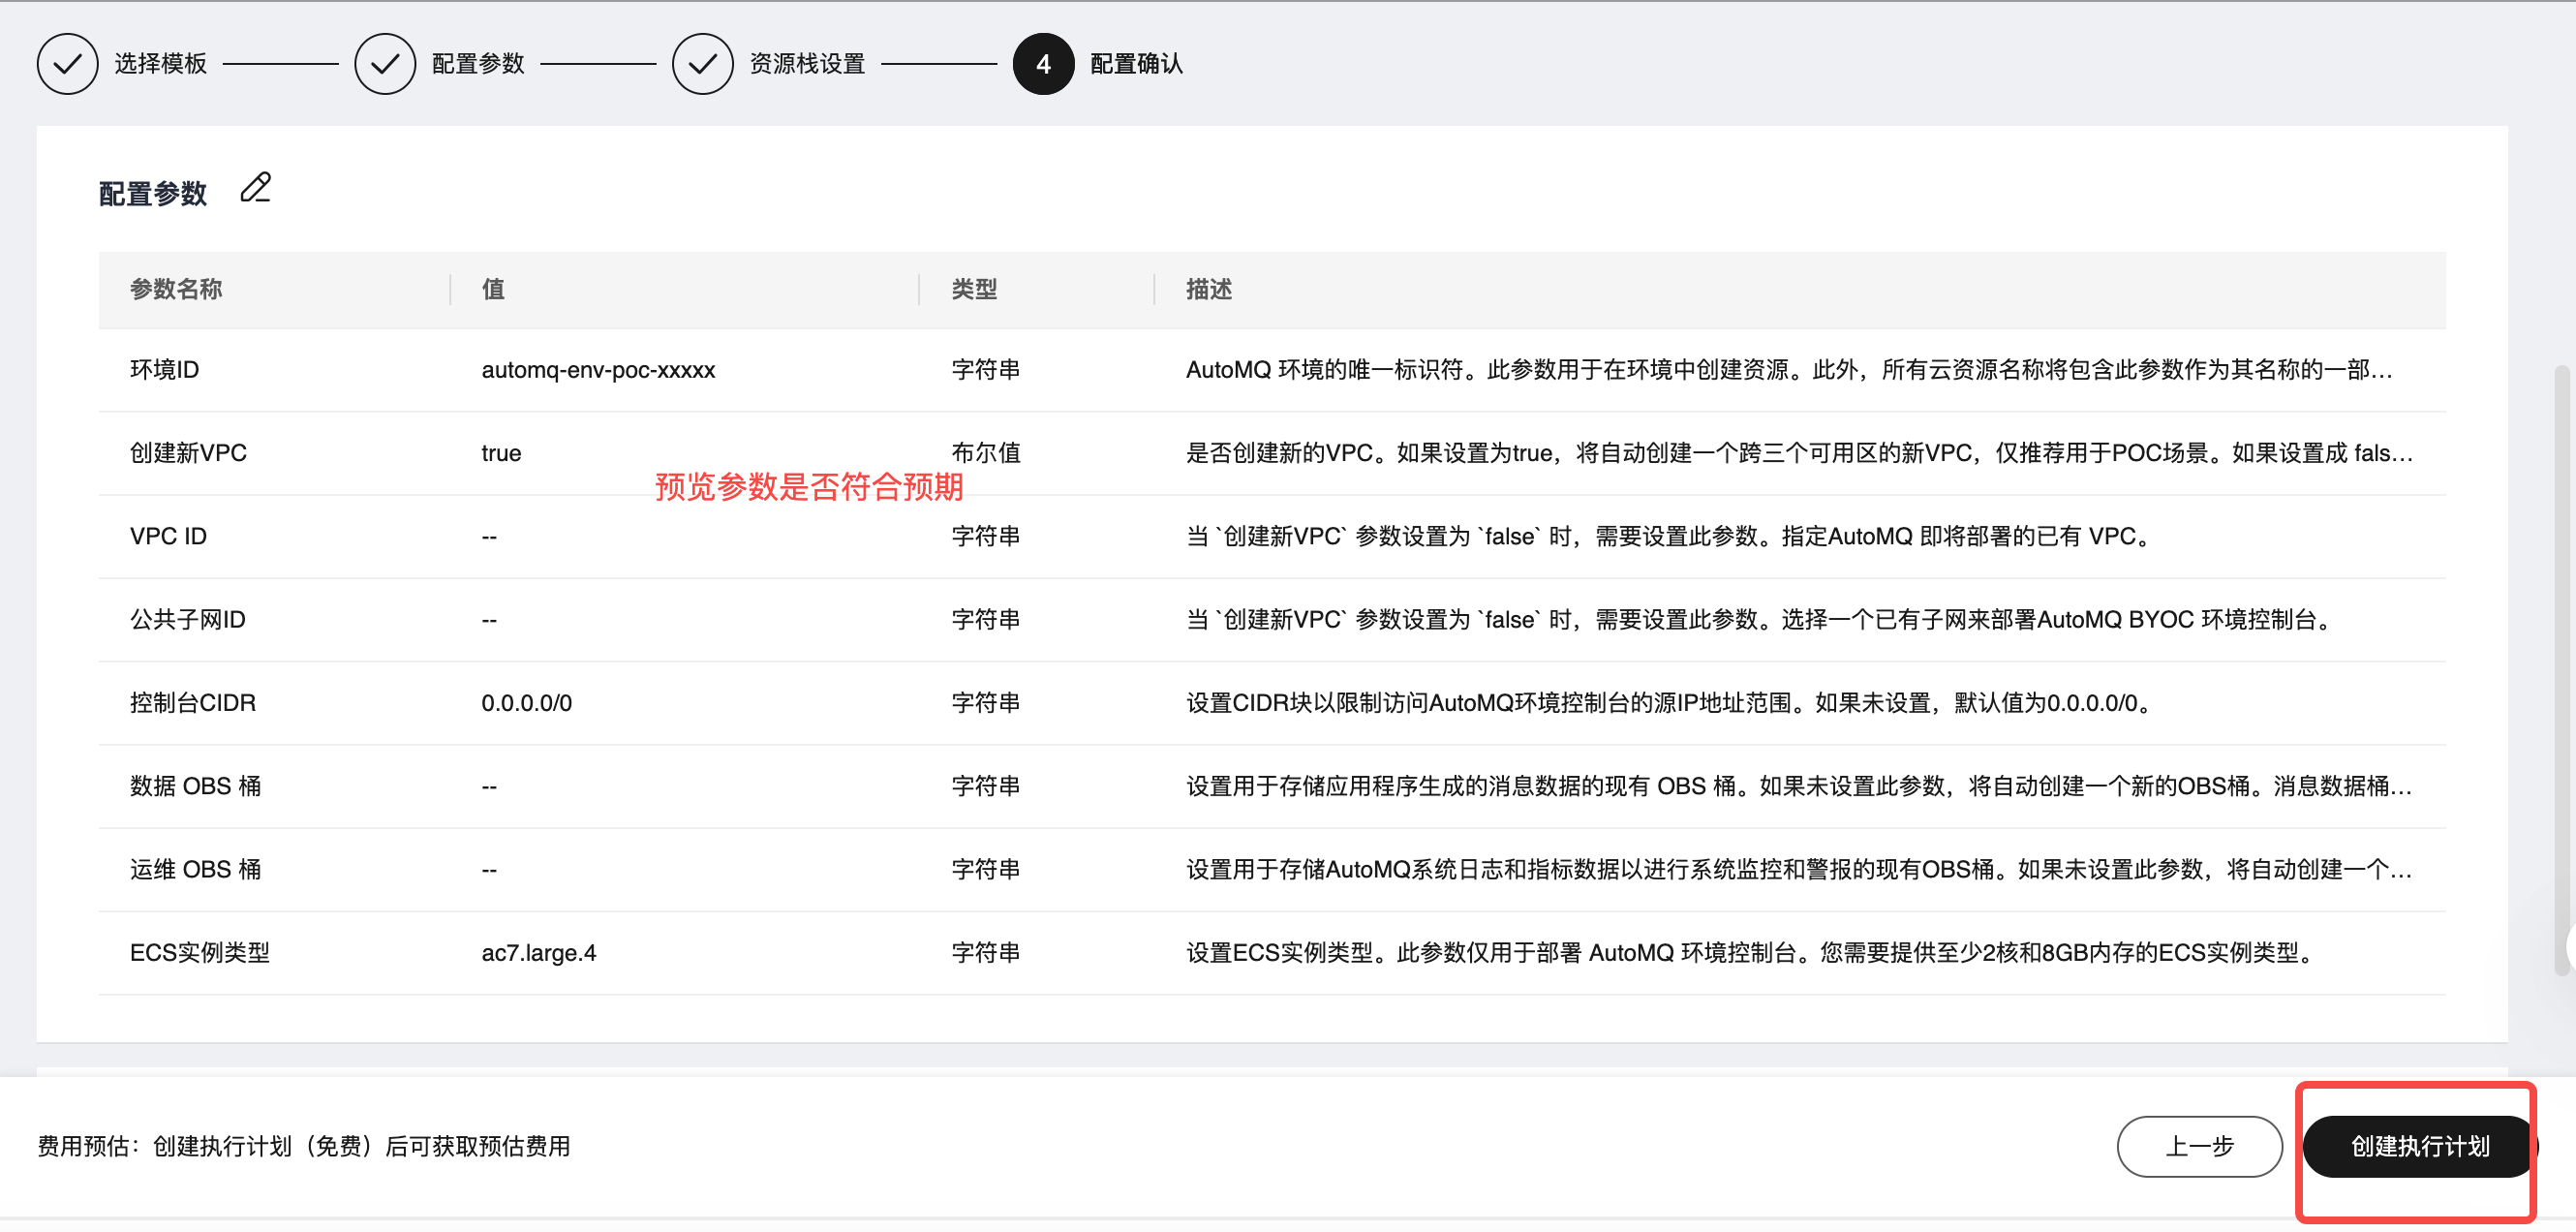
- Follow the instructions to fill in the installation template parameters. Generate the deployment plan. The parameters that need to be set are detailed in the table below.
| Setting Parameter | Value Description |
|---|---|
| Environment ID |
|
| Create New VPC |
|
| VPC ID |
|
| Public Subnet ID |
|
| Console CIDR |
|
| Data OBS Bucket |
|
| Maintenance OBS Bucket |
|
| ECS Instance Type |
|
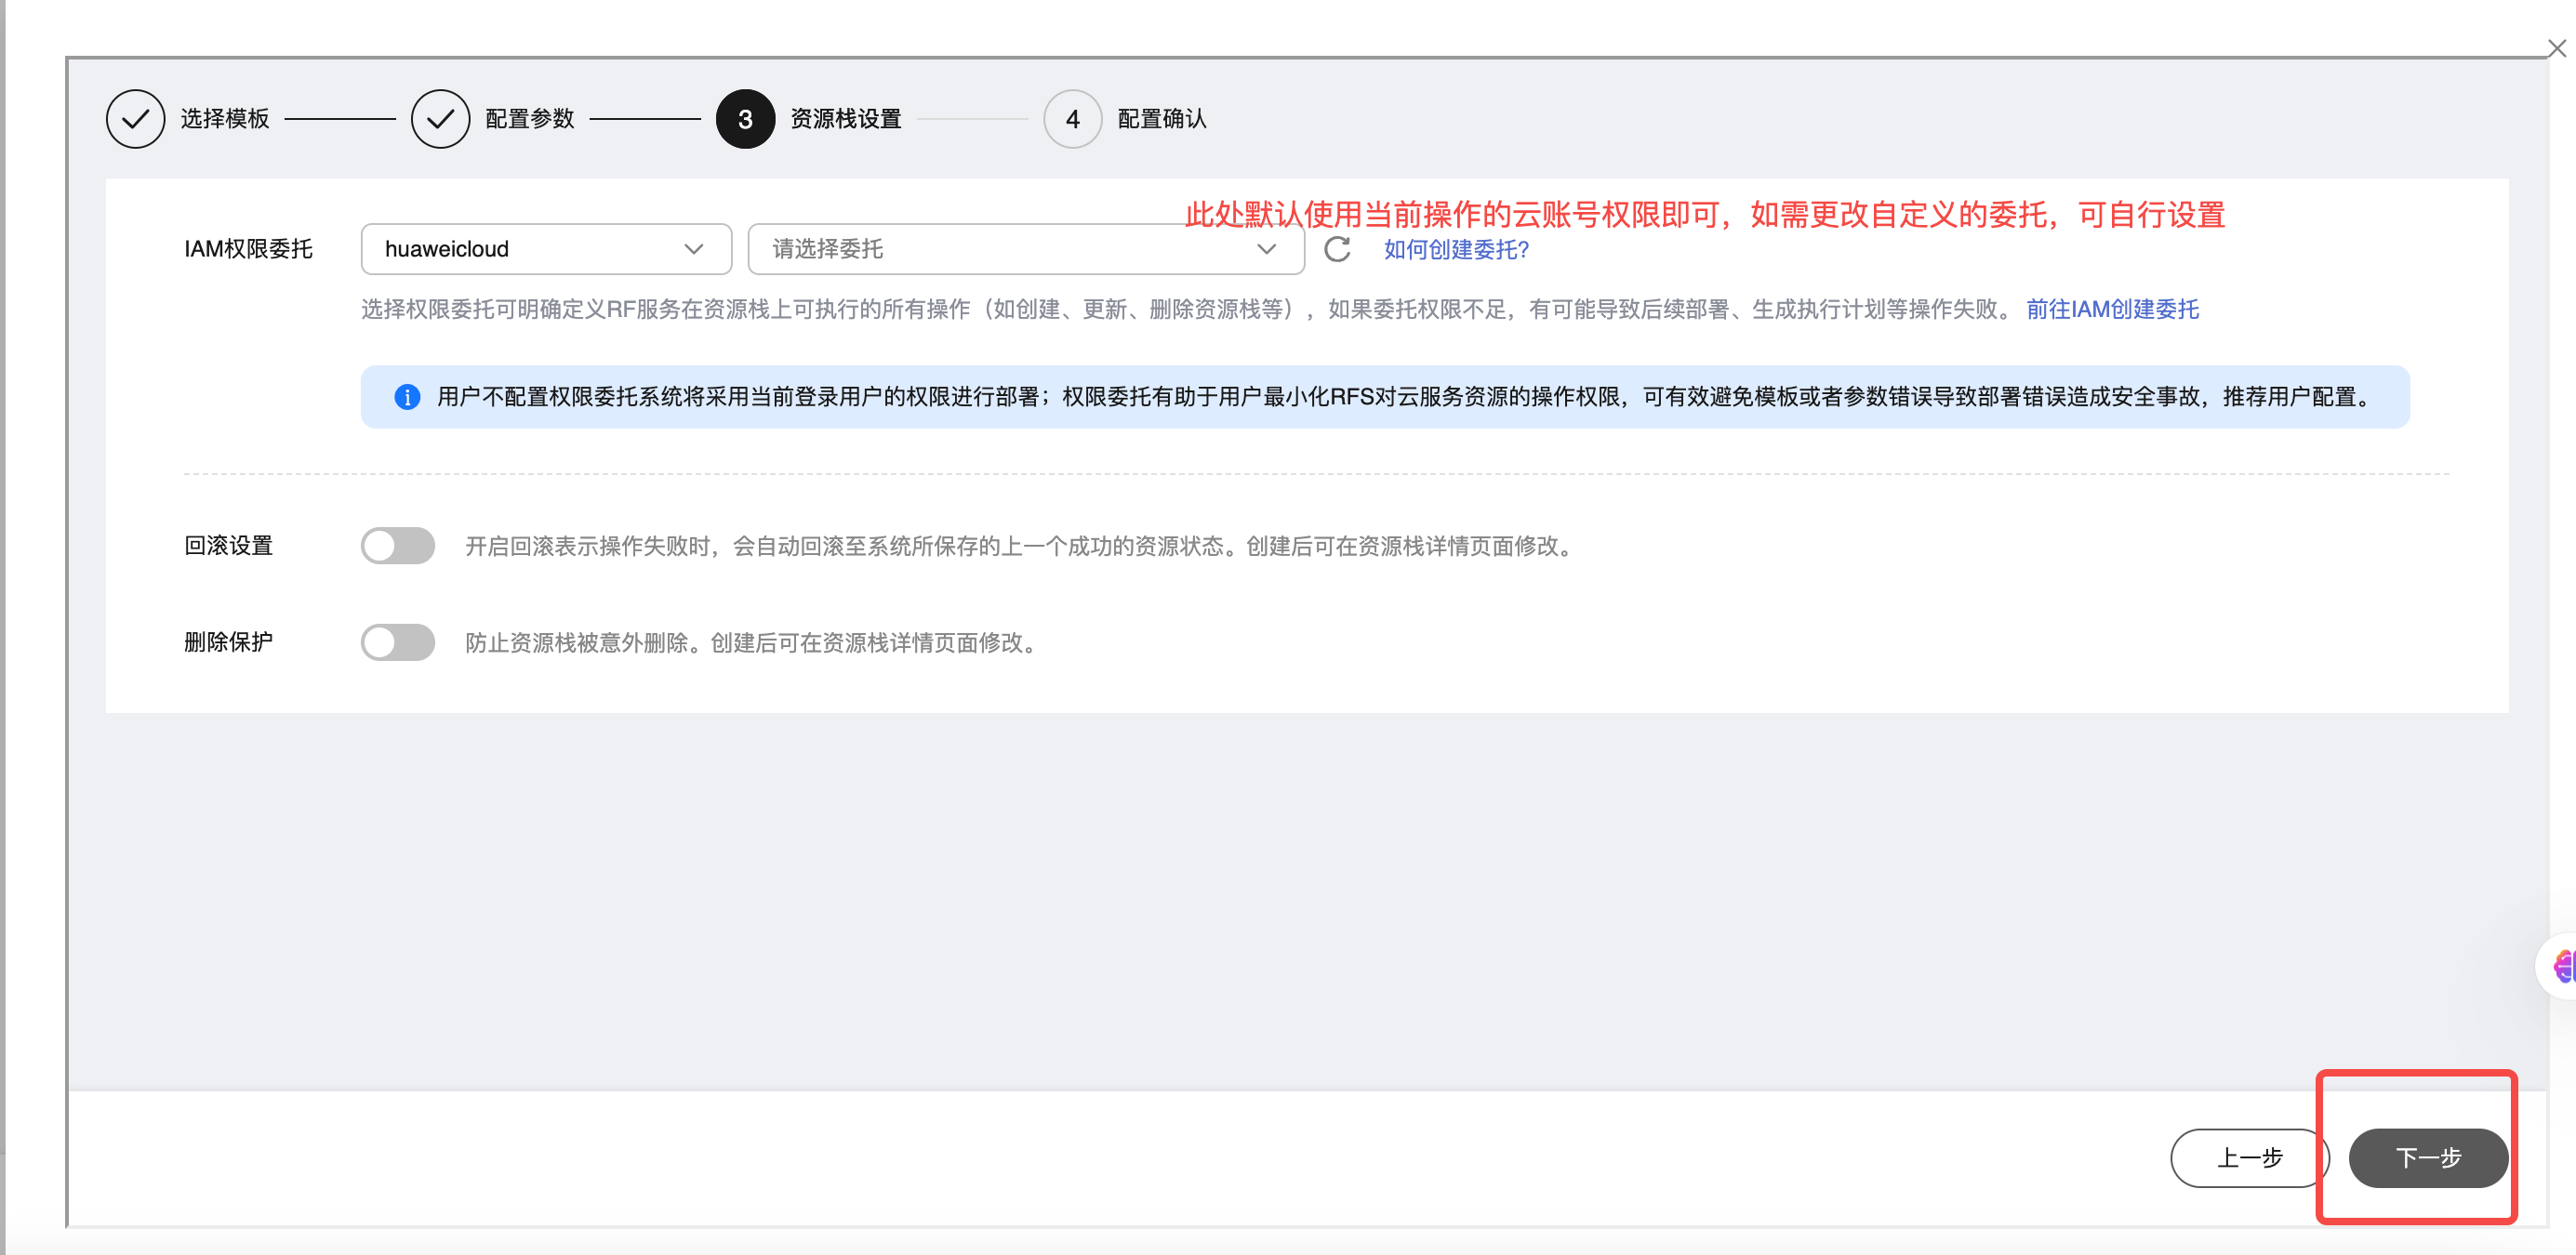
It is recommended to preview the parameters configured in the previous step and confirm their correctness before creating the execution plan.
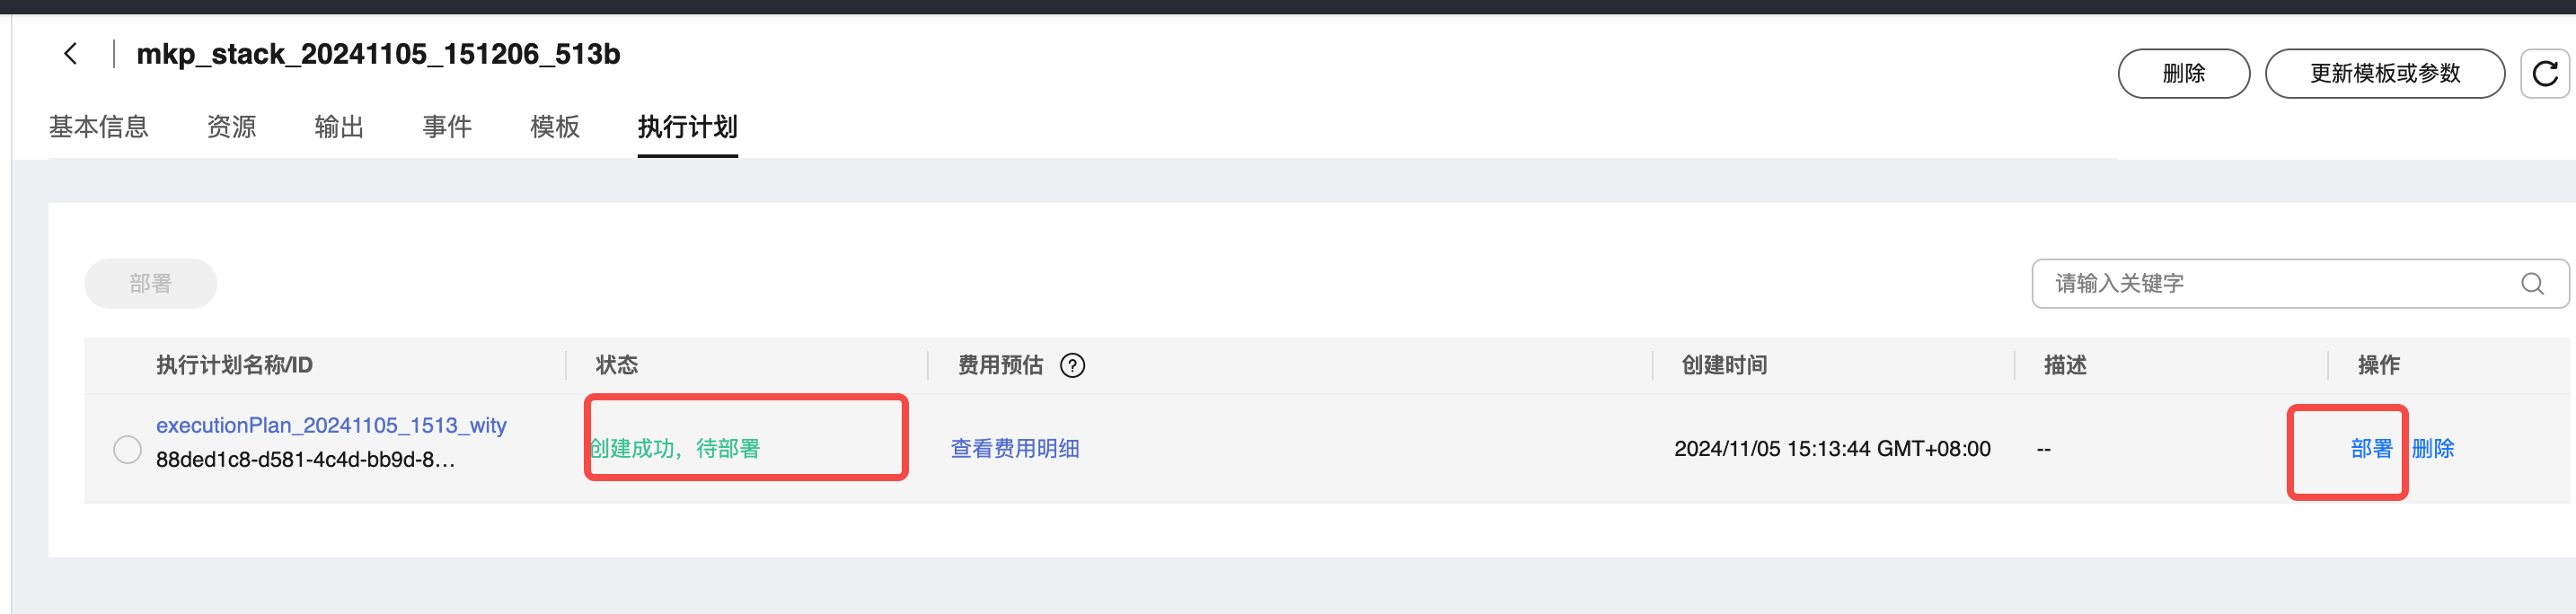
- After generating the execution plan, click Deploy Now.
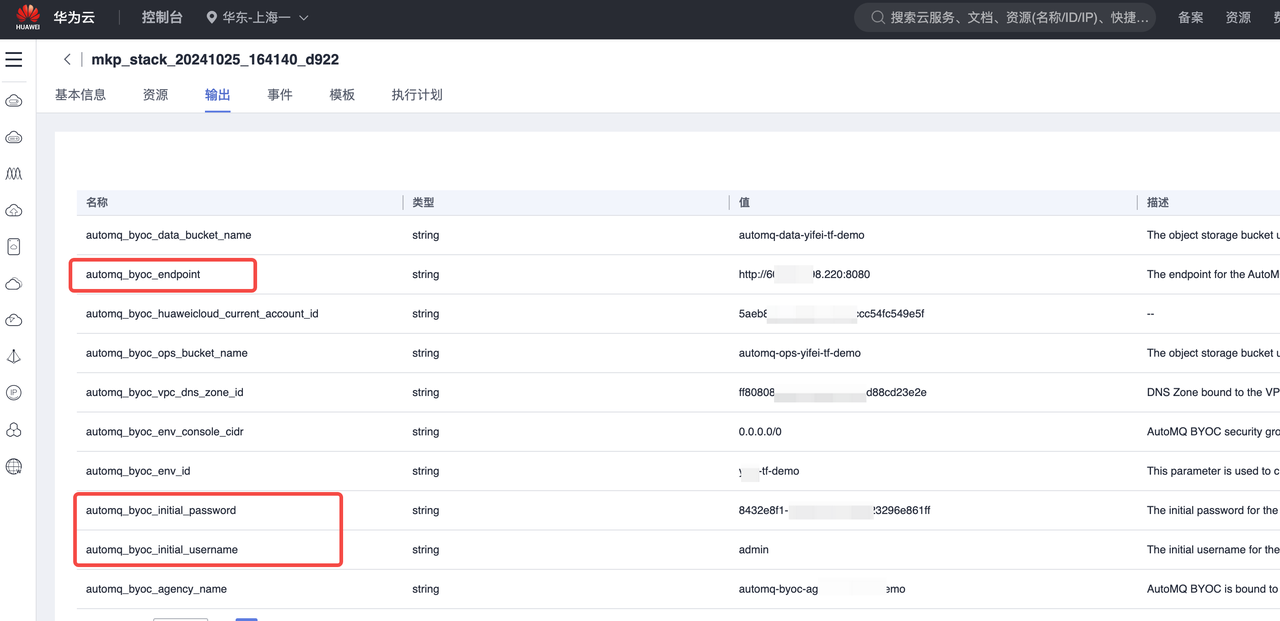
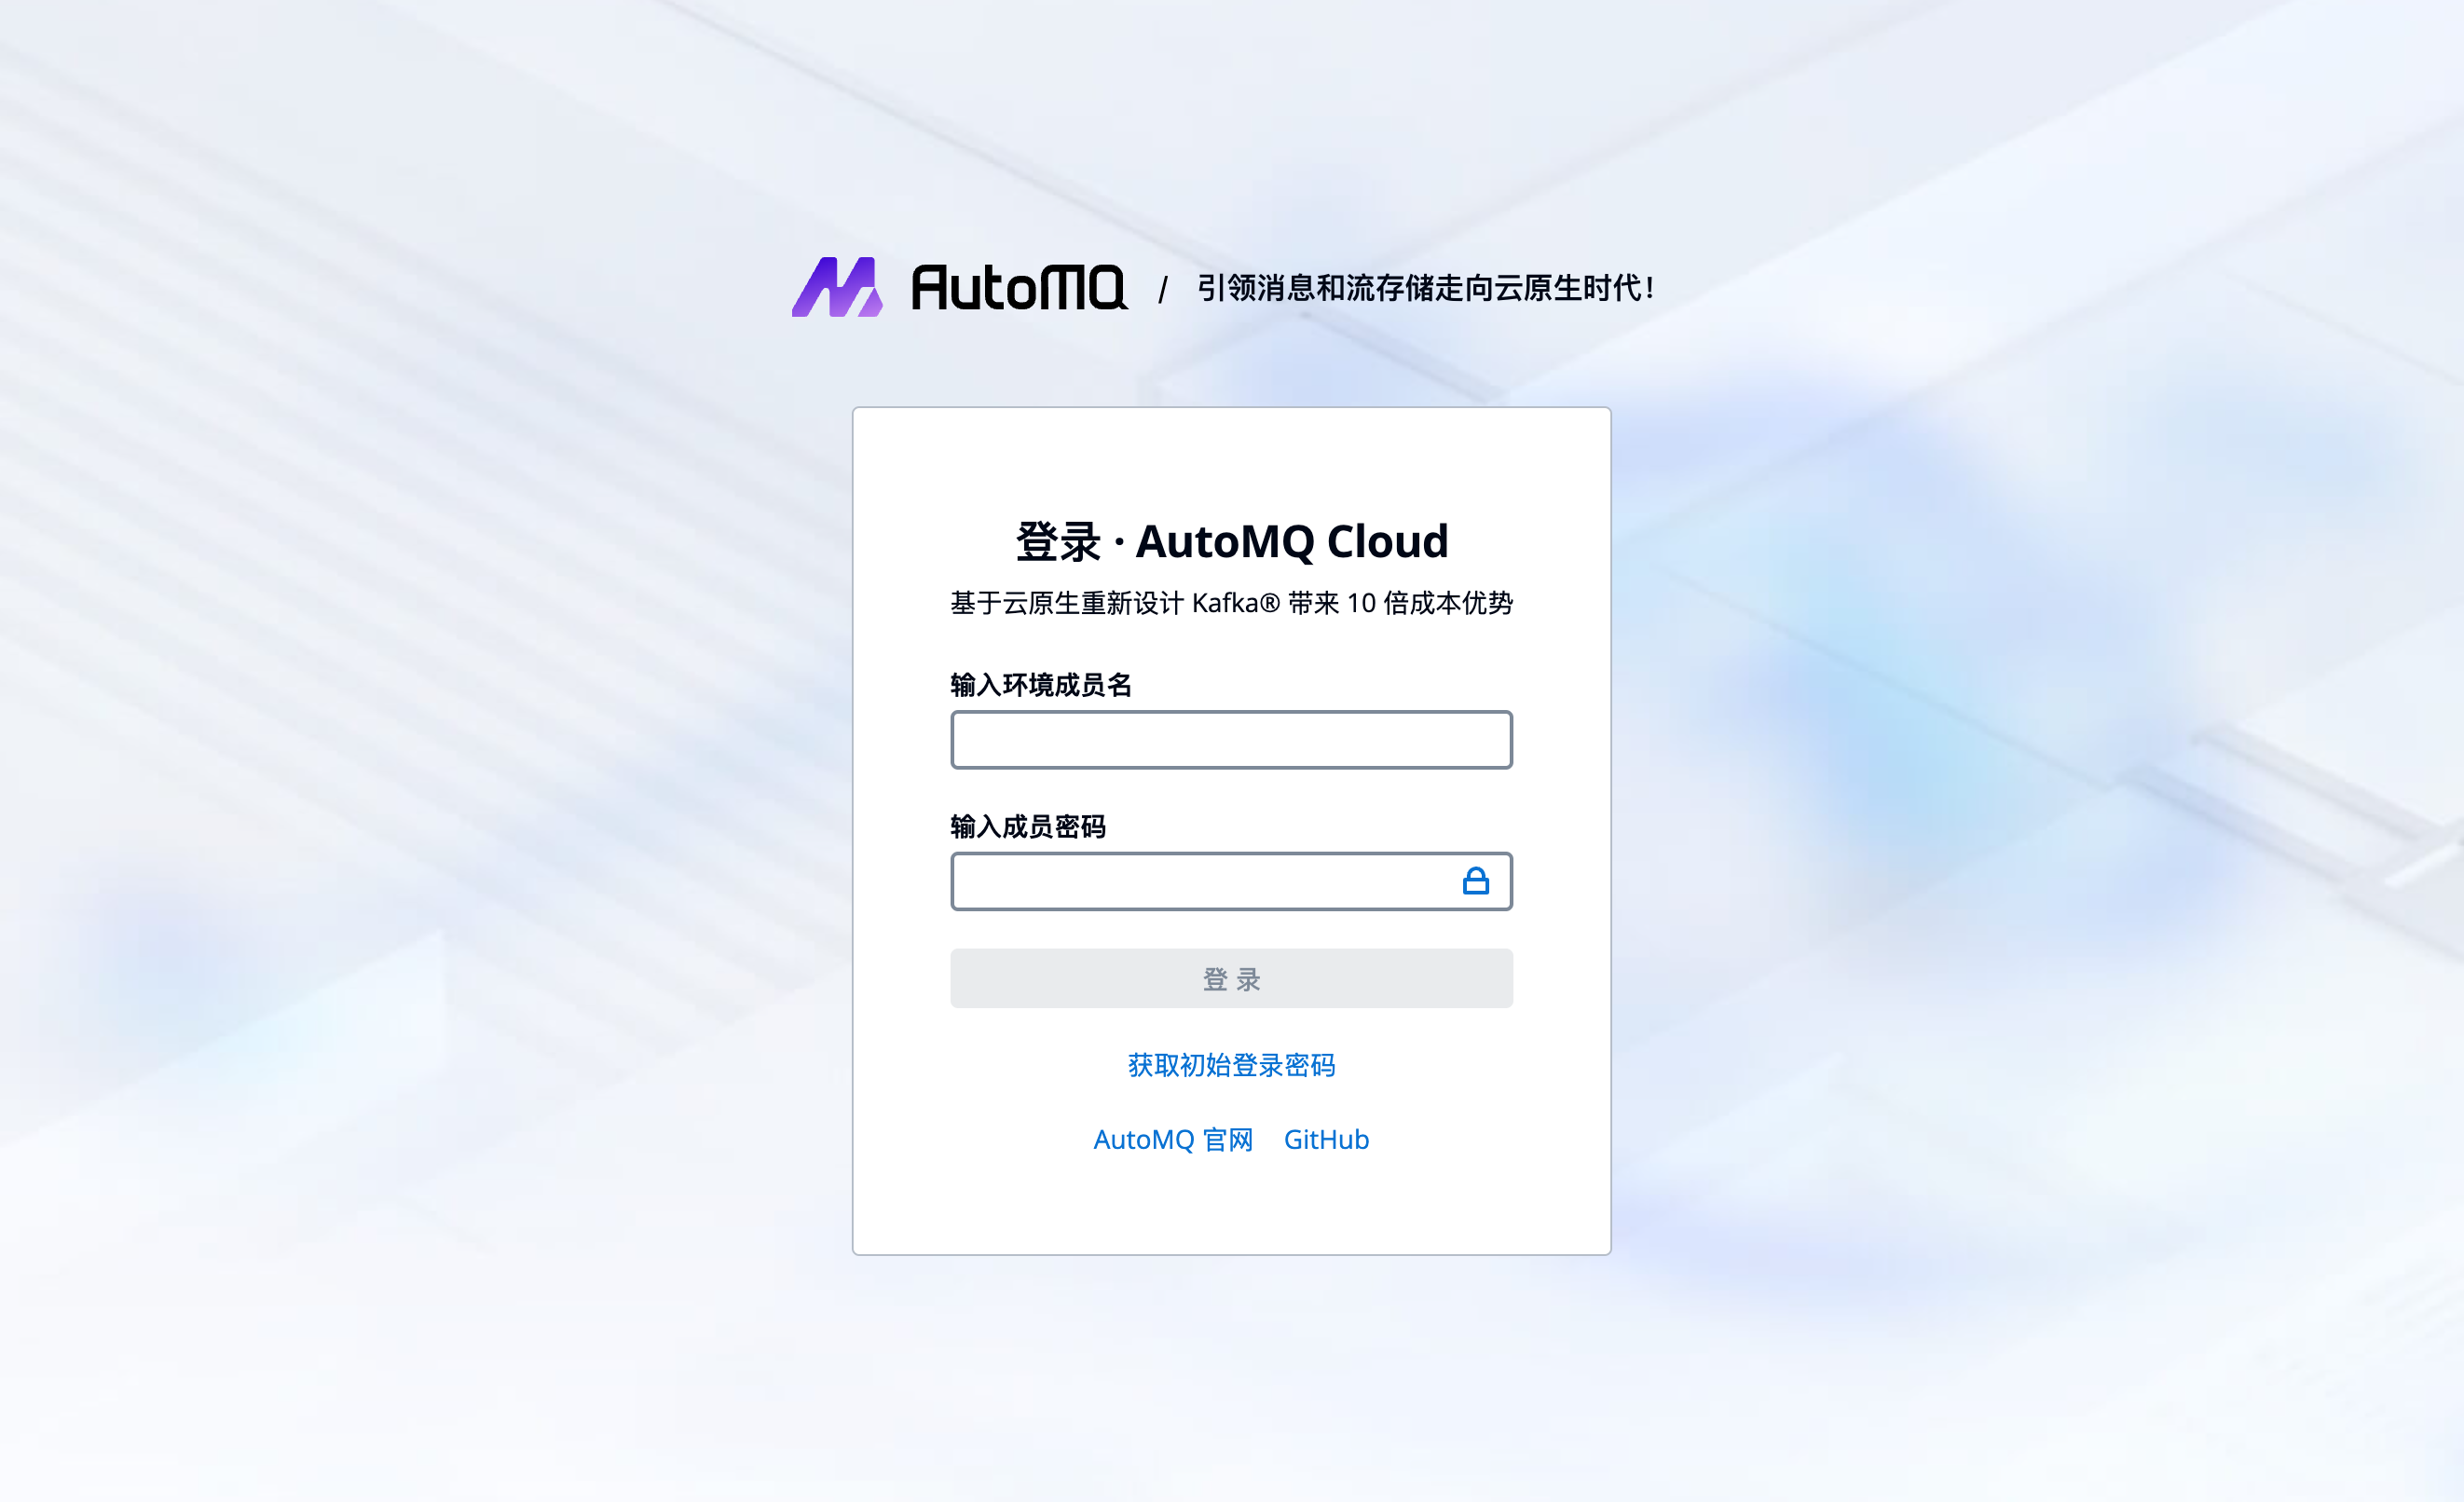
- Enter the Environment Console, log in using the initial username and password output by the RFS console, and change it to a custom password.
Note: When copying and pasting output variables from the Huawei Cloud RFS console using the mouse, it is recommended to paste them into a text editor first to avoid hidden characters that might lead to incorrect password input.
Complete RFS console output information is shown in the table below.
| Output | Description of Output |
|---|---|
| automq_byoc_endpoint |
|
| automq_byoc_initial_username |
|
| automq_byoc_initial_password |
|
| automq_byoc_env_id |
|
| automq_byoc_vpc_id |
|
| automq_byoc_agency_name |
|
| automq_byoc_instance_id |
|
Step 3: Complete BYOC Environment Operations Authorization
The BYOC environment is deployed in the user's VPC, providing data security and privacy isolation. However, system data such as system logs and metrics, unrelated to business operations, will be generated within the BYOC environment. After completing the environment installation, users need to refer to Overview▸ to grant the AutoMQ service provider the necessary operational authorization for system stability monitoring and self-healing operations.
Next Steps
-
Configure CCE: After installing the BYOC environment console, users need to prepare a CCE cluster and then configure it in the AutoMQ console to deploy the AutoMQ cluster to CCE. For documentation on preparing CCE and completing the subsequent deployment, refer to Deploy to HuaWei Cloud CCE▸.
-
Using AutoMQ with Terraform: After the environment installation is complete, users can manage and use AutoMQ through the AutoMQ Terraform Provider. For details on using AutoMQ with Terraform, please refer to the documentation.
-
Using AutoMQ via WebUI: Access the returned console address through a browser, and enter the initial username and password to access the environment console and explore the product features. Experience AutoMQ▸
Note:
This document focuses exclusively on the installation of the AutoMQ console. Once you have completed the console installation, you must configure the CCE cluster before you can create an AutoMQ instance (cluster). For details on configuring the CCE cluster, please refer to Deploy to Huawei Cloud CCE▸.
Appendix
VPC Adding Public SNAT Operation Instructions
Deployment artifacts such as Charts and Docker image repositories for AutoMQ on Kubernetes are available at public addresses. Therefore, when pulling images within the Huawei Cloud CCE cluster, ensure that the current VPC subnet has access to these public addresses.
It is generally recommended to configure a public NAT gateway to achieve outbound internet access. Refer to the following steps for operation instructions:
- Create a NAT Gateway, go to the NAT Console to create a public NAT gateway.
When creating the VPC gateway, choose the small specification, and ensure that the region and VPC are consistent with the VPC you will use subsequently.

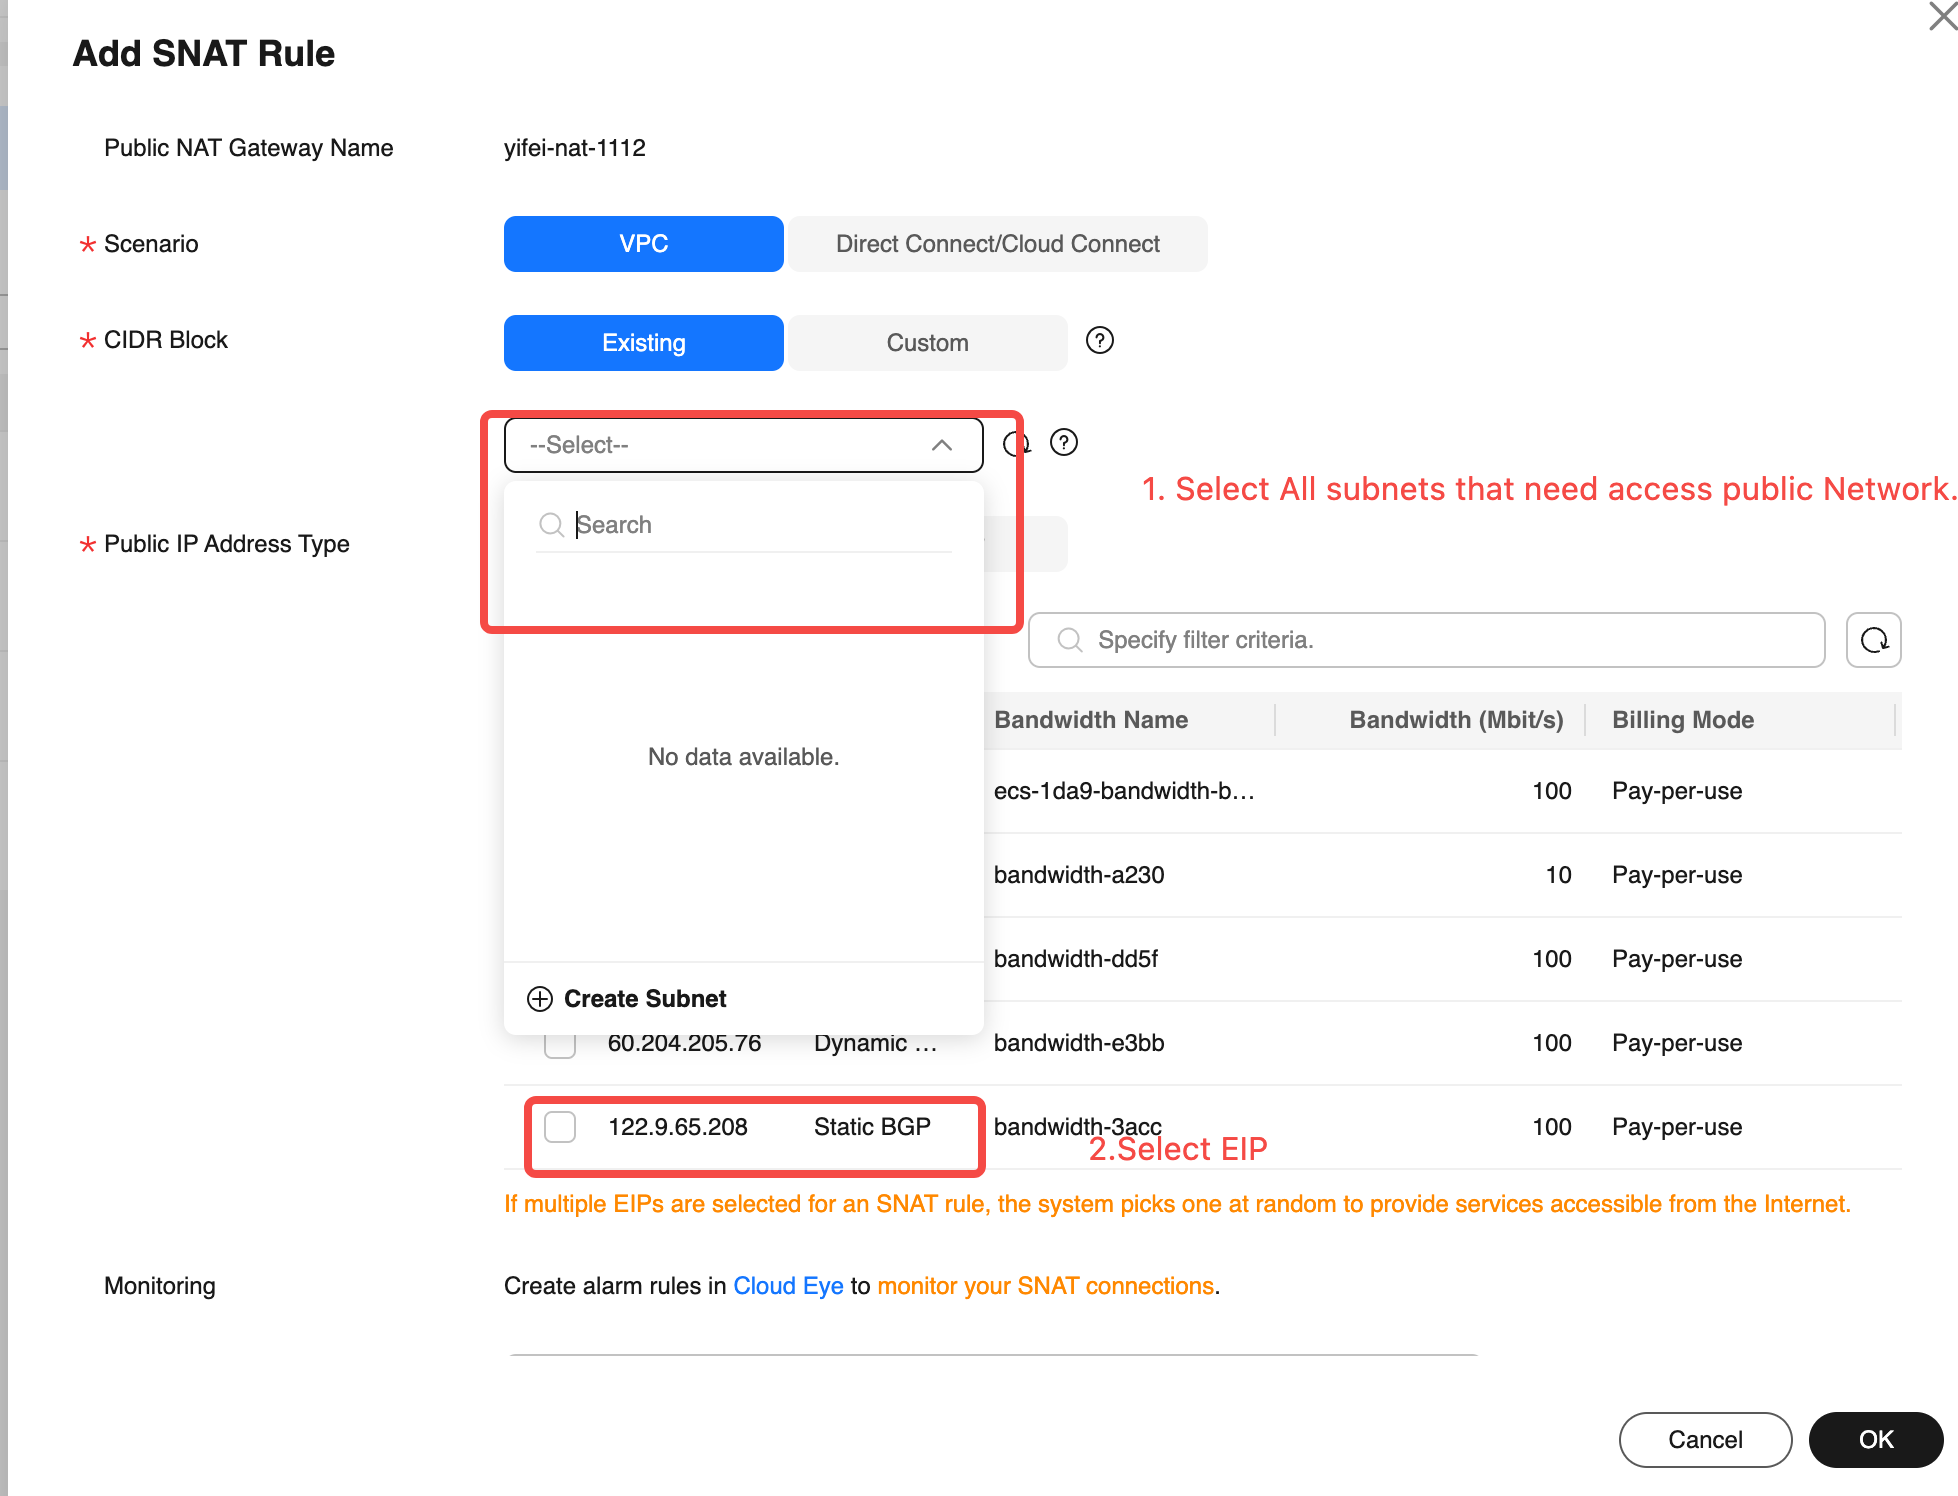
- Go to the NAT gateway, Create SNAT Rules, and associate the subnets that need access to the internet.

Fill in the list of subnets that need to access the Public Cloud and complete the SNAT rule creation.
Note:
Each subnet that needs to access the Public Cloud must have an SNAT rule added.