
Enable mTLS
The mTLS protocol verifies clients by issuing a unique TLS certificate to each one. During communication, it authenticates the legitimacy of the certificate and conducts ACL access control checks on verified identities.In the AutoMQ BYOC environment, enabling TLS transport encryption requires users to provide a CA and server certificate, ensuring that the certificates align with the domain name. Users must also regularly update certificates to prevent service disruptions due to expired certificates.
Step 1: Create a CA and Certificate
If your organization cannot obtain certificates from a trusted CA, you can follow the document below to issue and maintain a private CA and certificates on your own. Additionally, it is recommended to use AWS Private CA for managing CA and certificates in a production environment.- Configure the CA signing policy file
ca.cnf.
- Generate the CA private key
ca.keyand set file access permissions.
- Generate the CA public certificate
ca.crt.
ca.crt file as the CA public certificate, which will need to be deployed to AutoMQ instances and Kafka clients subsequently.
- Create a Broker Certificate Configuration File
broker.cnf.
- Generate the Broker Private Key
broker.key.
- Generate the Broker Certificate Signing Request CSR
broker.csr.
- Sign the CSR using the previously generated CA private key to create the Broker Certificate
broker.crt.
broker.crt is the signed Broker certificate. It’s recommended to set it with read-only permissions. You will need the broker.crt, broker.key, and ca.crt files when creating the AutoMQ instance later.
Step 2: Create a Client Certificate
- Refer to Manage Kafka ACLs▸, navigate to the AutoMQ console to create ACL users for clients, grant read and write permissions for the necessary Topics and Groups, and take note of the ACL username.
-
Create a Client certificate configuration file
client.cnf, and set the CN information to the ACL username.
- Generate Client private key
client.key.
- Generate Client Certificate Signing Request (CSR)
client.csr.
- Use the previous CA private key to sign the CSR and generate the client certificate
client.crt.
client.crt is the signed client certificate. The client application will need both client.crt and client.key files during connection.
Step 3: Server Configuration
-
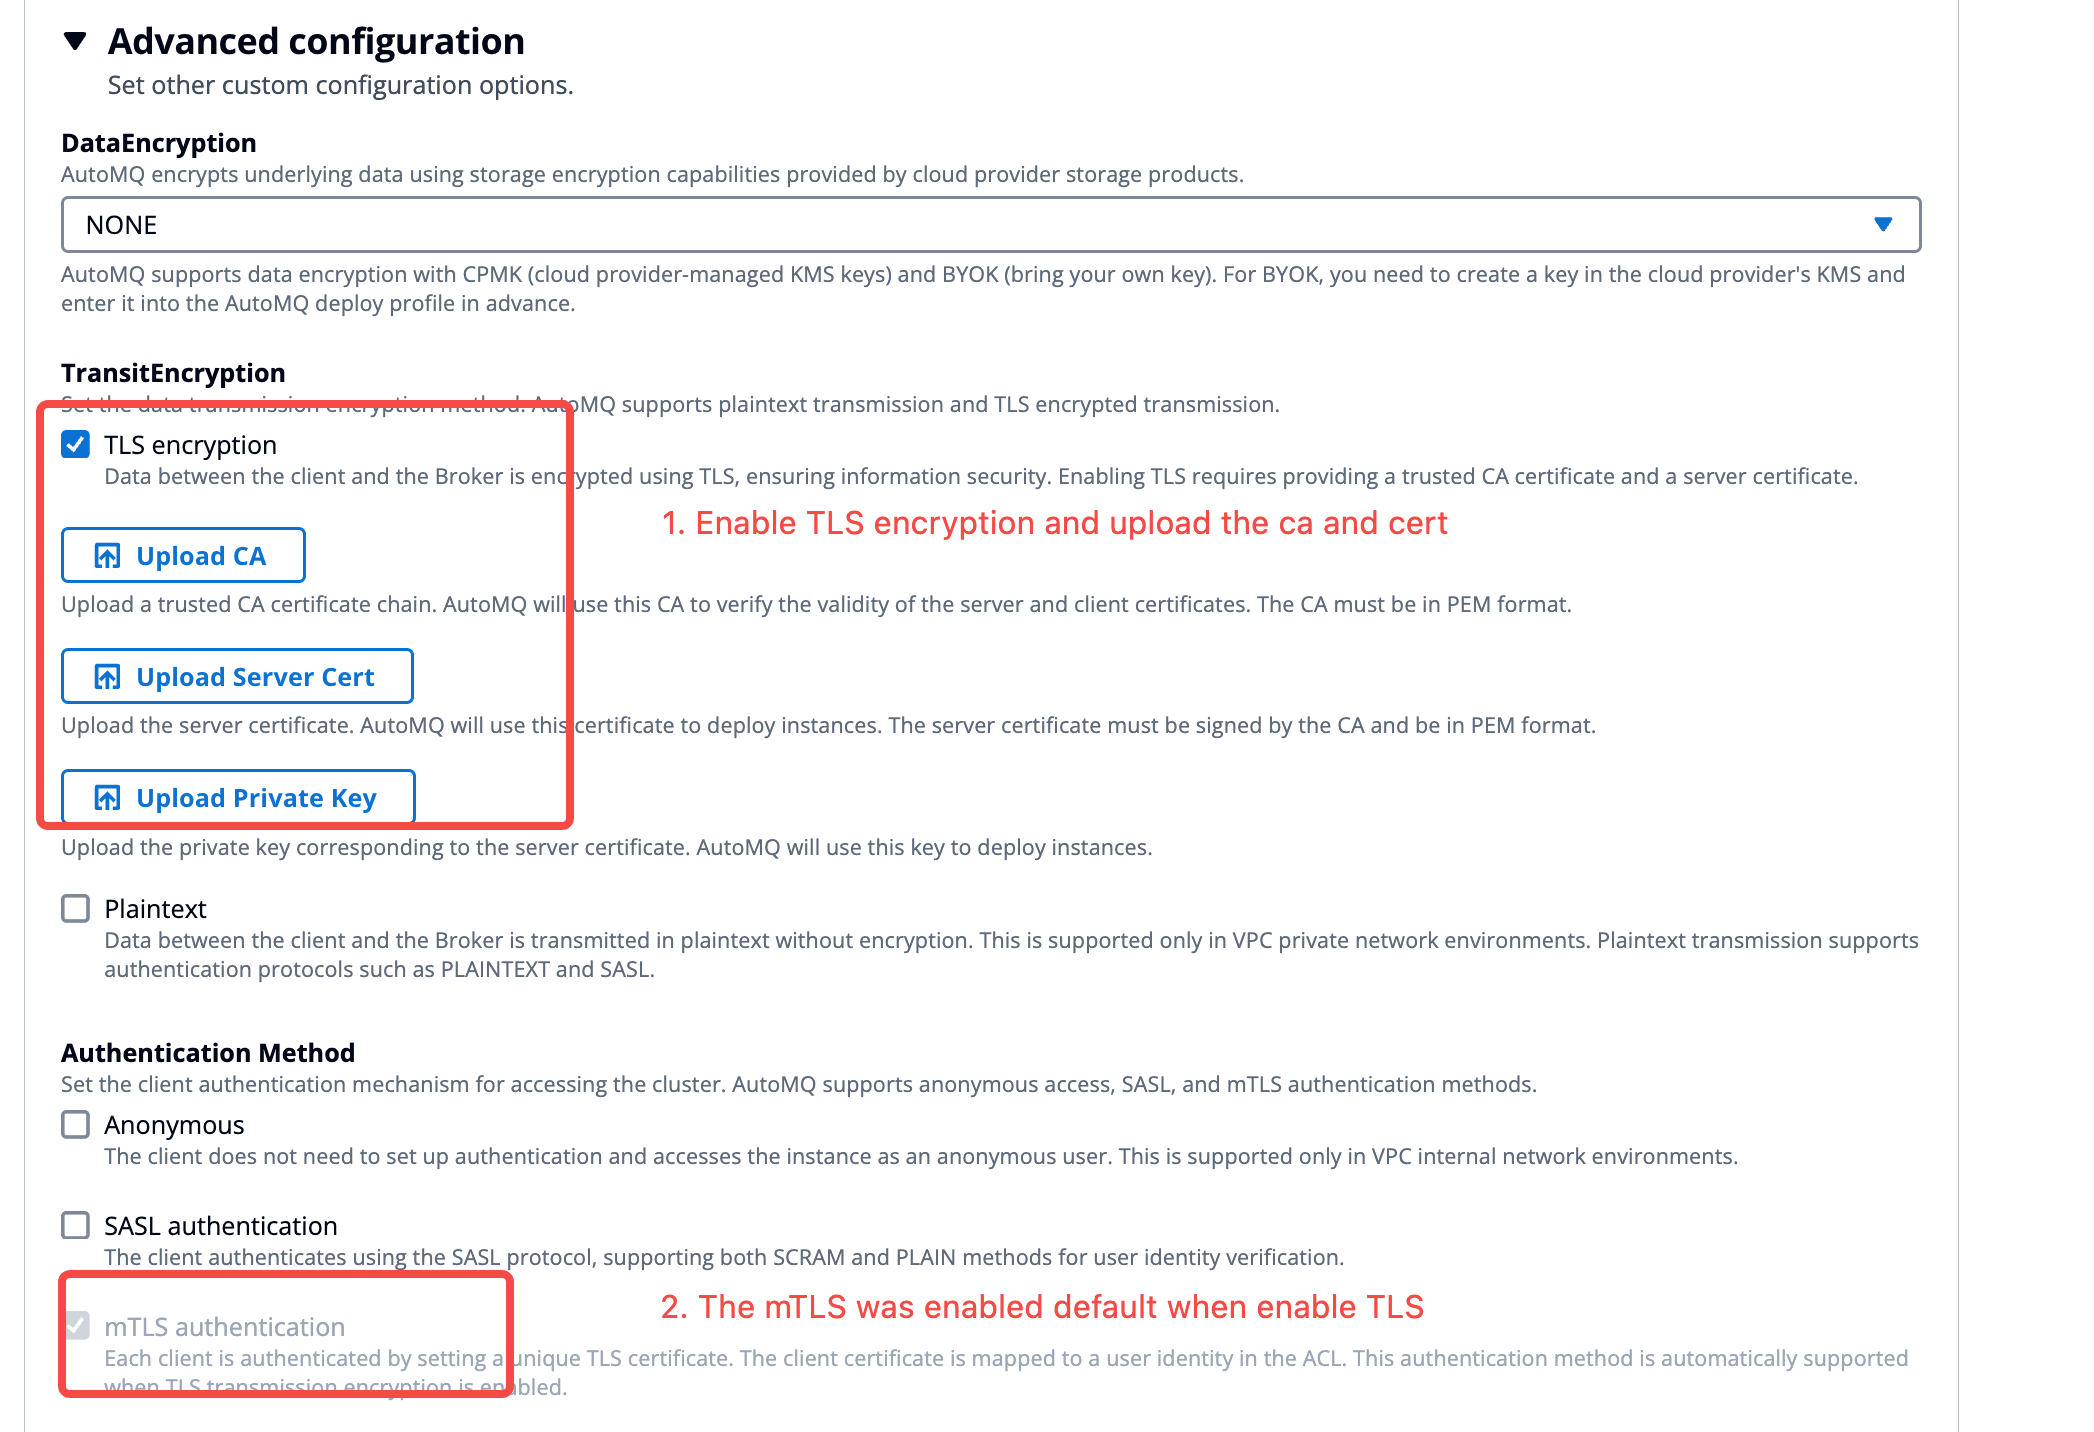
For mTLS, click on Advanced Options >> Enable the following parameters when creating the instance. Refer to the interface diagram below:
- TransitEncryption: Enable TLS Encryption.
-
Upload CA: Upload the CA certificate file obtained in the previous step
ca.crt. -
Upload Server Cert: Upload the Broker certificate file obtained in the previous step
broker.crt. -
Upload Private Key: Upload the key file for the Broker certificate obtained in the previous step
broker.key.
- After enabling mTLS, navigate to the instance details page to view the corresponding connection point information.

Step 4: Client Configuration
Kafka clients use the mTLS protocol to connect to the server. Refer to the Apache Kafka documentation for examples and configure the appropriate parameters.-
Convert the previously generated CA certificate into a JKS trustStore. Be sure to replace the parameters in the command below based on your actual situation.
- alias: Enter the alias of the CA certificate.
- file: Enter the CA certificate file obtained in the previous step.
- keystore: Enter the name of the JKS, which will need to be configured in the Kafka client later.
- storepass: Enter the access password for the JKS, which will need to be configured in the Kafka client later.
-
Convert the previously generated client certificate into a PKCS12 keystore (including the client key). Be sure to replace the parameters in the command below according to your actual situation.
-
in: Enter the client certificate file,
client.crt, obtained in the previous step. -
inkey: Enter the client private key,
client.key, obtained in the previous step. -
CAfile: Enter the CA certificate, which is the
ca.crtobtained from the previous step. - out: The name of the output keystore file.
- name: The alias for the output keystore.
- password: Set the password.
-
in: Enter the client certificate file,
- Add the following configuration information to the Kafka client configuration file.
Certificate Expiry Monitoring
In a BYOC environment, TLS certificates are supplied by the users, so it’s essential for users to monitor the certificates’ validity periods to ensure renewal before expiration. The AutoMQ server provides the following metrics to monitor the server certificates’ expiration time:- kafka_stream_cert_expiry_timestamp_milliseconds: Displays the expiration timestamp of the current certificate in milliseconds.
-
kafka_stream_cert_days_remaining: This metric calculates the number of days left until a certificate expires from the current moment.