AutoMQ Table Topic supports integration with Iceberg, allowing for streaming data into the lake for analysis and queries, while eliminating the need for ETL configuration and maintenance. This document explains how to configure the integration of Table Topic with Glue in an AWS environment.
Prerequisites
To use the AutoMQ Table Topic feature in an AWS environment, the following conditions must be met:
-
Version Constraints: The AutoMQ instance must be version >= 1.4.1.
-
Instance Constraints: The Table Topic feature must be enabled at the time of creating the AutoMQ instance. It can only be used if enabled during creation, as it cannot be activated later.
-
Resource Requirements: On AWS, Table Topic allows you to use AWS Glue as a Data Catalog or AWS S3 Tablebucket as a Data Catalog.
Operational Steps
Step 1: Create Glue Catalog Integration
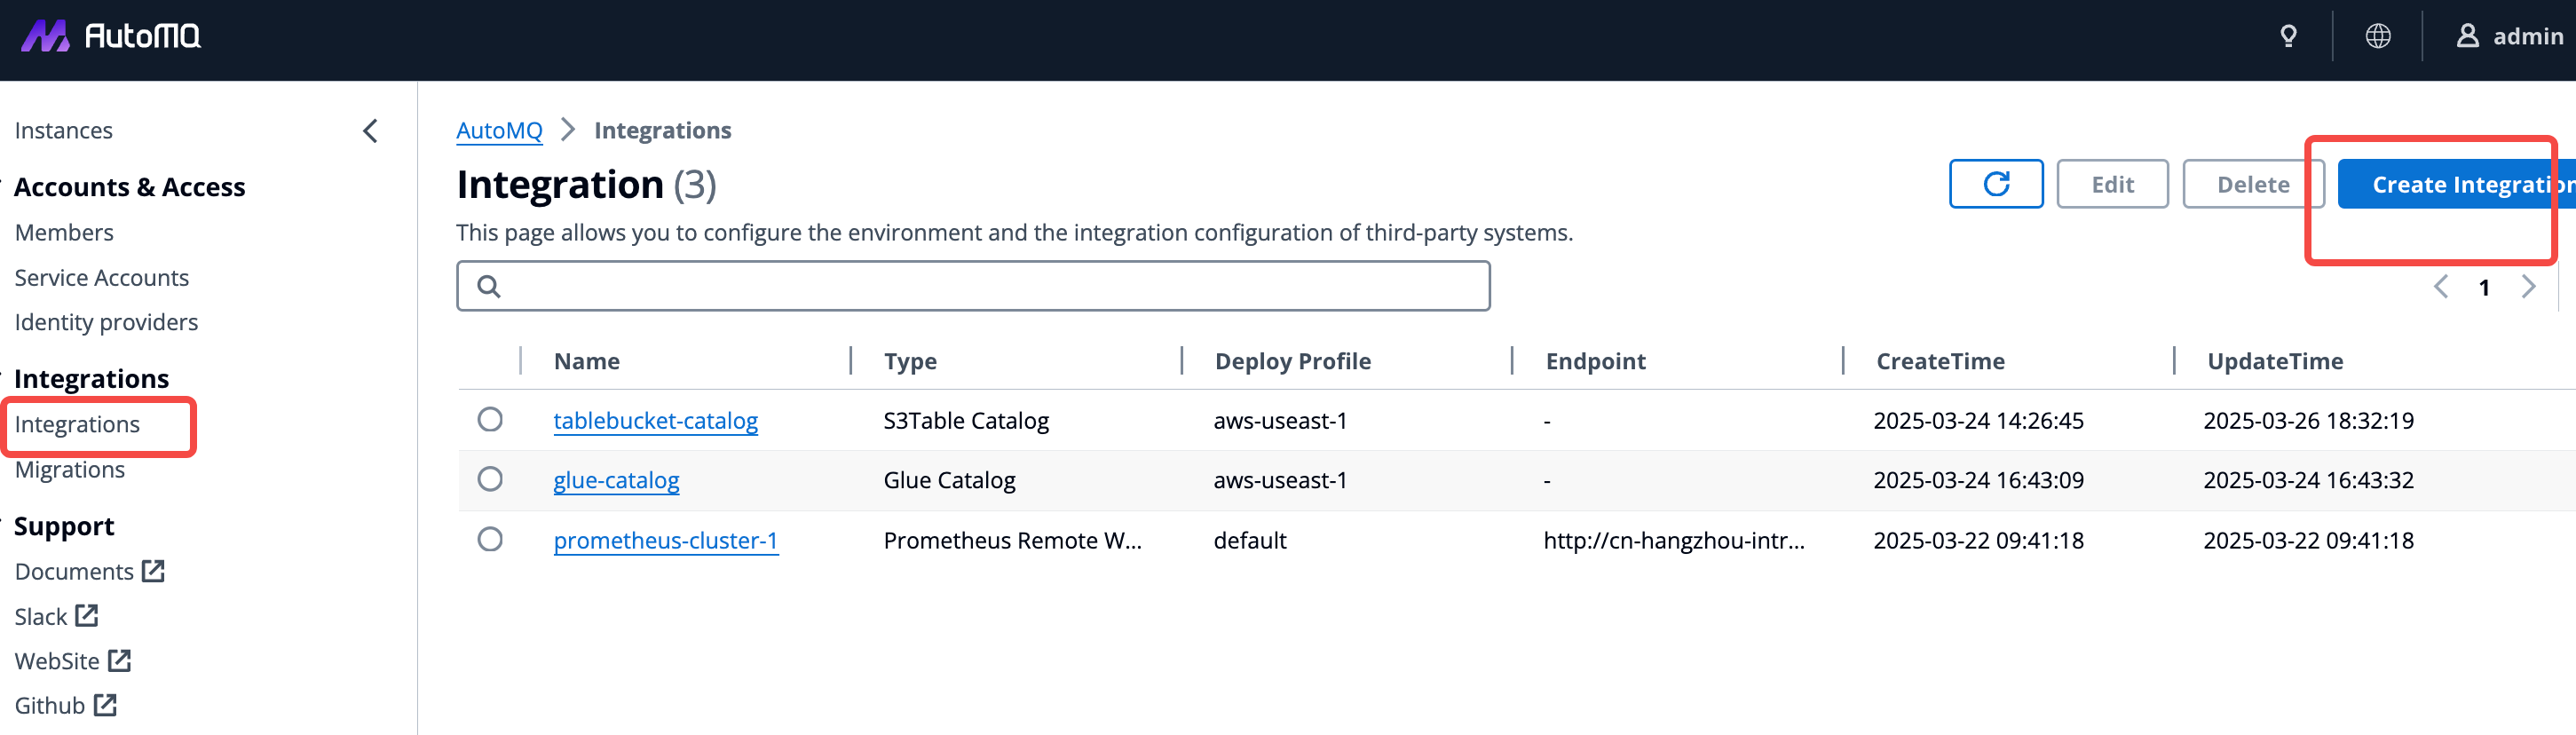
Before utilizing Table Topic, navigate to the AutoMQ console to create a Glue Catalog integration for recording Catalog information. Follow the operational instructions below:
- Log into the AutoMQ console and click the Integration menu.
-
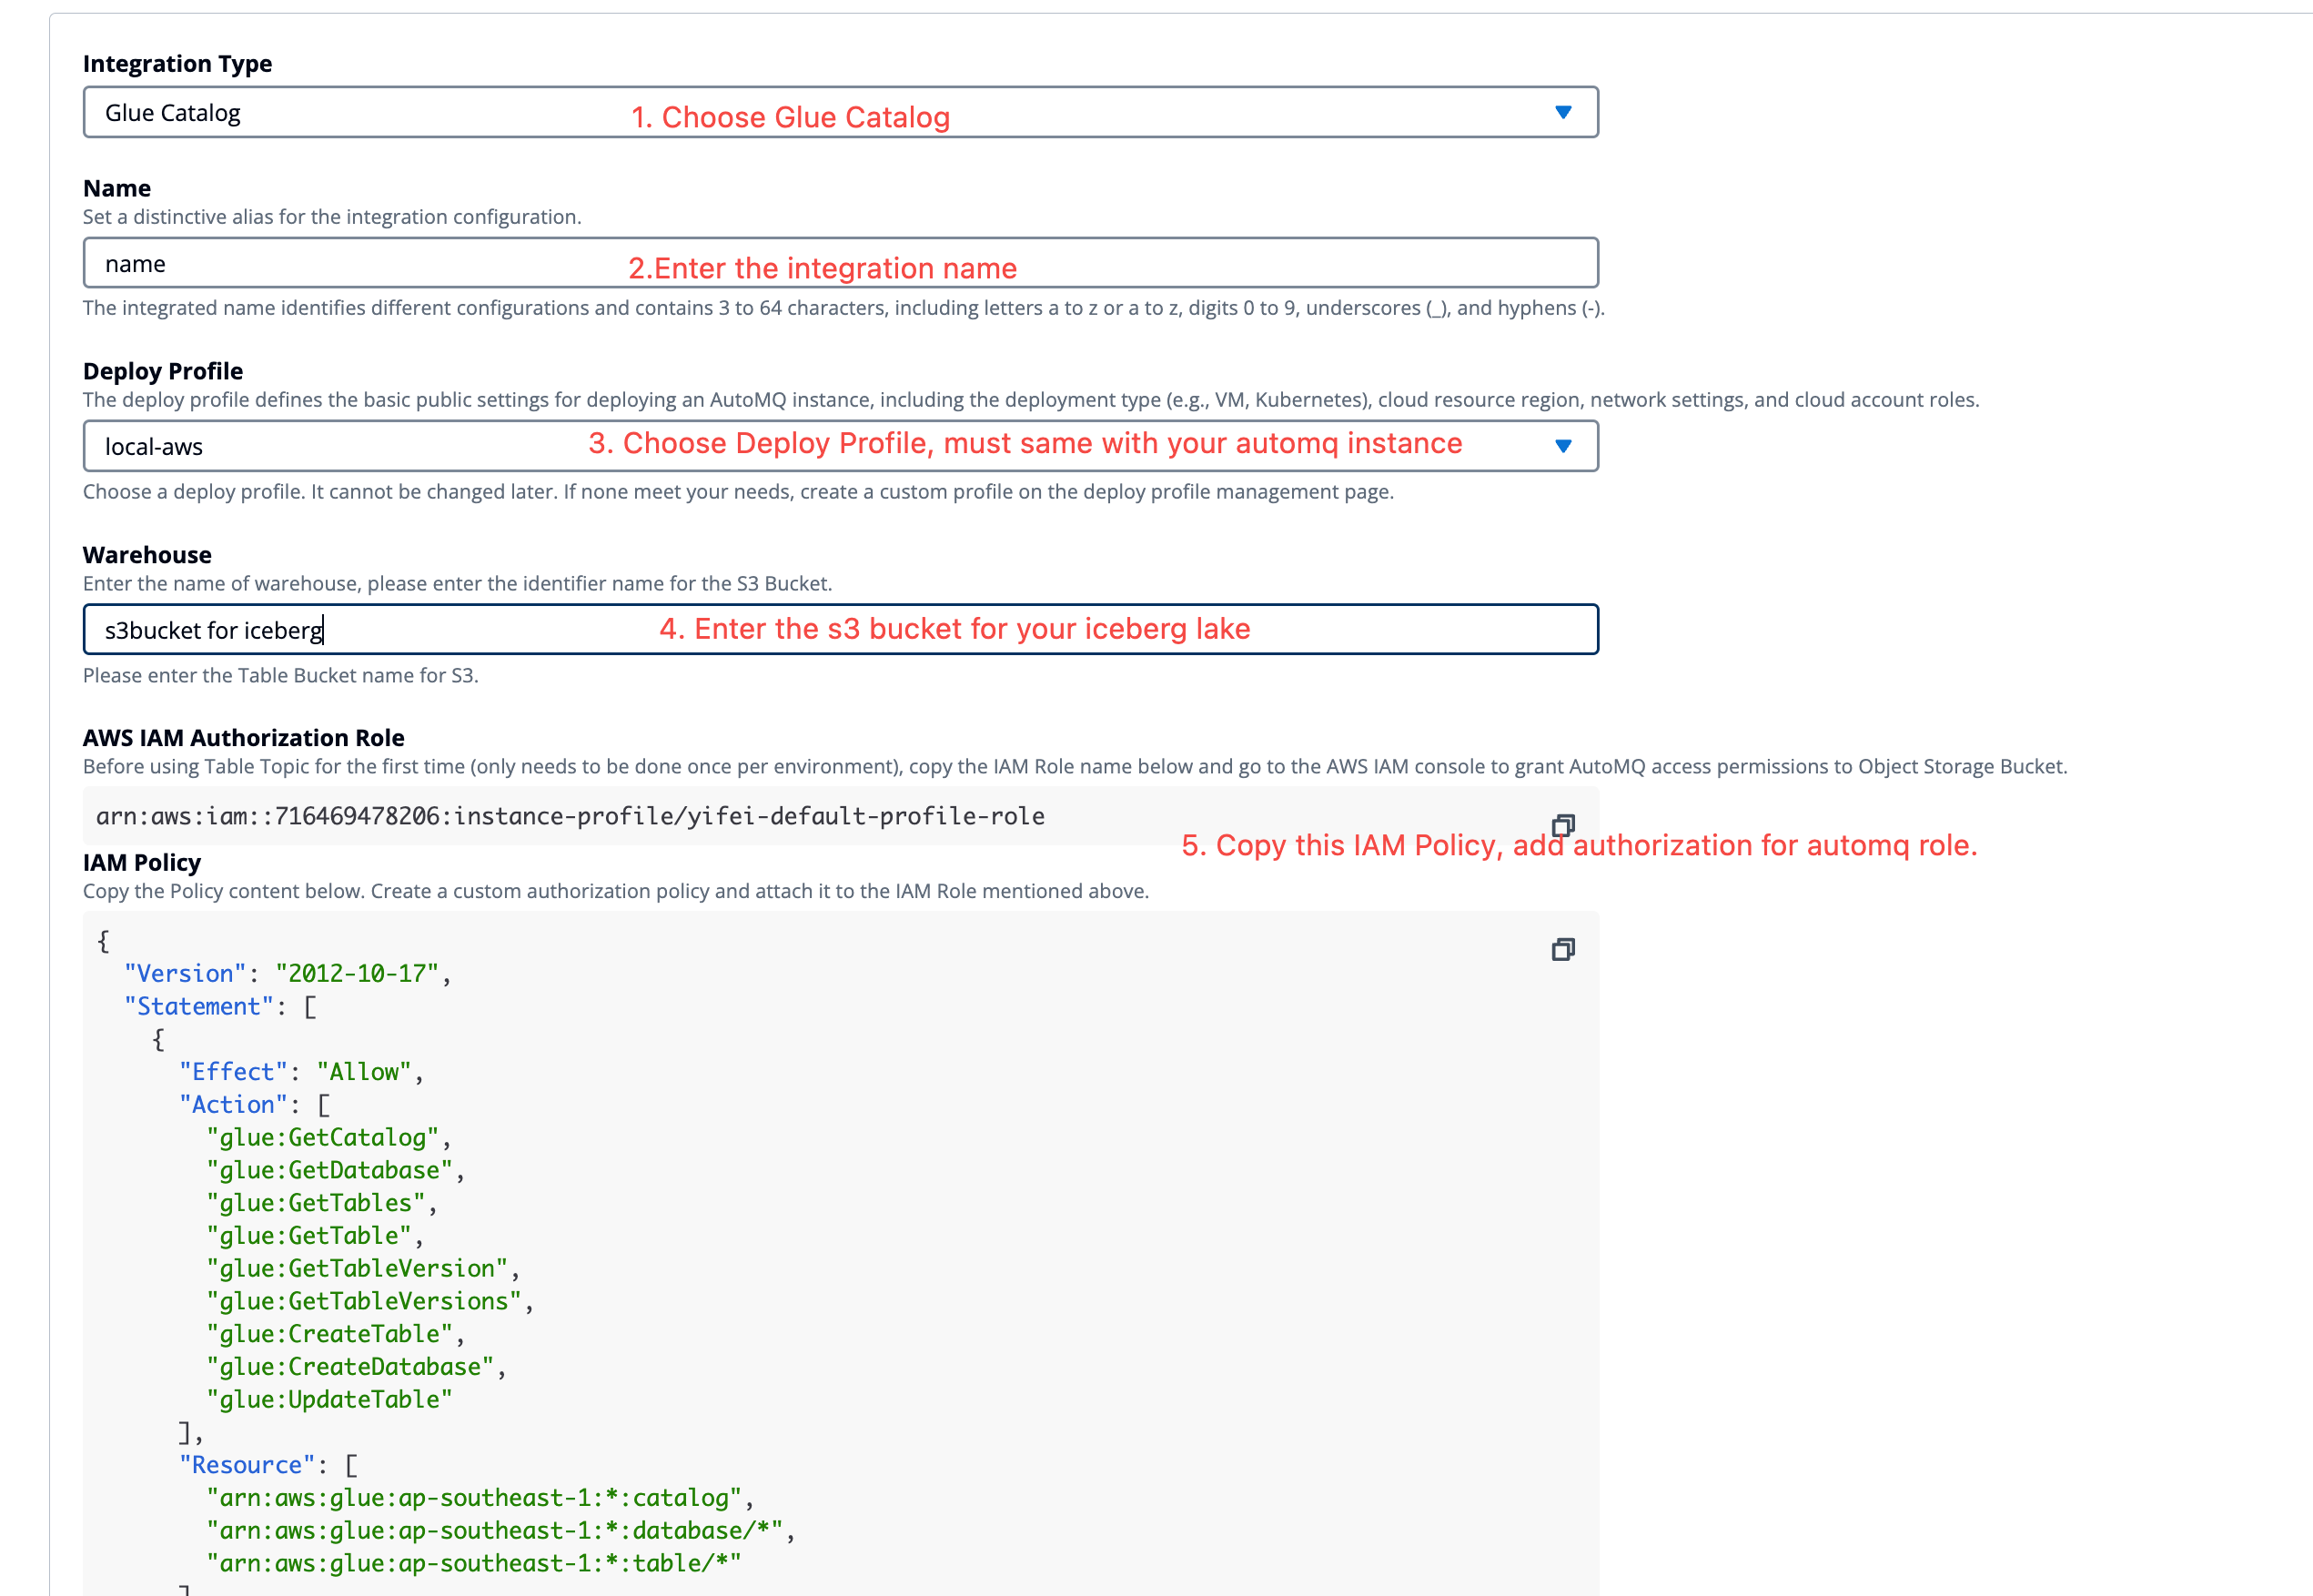
Select Create Glue Catalog Integration, and fill in the following information:
-
Name: Enter a unique integration configuration name.
-
Deployment Configuration: Choose the deployment configuration associated with the integration, ensuring consistency for future instance creation.
-
Warehouse: Enter the object storage Bucket used by the data lake, which is intended for long-term data storage.
-
After entering the Warehouse parameters, AutoMQ will generate the IAM Policy needed to access the Bucket and display the IAM Role used by the AutoMQ instance. Please navigate to your cloud provider’s IAM console and use this Policy to create the authorization.
-
After authorization is completed, you can proceed to create the Glue Catalog integration.
Step 2: Create an AutoMQ Instance and Enable the Table Topic Feature.
To use the AutoMQ Table Topic feature, it must be enabled during instance creation to facilitate streaming data into the lake eventually. Therefore, refer to the instructions below for configuration when creating the instance:
Note:After enabling the Table Topic for an AutoMQ instance, not all Topics will automatically activate the table transformation feature. Configuration is required at the individual Topic level to stream data into the lake as needed.To utilize Table Topics, you must enable them during the instance creation process. After an instance is created, this setting cannot be modified.
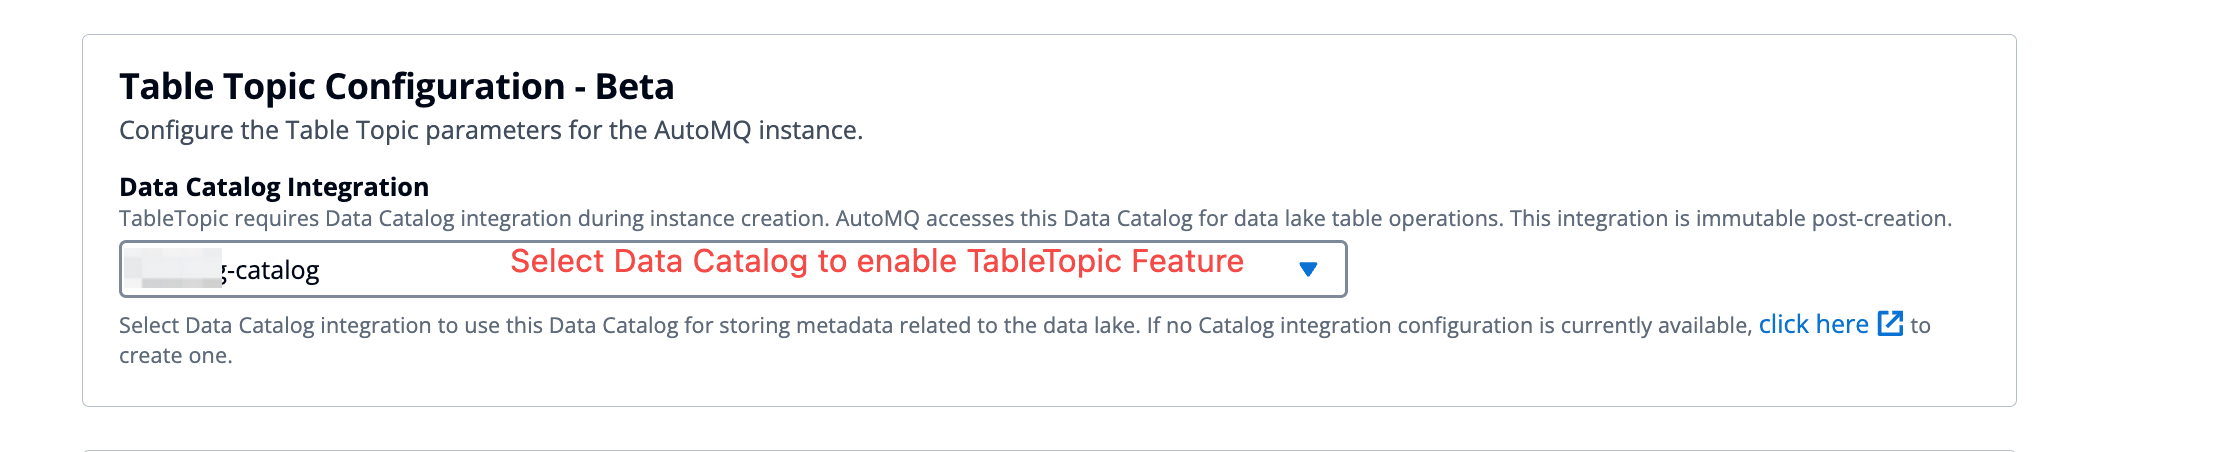 Once the Table Topic feature is enabled in the AutoMQ instance, you can set up a materialized view table as necessary when creating a Topic. Follow these steps:
-
Navigate to the instance from Step 2, find the Topic list, and click Create Topic.
-
In the configuration for creating the Topic, enable Table Topic conversion and configure the following parameters:
-
Namespace: A namespace serves to segregate different Iceberg tables, analogous to a Database in the Data Catalog. It’s advisable to assign parameter values based on business ownership.
-
Schema Constraint Type: This setting determines whether a Topic message complies with Schema constraints. Selecting Schema enables these constraints, requiring message Schemas to be registered in AutoMQ’s built-in SchemaRegistry. Messages must then be strictly formatted according to the Schema, and upcoming Table Topics will use this Schema’s fields to populate the Iceberg table. Choosing Schemaless signifies that the message content lacks explicit Schema constraints; in this scenario, the message Key and Value are used as a single field to populate the Iceberg table.
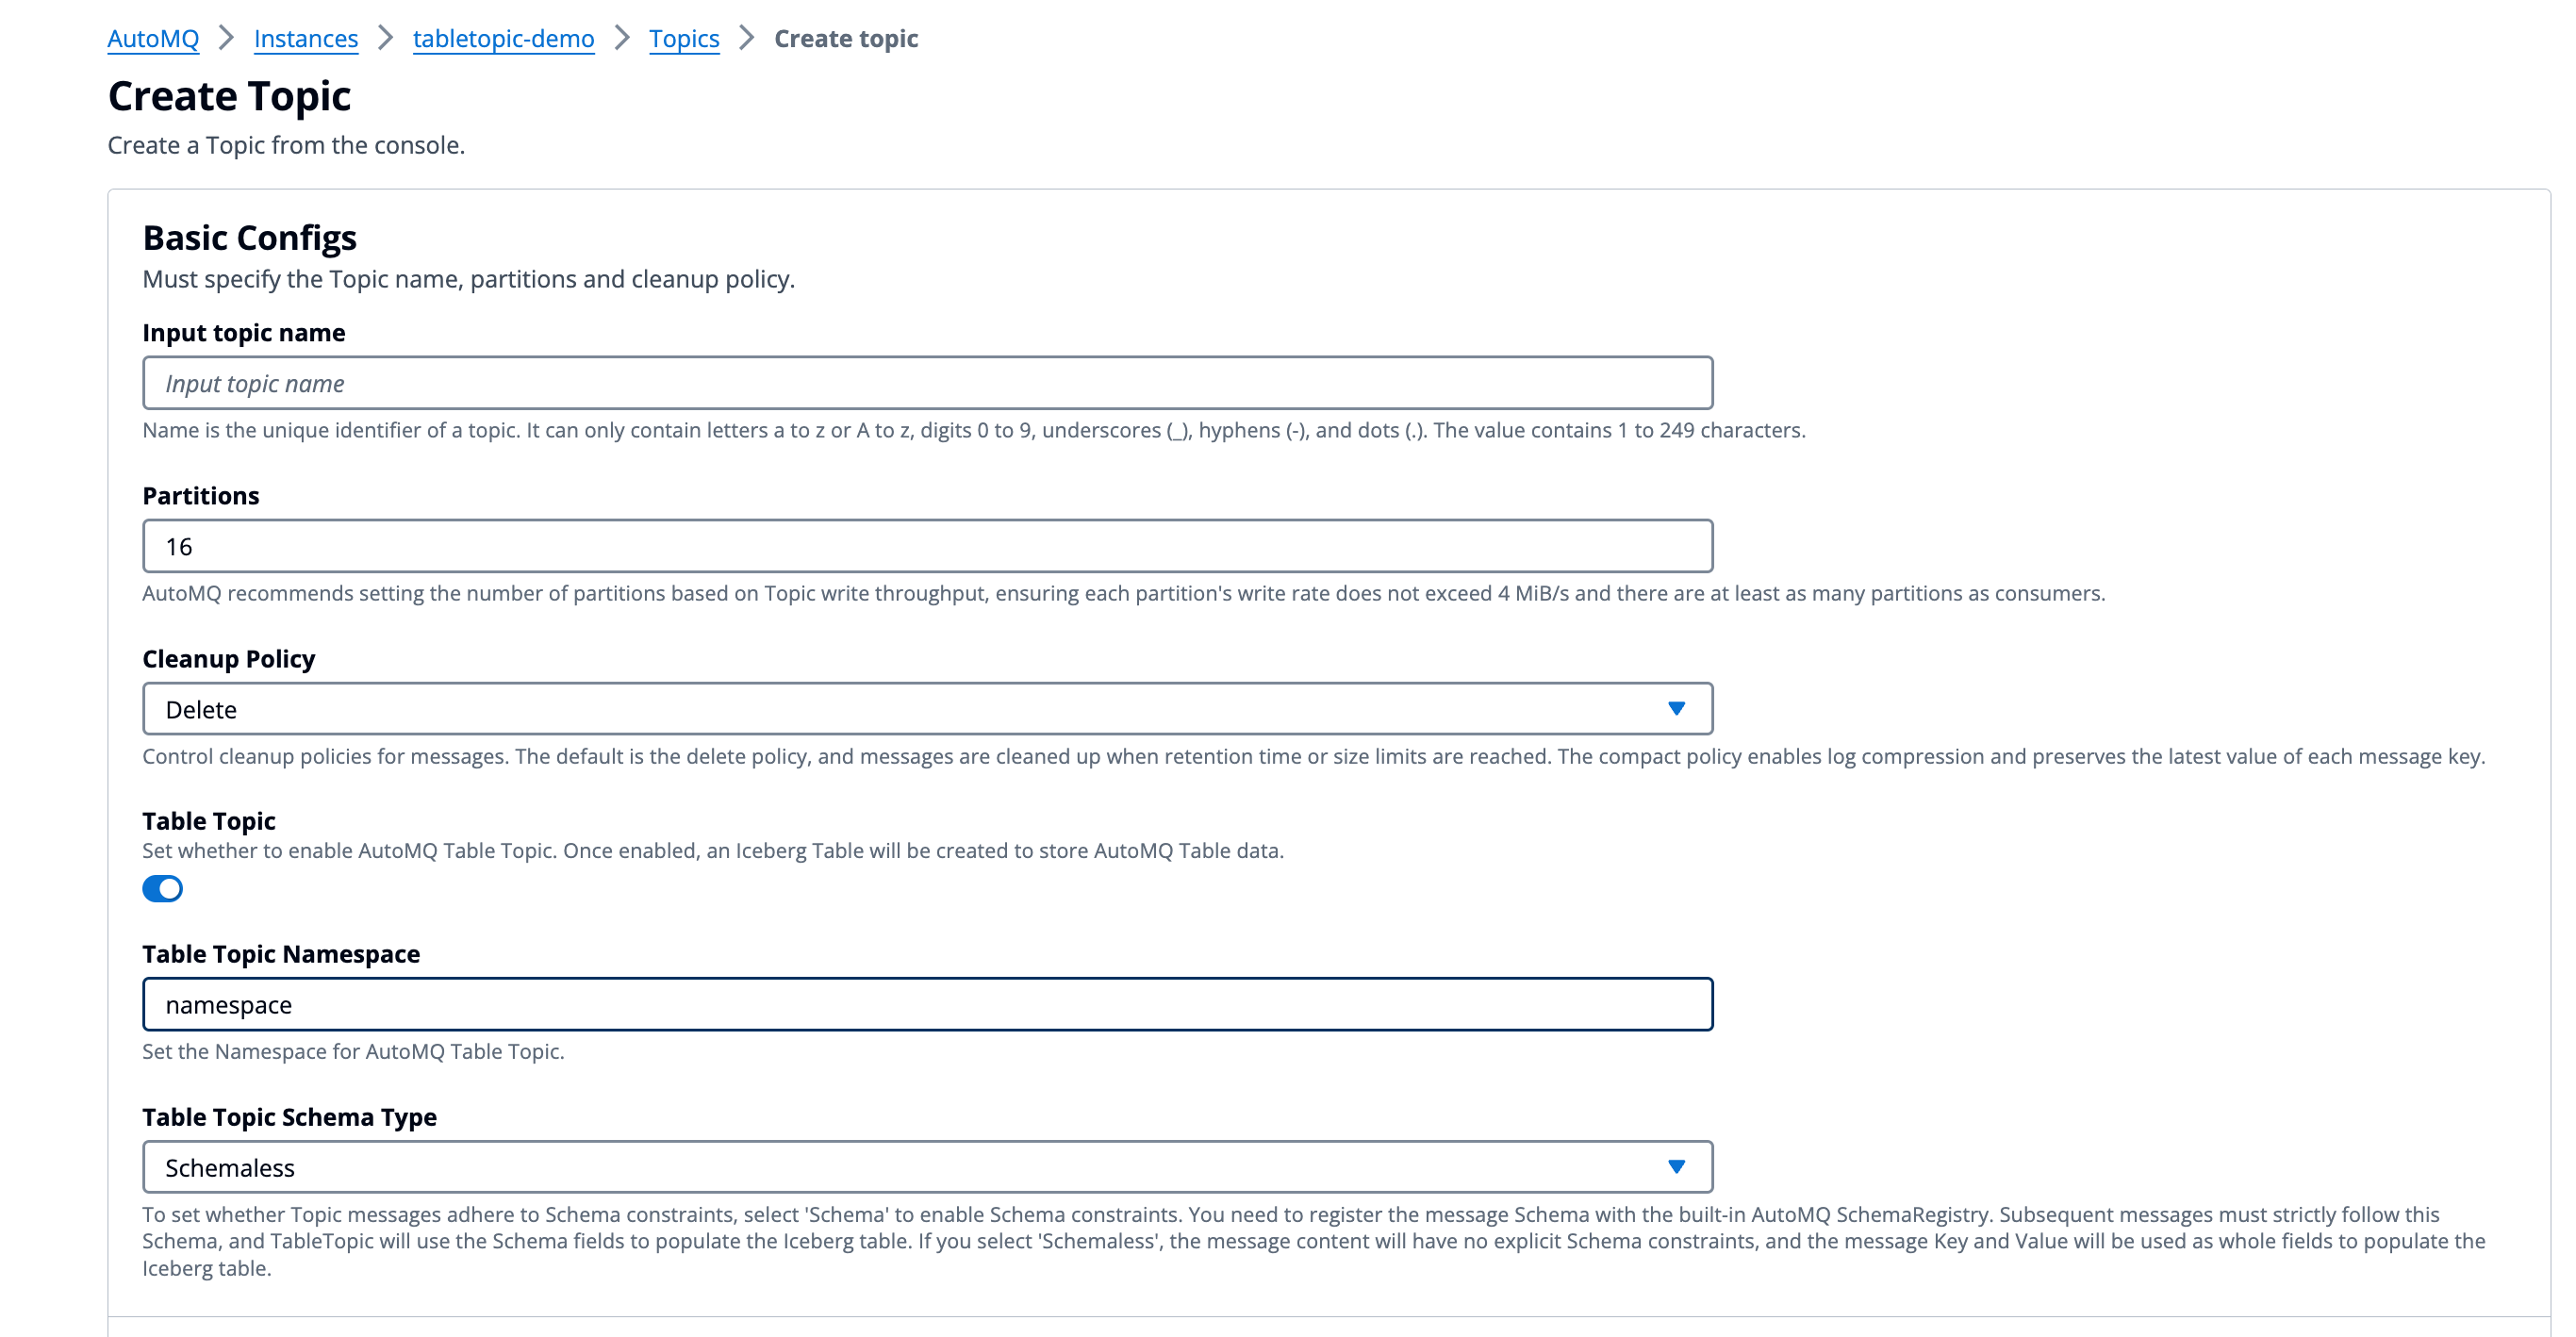
- Click Confirm to create a Topic that supports streaming tables.
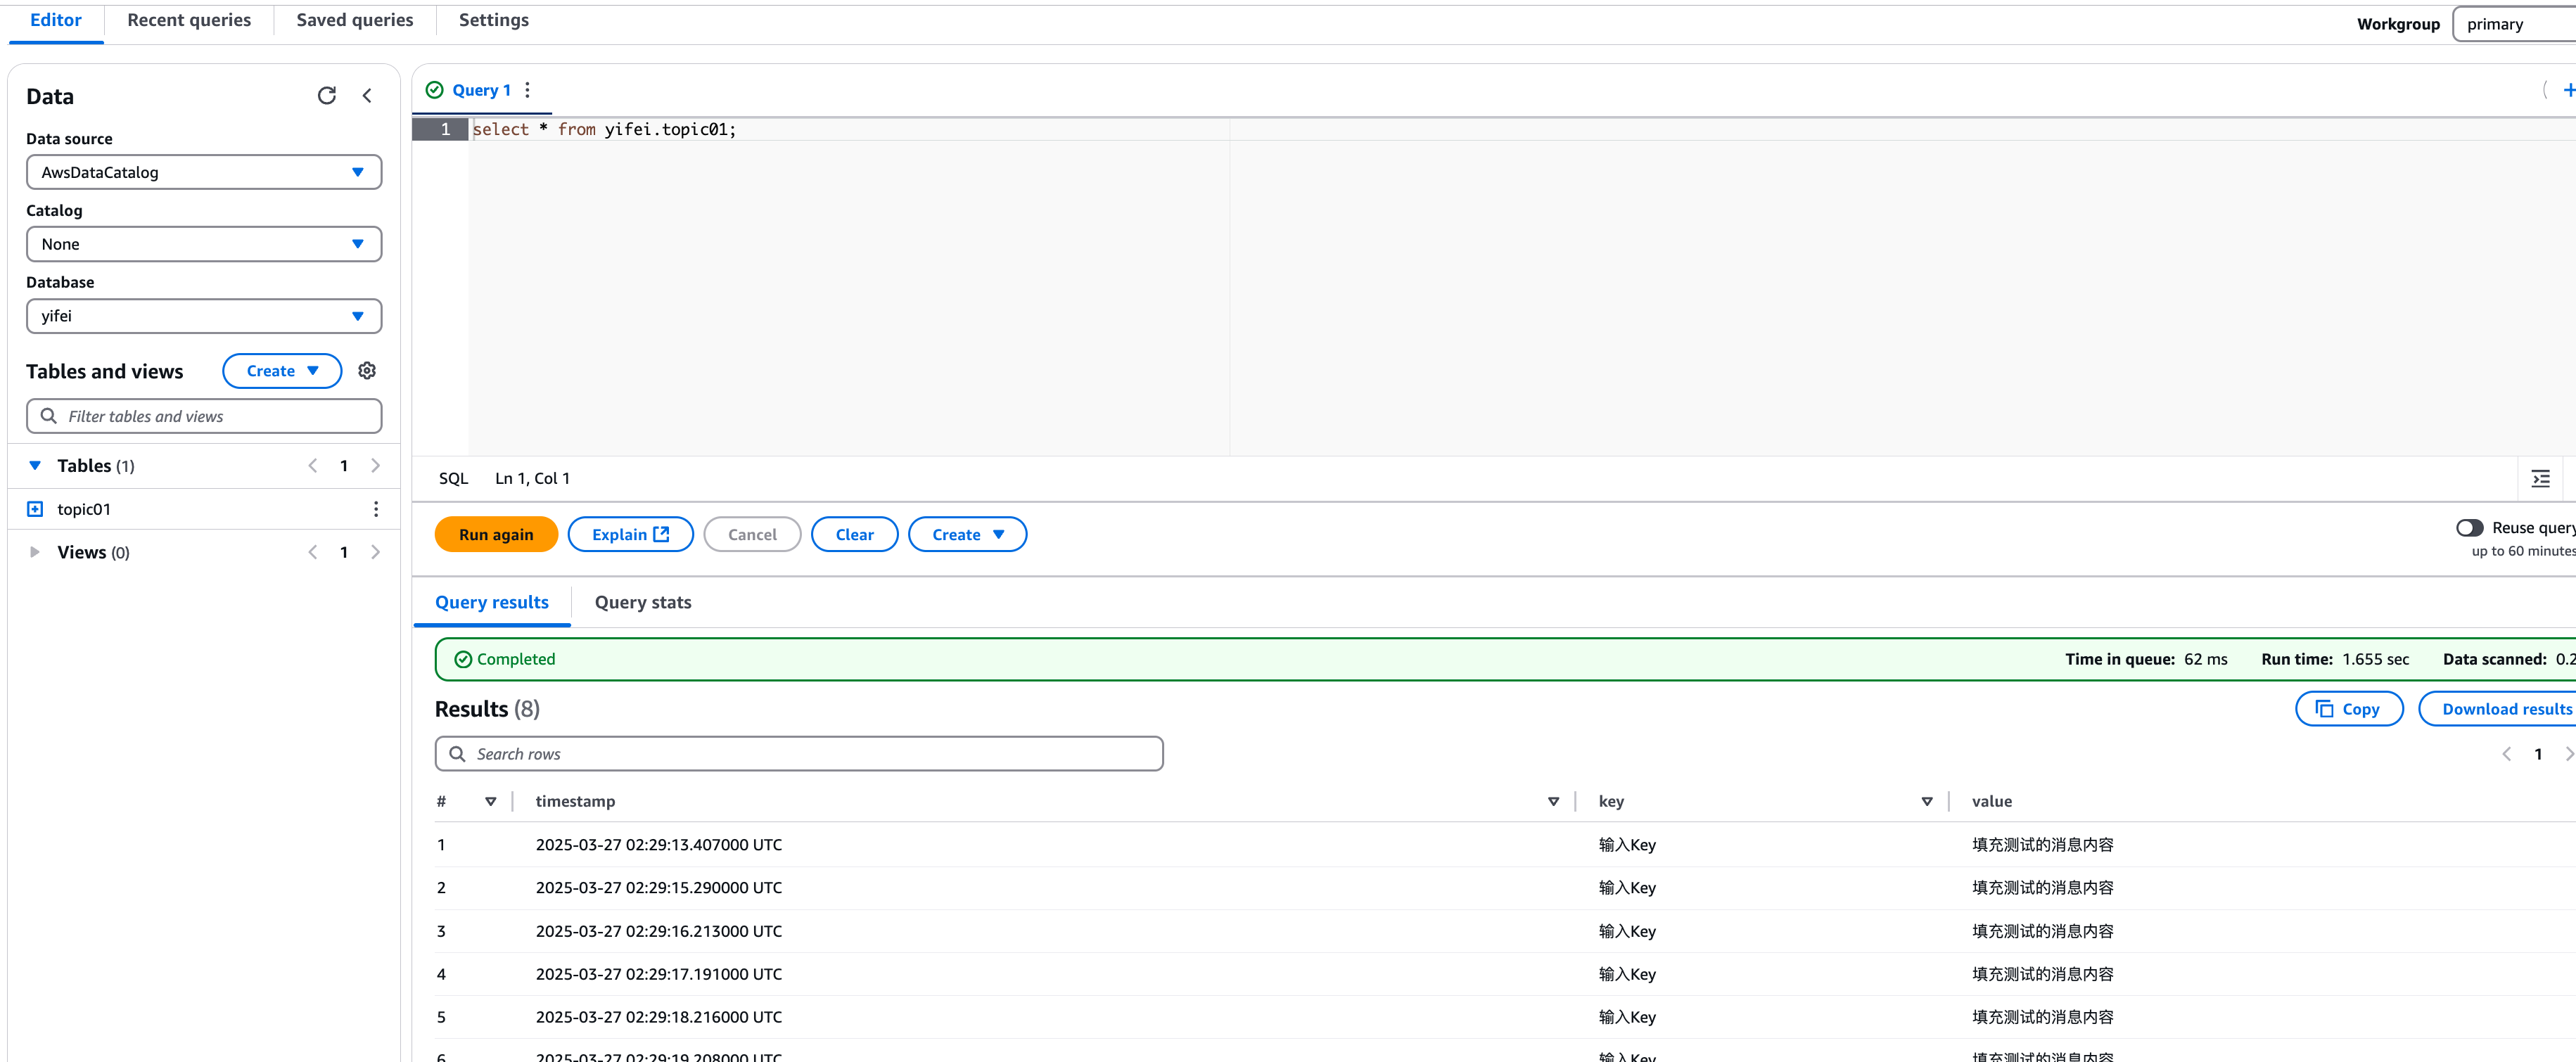
Step 4: Produce Messages and Query Iceberg Table Data in Real-time
After configuring the AutoMQ instance and creating the Table Topic, you can proceed with testing data production and real-time querying of data in Iceberg tables.
-
Click to enter the Topic details, navigate to the Produce Message tab, input the test message Key and message Value, and send the message.
-
Go to the AWS Glue Console to view the Iceberg database and table created by AutoMQ.
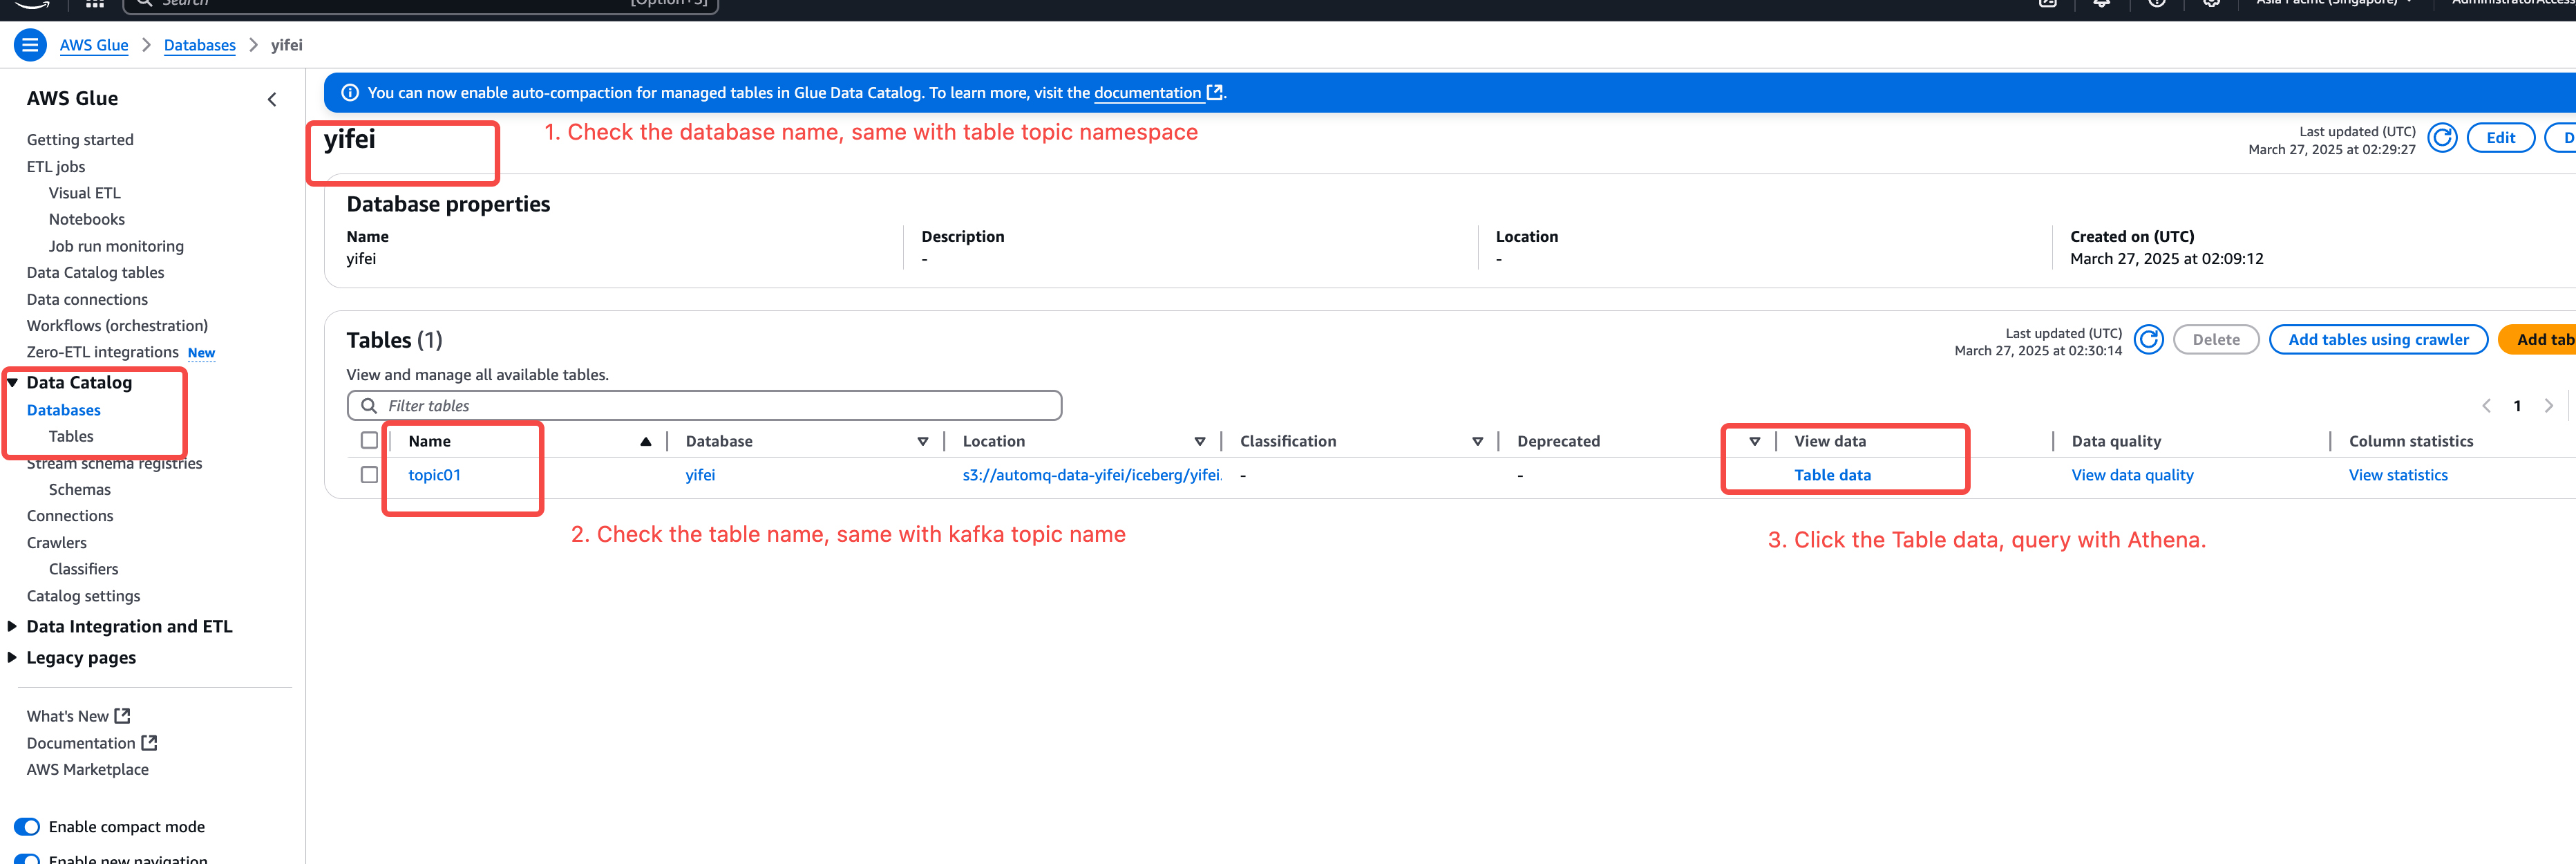
- Click View Data to enable AWS Athena to query the table data in Glue, allowing you to see how AutoMQ transforms Kafka messages into corresponding data records in real-time. Users can also utilize other query engines for analysis and computation.