In this article, references to AutoMQ Product Services, AutoMQ Services, and AutoMQ specifically refer to AutoMQ HK Limited and its subsidiaries.
Operational Process
Step 1: Prepare VPC
The AutoMQ BYOC environment is deployed within the user’s VPC to ensure data privacy and security. When installing the AutoMQ environment using cloud applications, the user must specify existing VPC network and subnet information and ensure that the VPC meets the following conditions:- Subnet CIDR Requirements: The AutoMQ data plane cluster is deployed using the user’s VPC, which consumes the IPs of the VPC subnets. It is recommended to allocate sufficient available IPs for each subnet (each subnet should have at least 1000 available IPs) to avoid future deployment and scaling issues.
- Configuring Private Network Access to Google API: AutoMQ needs to access GCS and other cloud services. It is recommended to configure private network resolution and routing to access the aforementioned Google API through a private network to avoid unnecessary public network traffic costs. For configuration methods, refer to the appendix at the end of this article “Configuring VPC to Access Google Cloud Services API through Private Network”.
Note: Failure to correctly configure VPC private network access may result in significant public network traffic costs. Please refer to the appendix for configuring private network access to Google Cloud Services API before installing AutoMQ.
Step 2: Install AutoMQ from GCP Marketplace
- Visit AutoMQ Application Link. AutoMQ Cloud BYOC environments are distributed by default through the Marketplace on Google Cloud. Users can search for AutoMQ in the Marketplace.
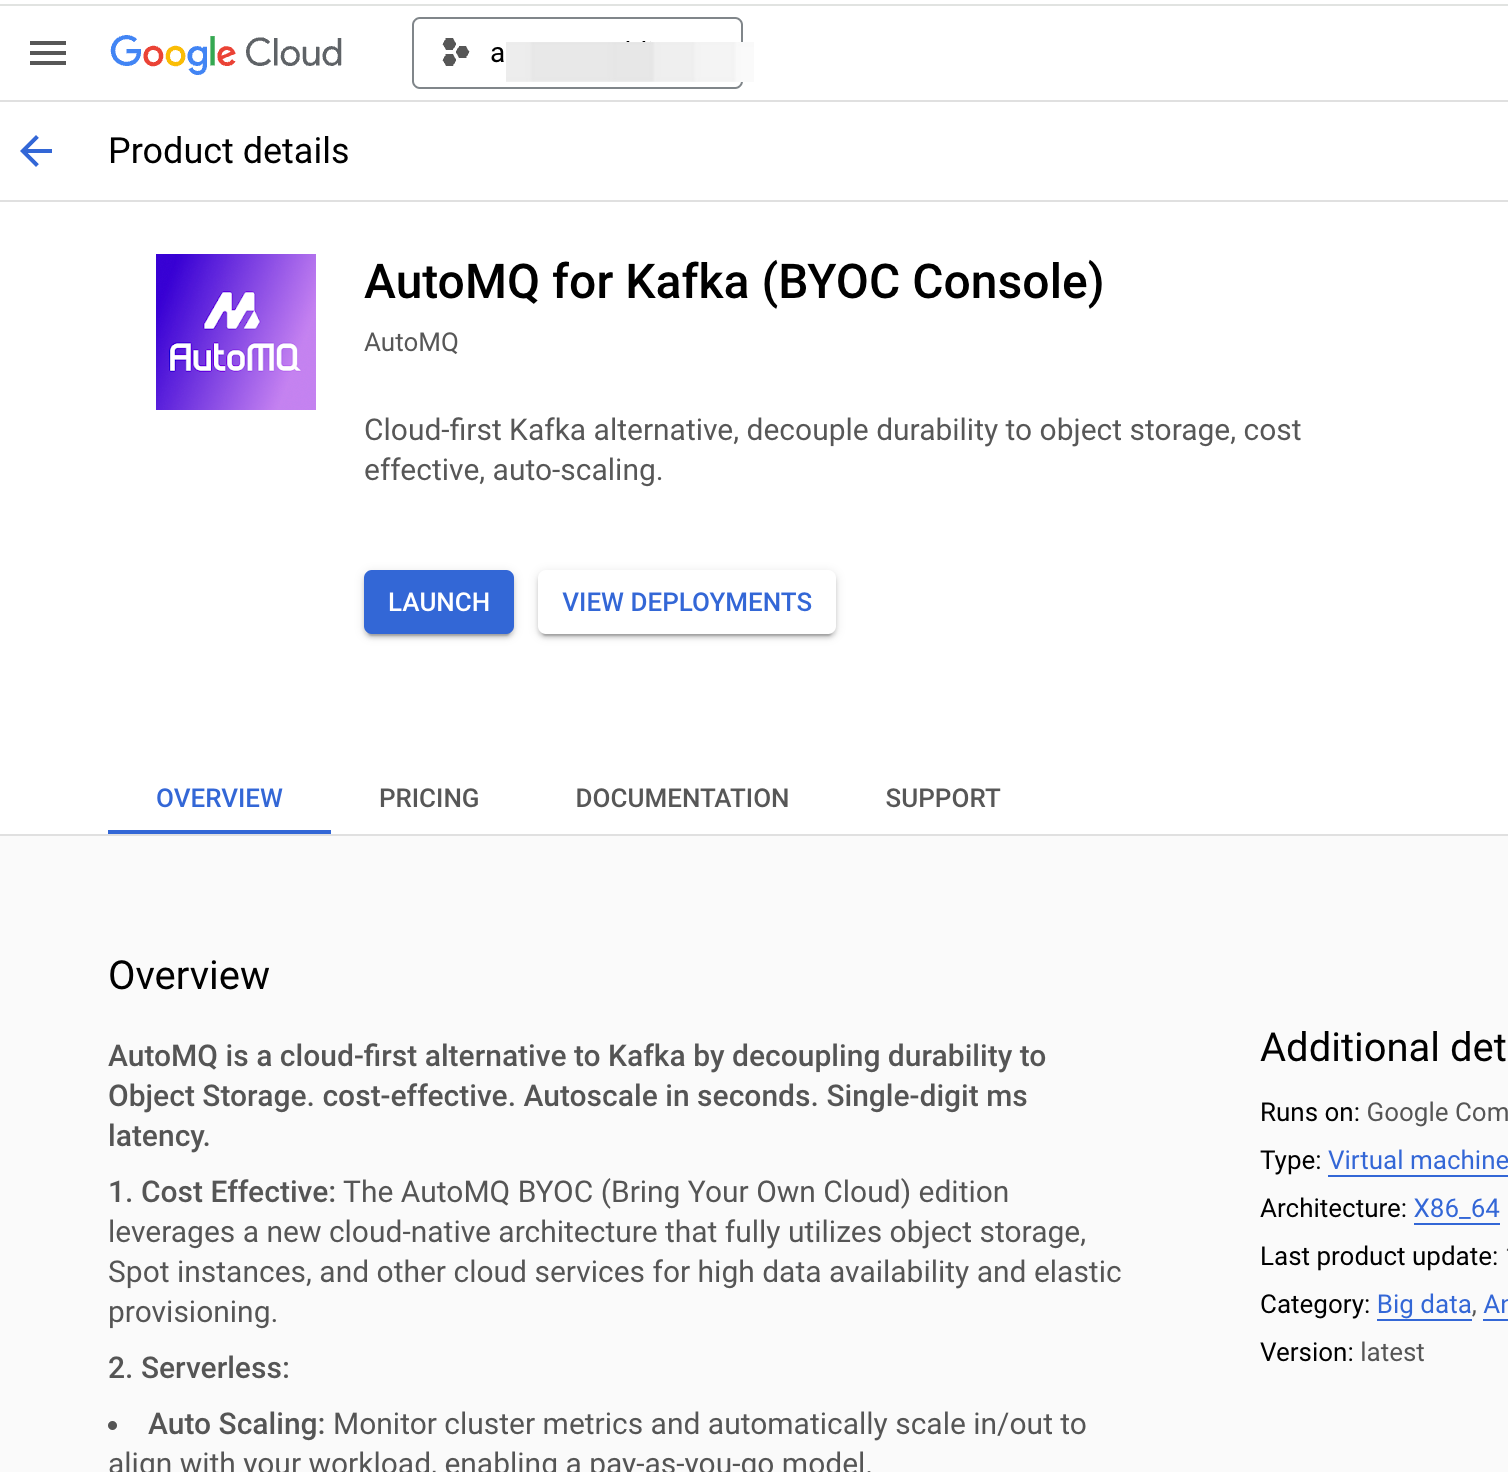
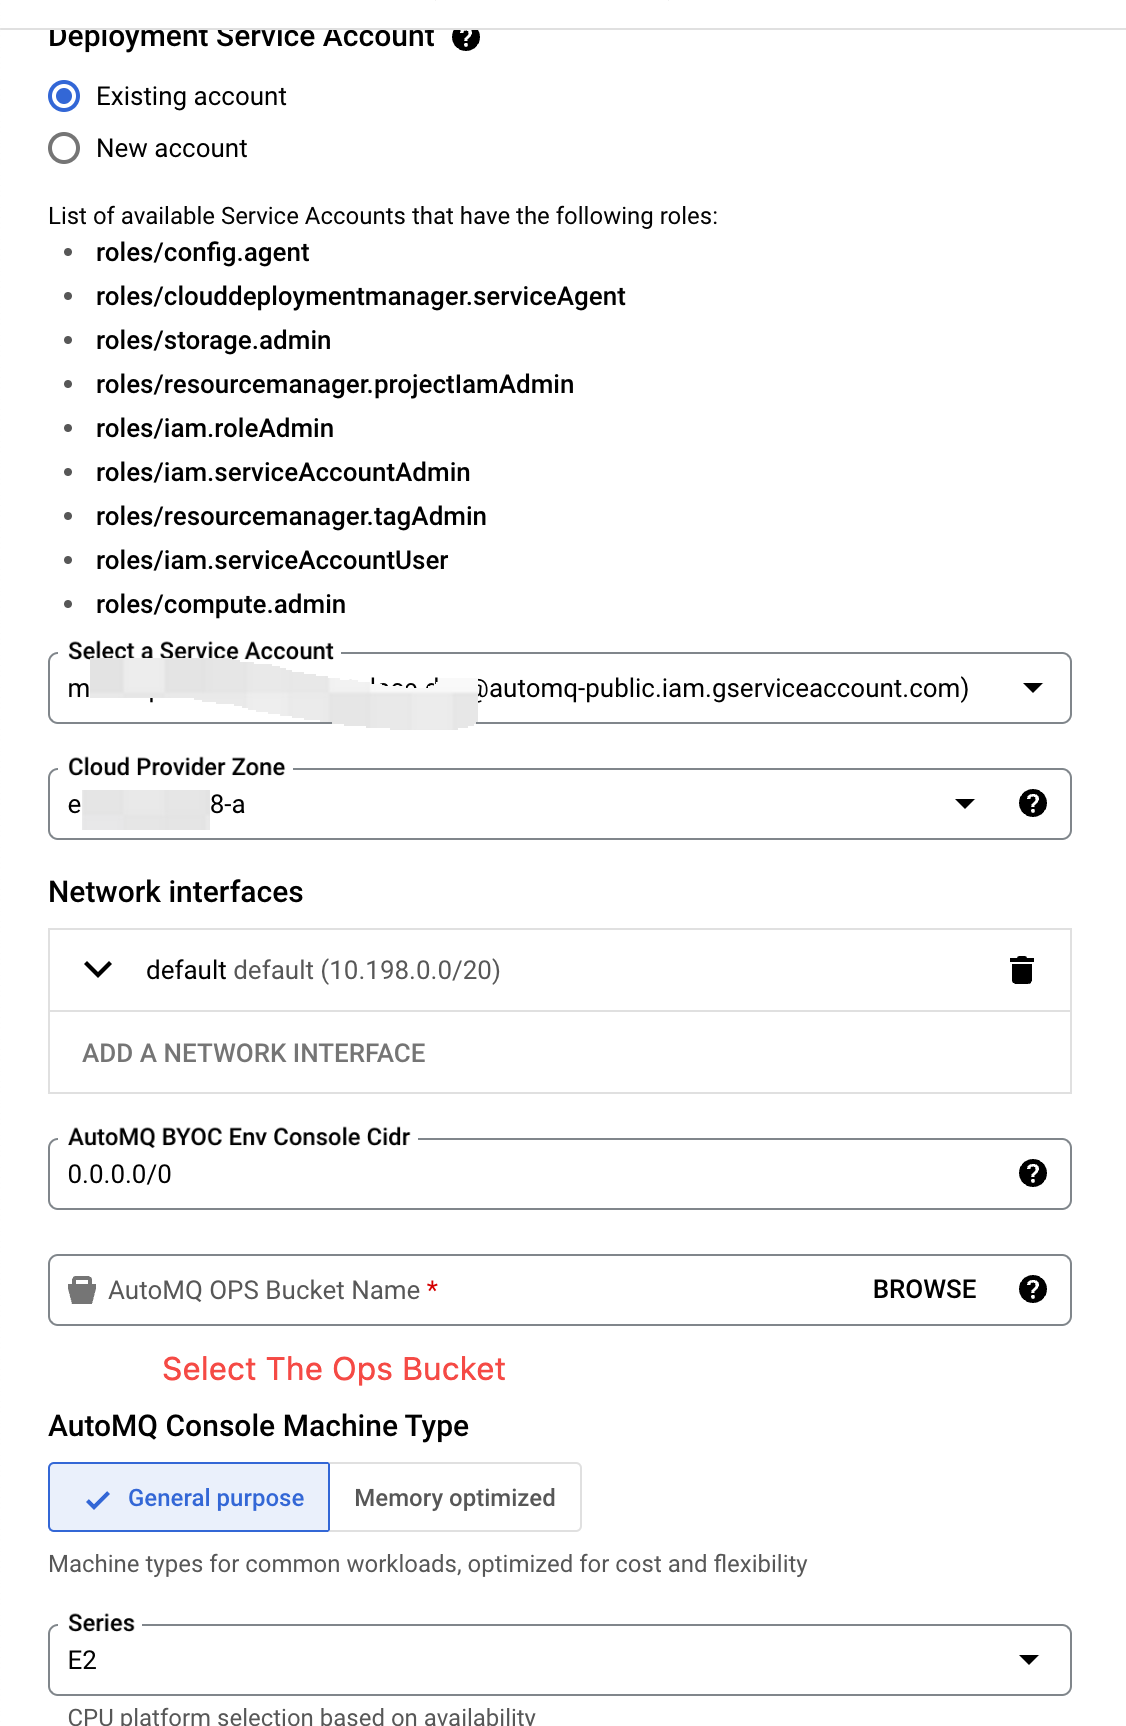
- Click Launch to begin installing the AutoMQ console and fill in the necessary parameters as instructed below.
| Parameter Setting | Description |
|---|---|
| Deployment name |
|
| Service Account |
|
| Cloud Provider Region and Zone |
|
| Network Interface |
|
| Console CIDR |
|
| Operations Bucket |
Note: The operations bucket and the data bucket must be set to different buckets. |
| Console Instance Type |
|
- After installation, check the console output for the initial account password and console address.
| Output | Output Description |
|---|---|
| Automq Byoc Endpoint |
|
| Automq Byoc Initial Username |
|
| Automq Byoc Initial Password |
|
| Environment Id |
|
| Automq Byoc Vpc Id |
|
| Automq Byoc Google Service Account |
|
| Automq Byoc Instance Id |
|
| Automq Deploy Zone |
|
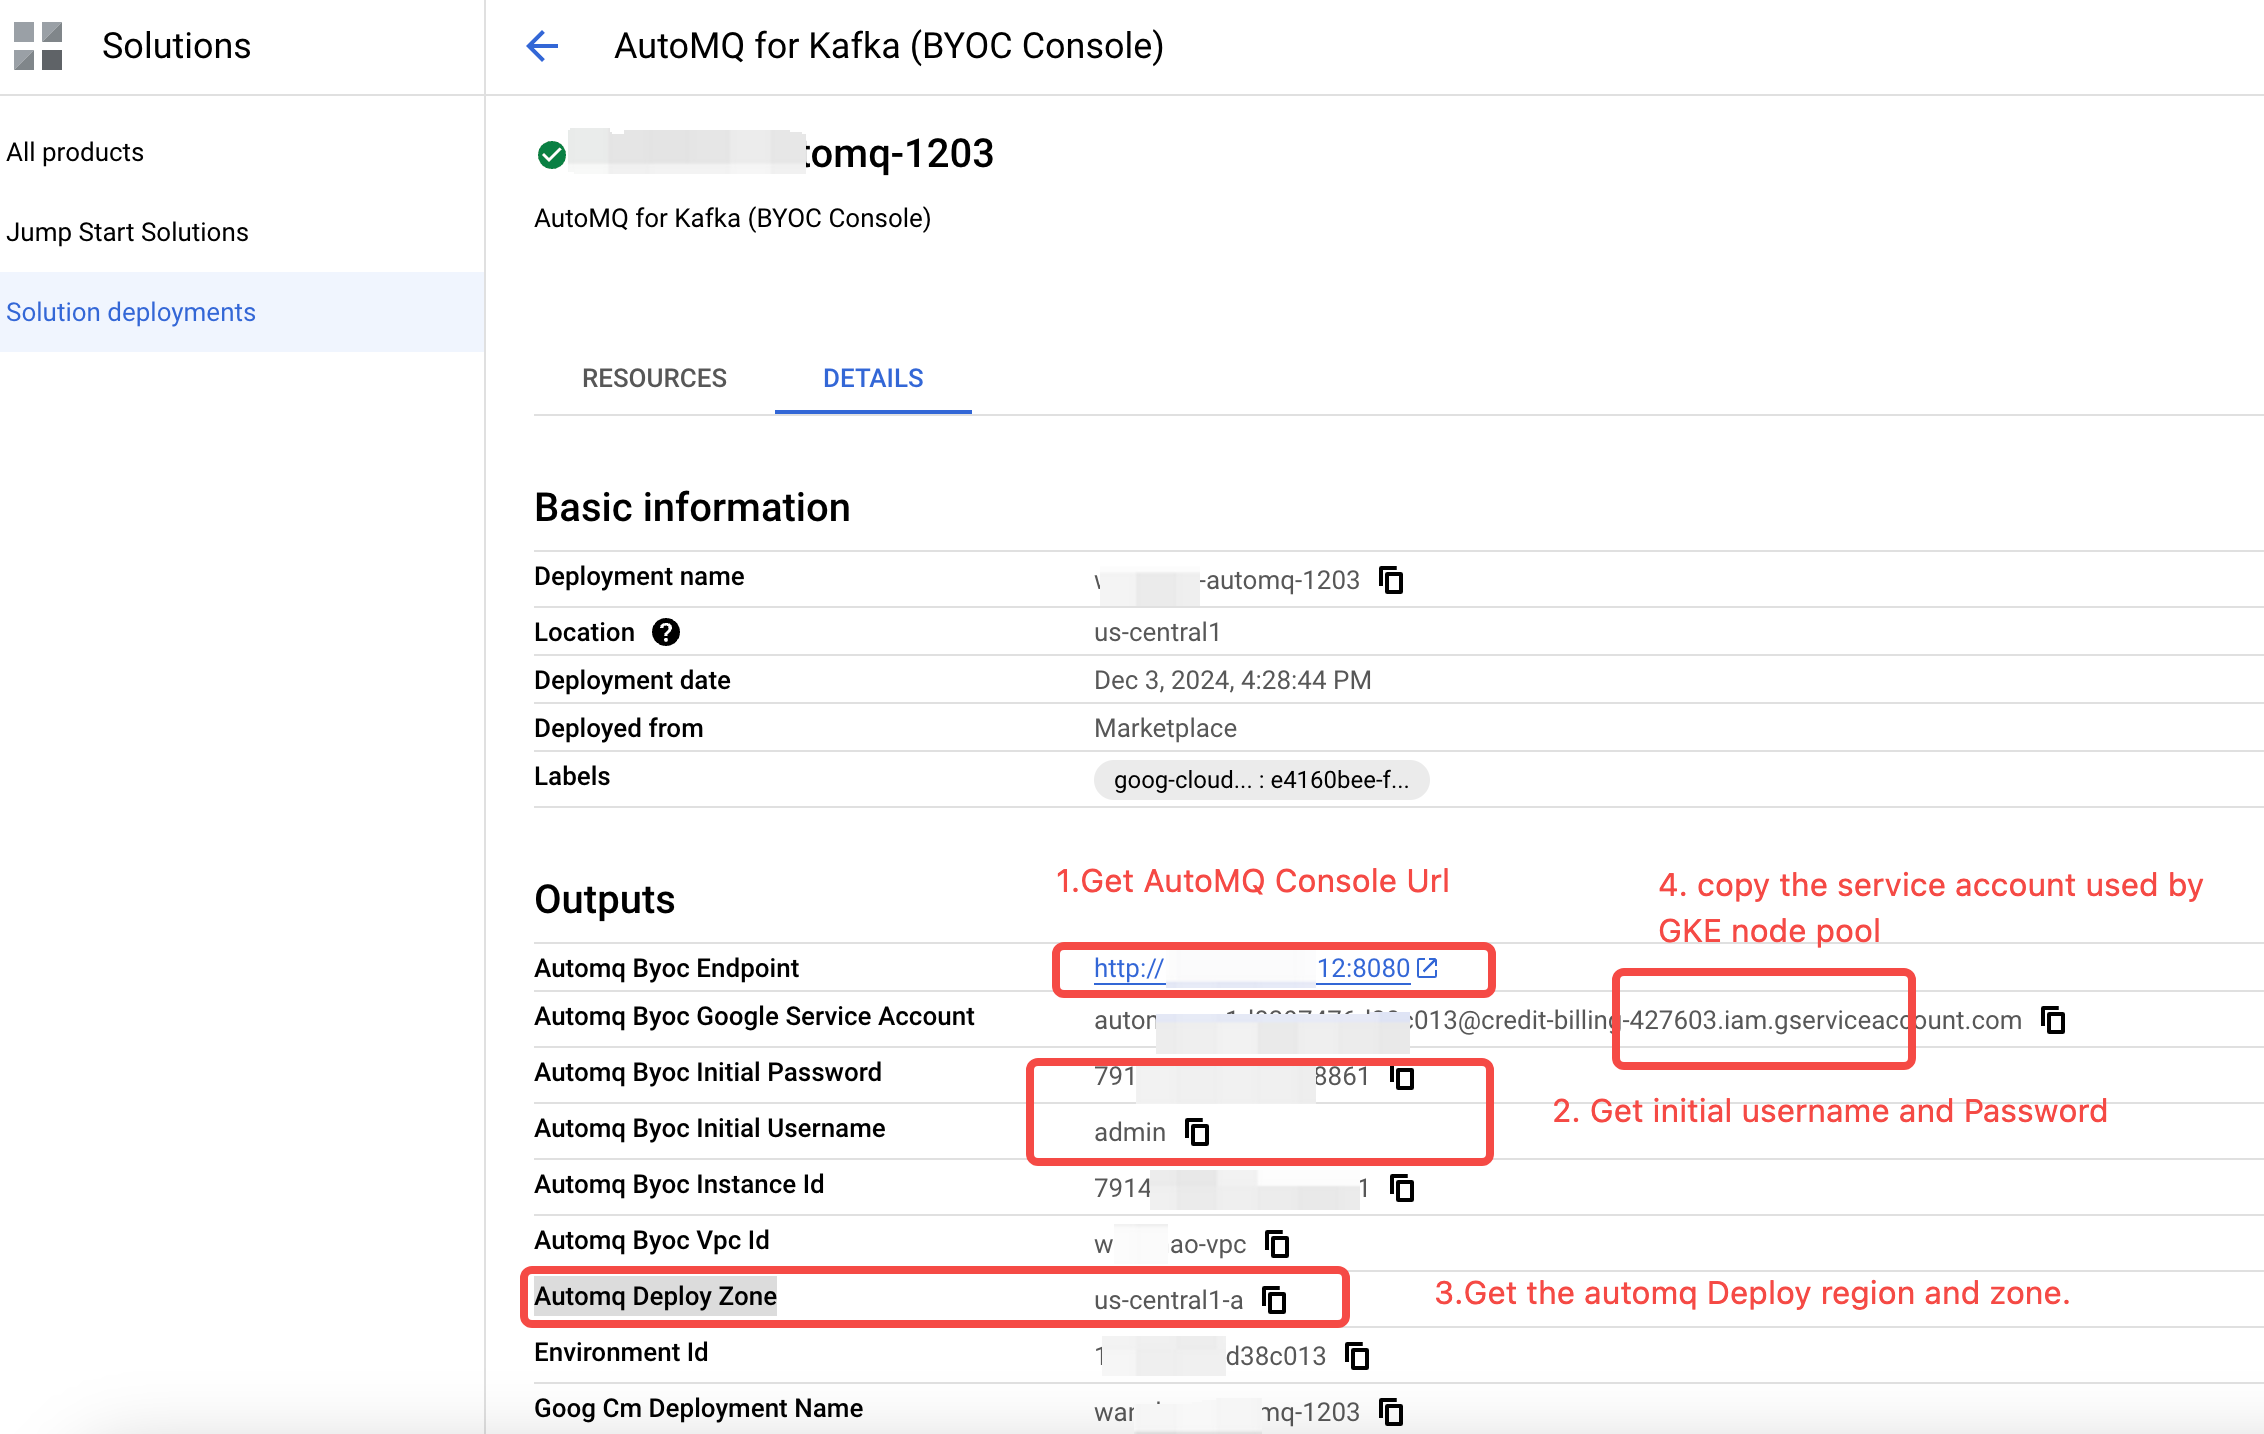
- Use the above information to log in to the AutoMQ console.
Step 3: Complete BYOC Environment Ops Authorization
The BYOC environment is deployed in the user’s VPC, ensuring data security and privacy isolation. However, non-business-related system data like system logs and metrics will still be generated internally within the BYOC environment. Once the environment is installed, users need to provide the appropriate operational authorization to the AutoMQ service provider, as referenced in Overview▸, to assist with system stability monitoring and fault recovery operations.Next Steps
On Google Cloud, AutoMQ currently only supports deployment to GKE clusters. Therefore, after completing the environment installation, users need to prepare a GKE cluster first, then configure it in the AutoMQ console to deploy the AutoMQ cluster to GKE. For documentation on preparing GKE and completing subsequent deployments, please refer to Deploy to Google Cloud GKE▸.Appendix
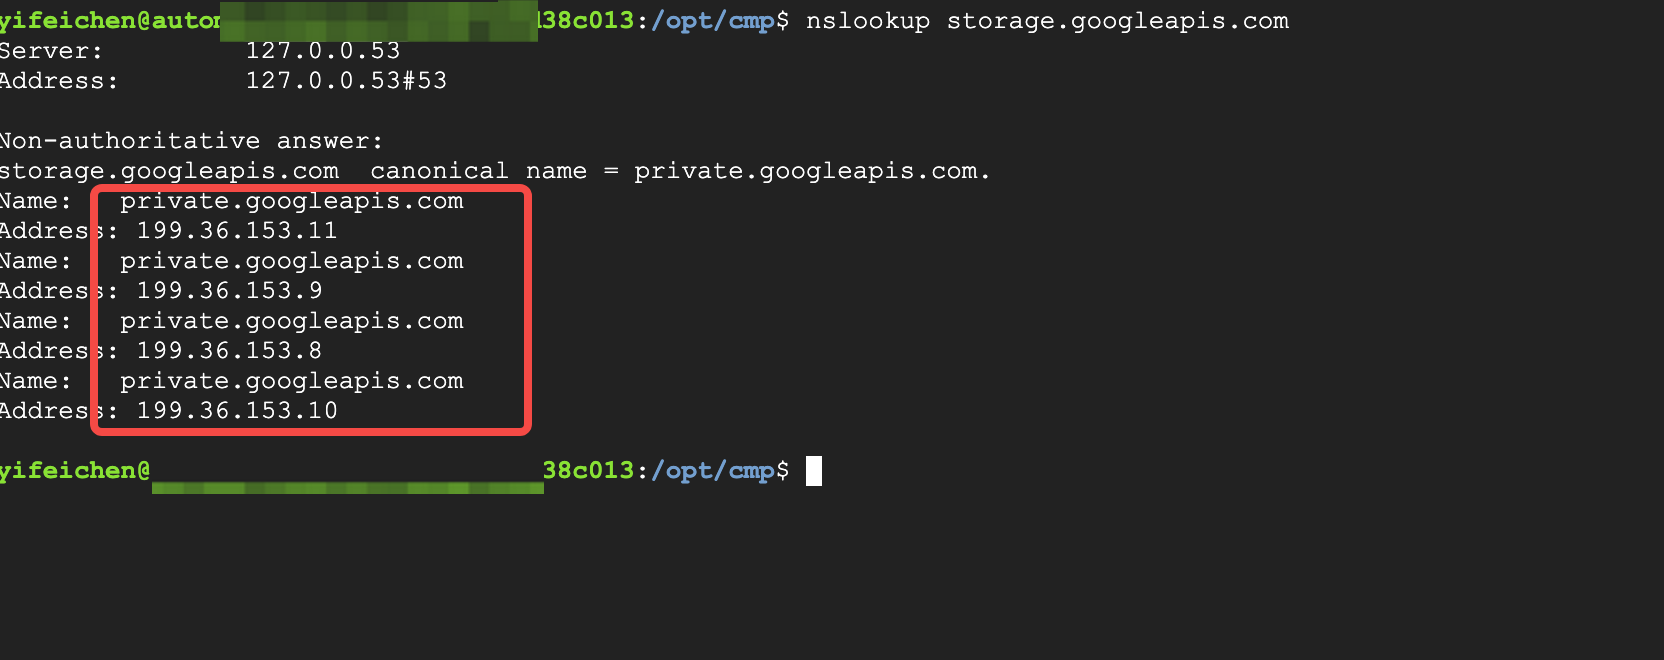
Configuring VPC for Private Access to Google Cloud Services API
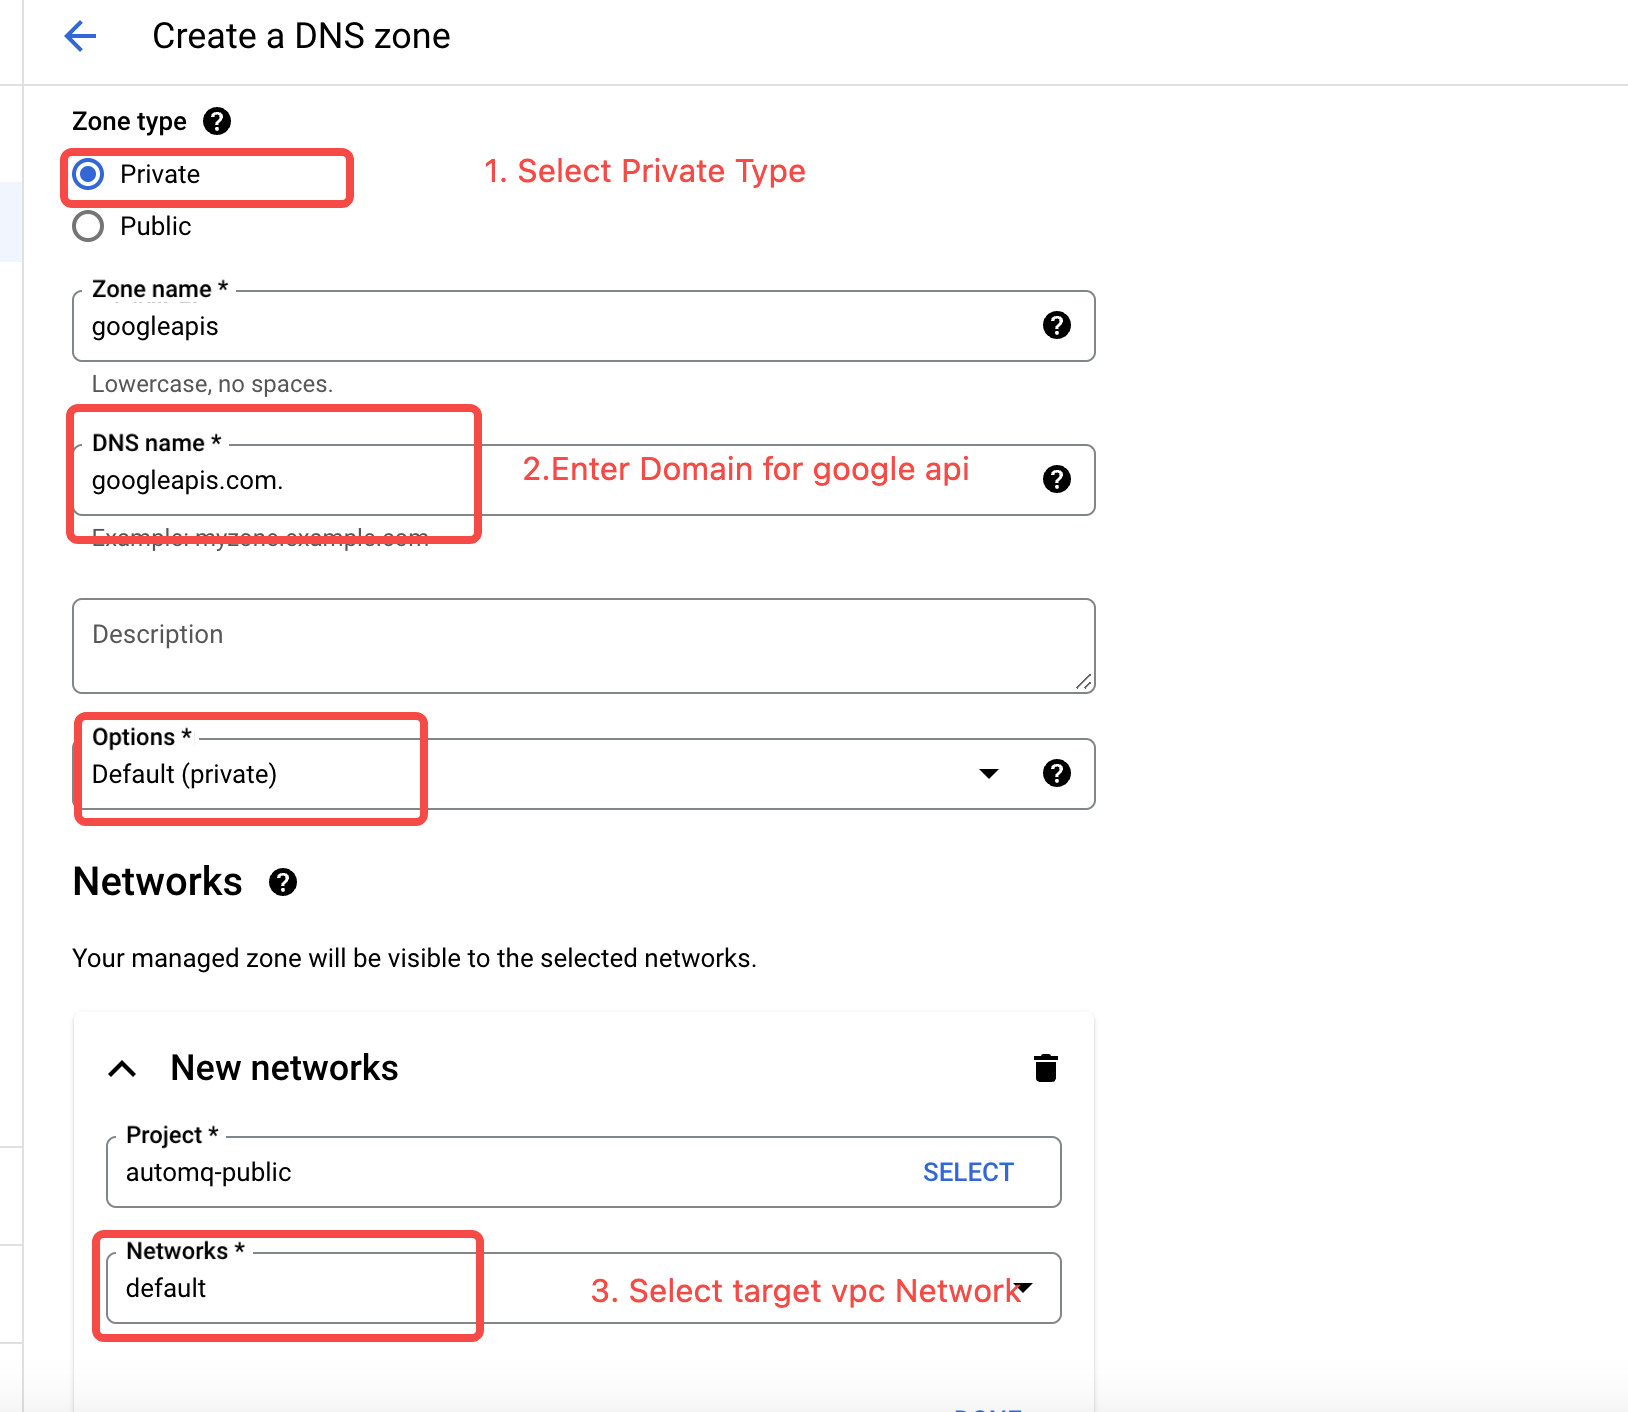
The default domain name for Google Cloud service APIs resolves to public addresses. If accessing cloud services within a VPC, the default is to access them from the public network. AutoMQ requires extensive access to GCS storage. To avoid unnecessary public network traffic costs, it is recommended that customers configure private network access to Google APIs at the VPC level. The configuration method is outlined in the steps below:- Go to the Cloud DNS Product Console and create a Private DNS Zone. The parameters are as follows:
- Zone Type: Set to Private.
- Zone Name: Custom input as desired.
- DNS Name: Set to “googleapis.com.”.
- Networks: Associate the VPC that needs to access Google API via private network.
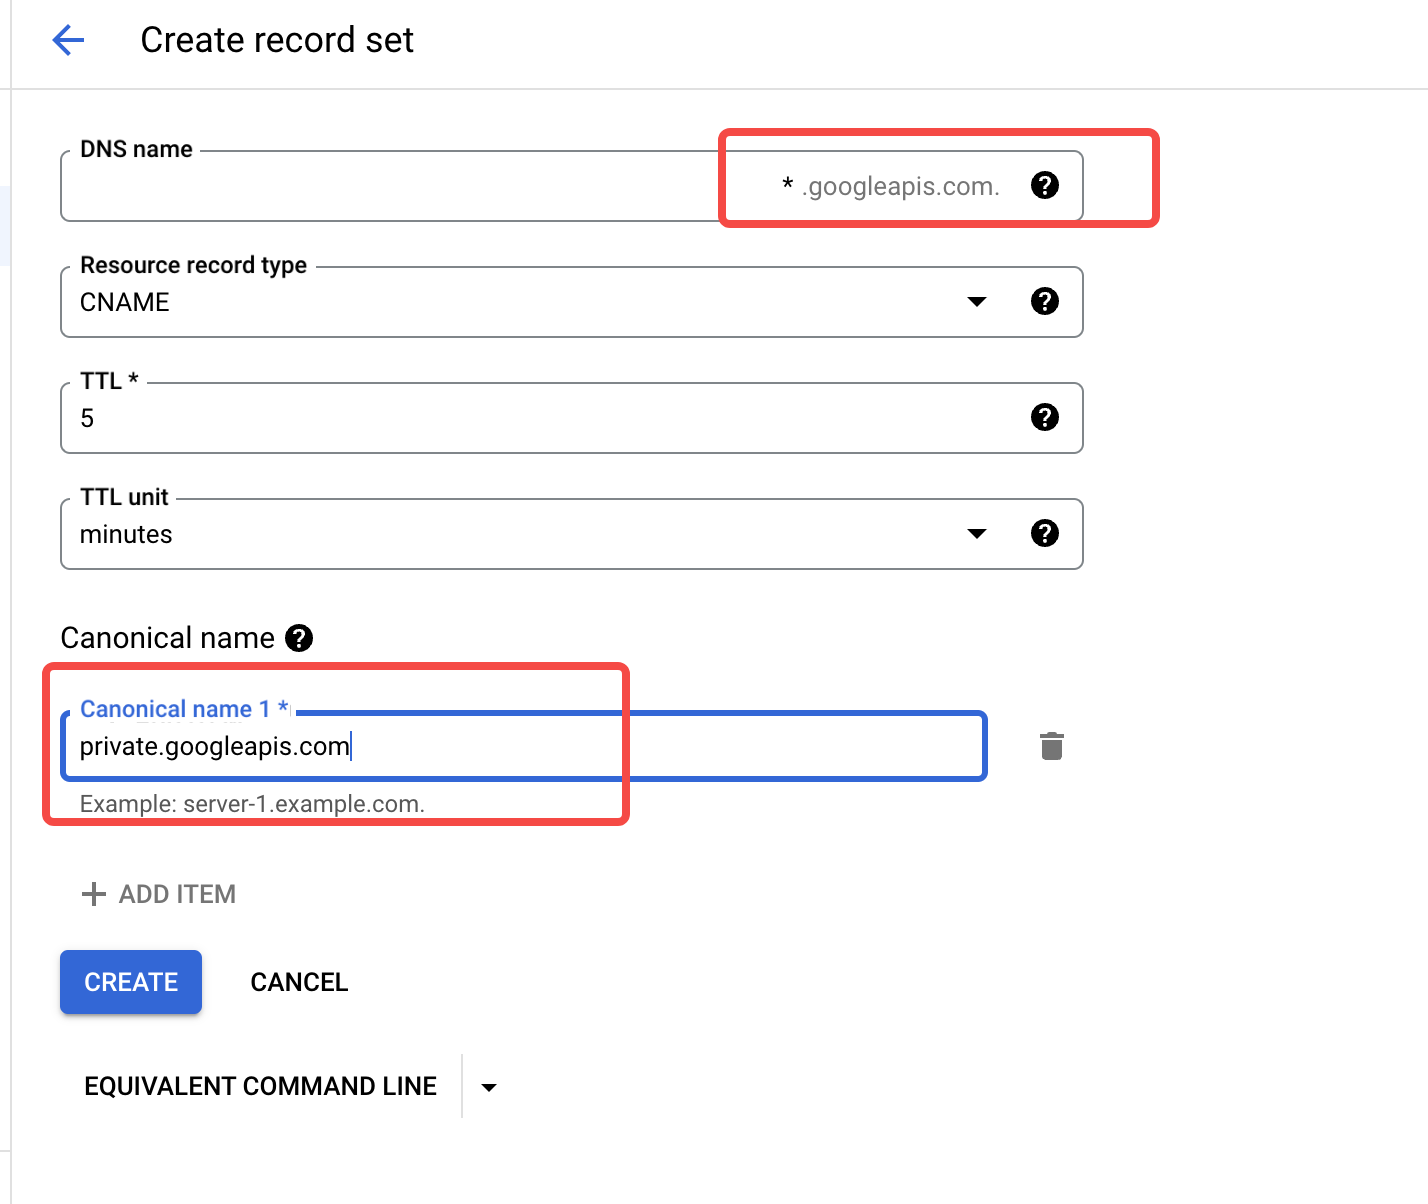
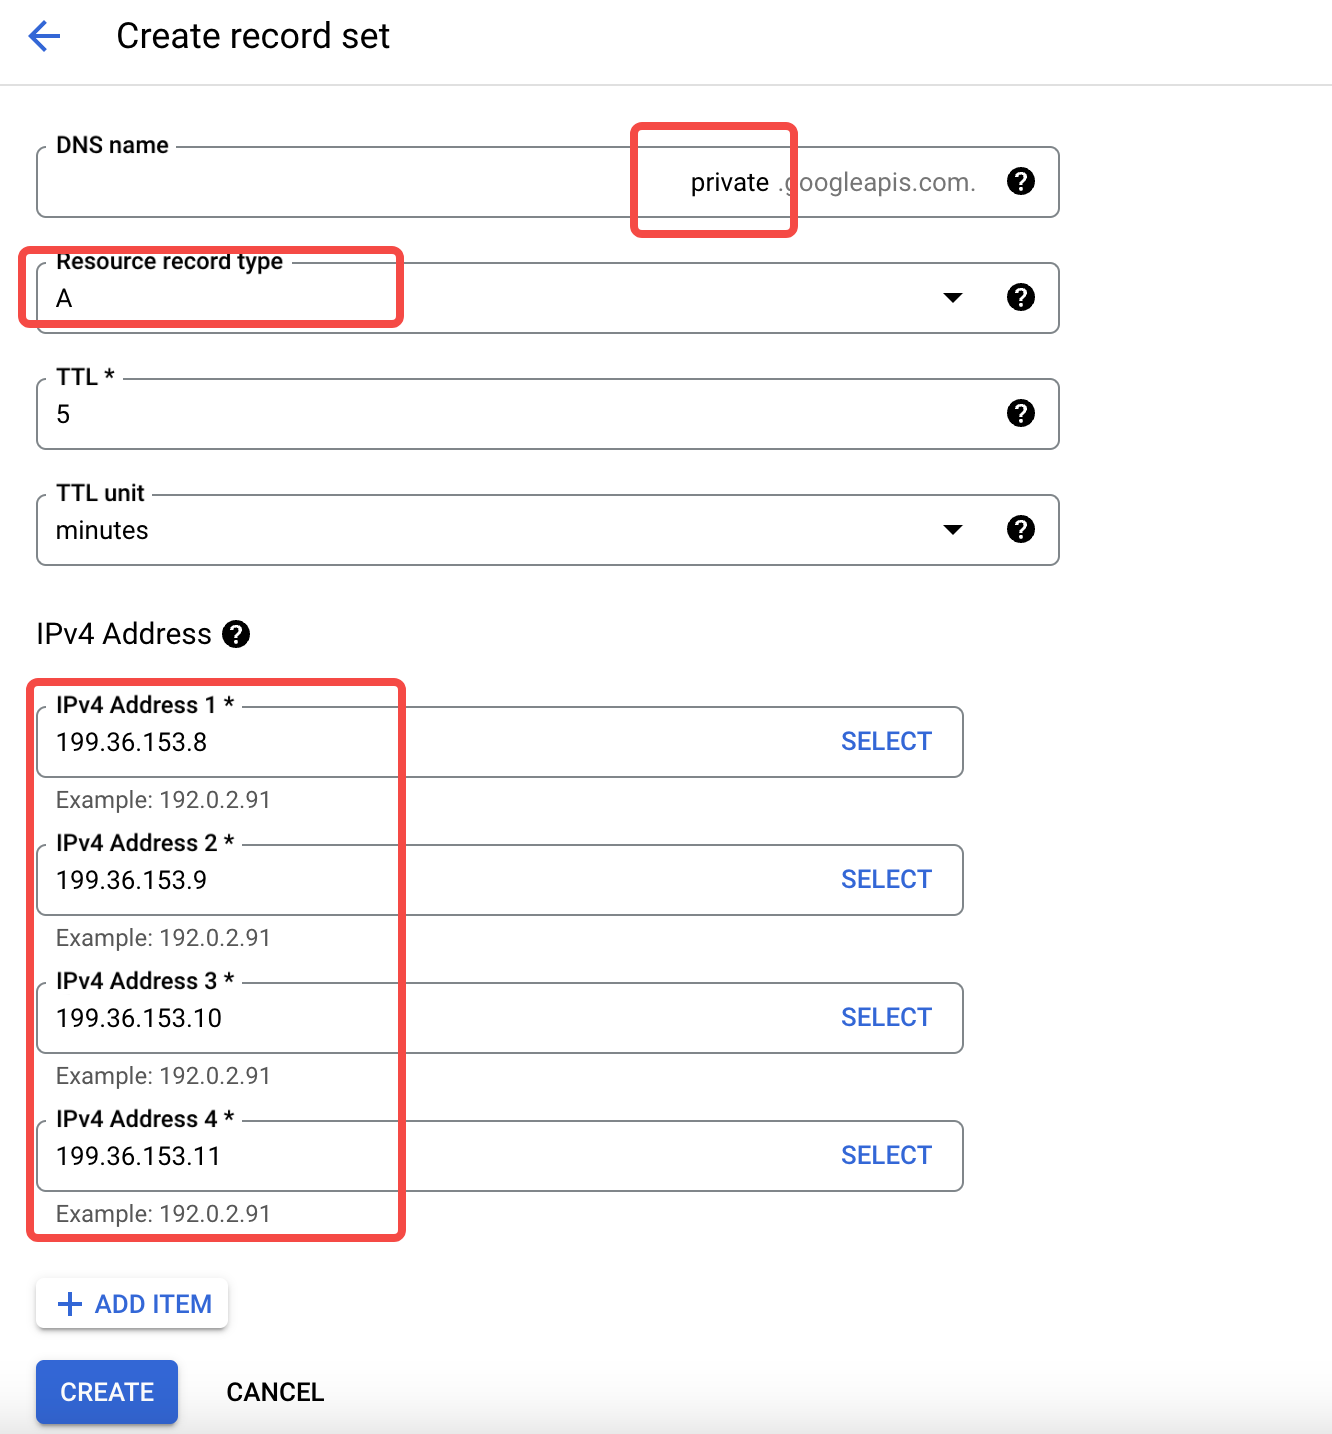
- Add private resolution records within the DNS Zone created in the previous step.
- Navigate to the target VPC and review the routing table. Add a route for Google API access.
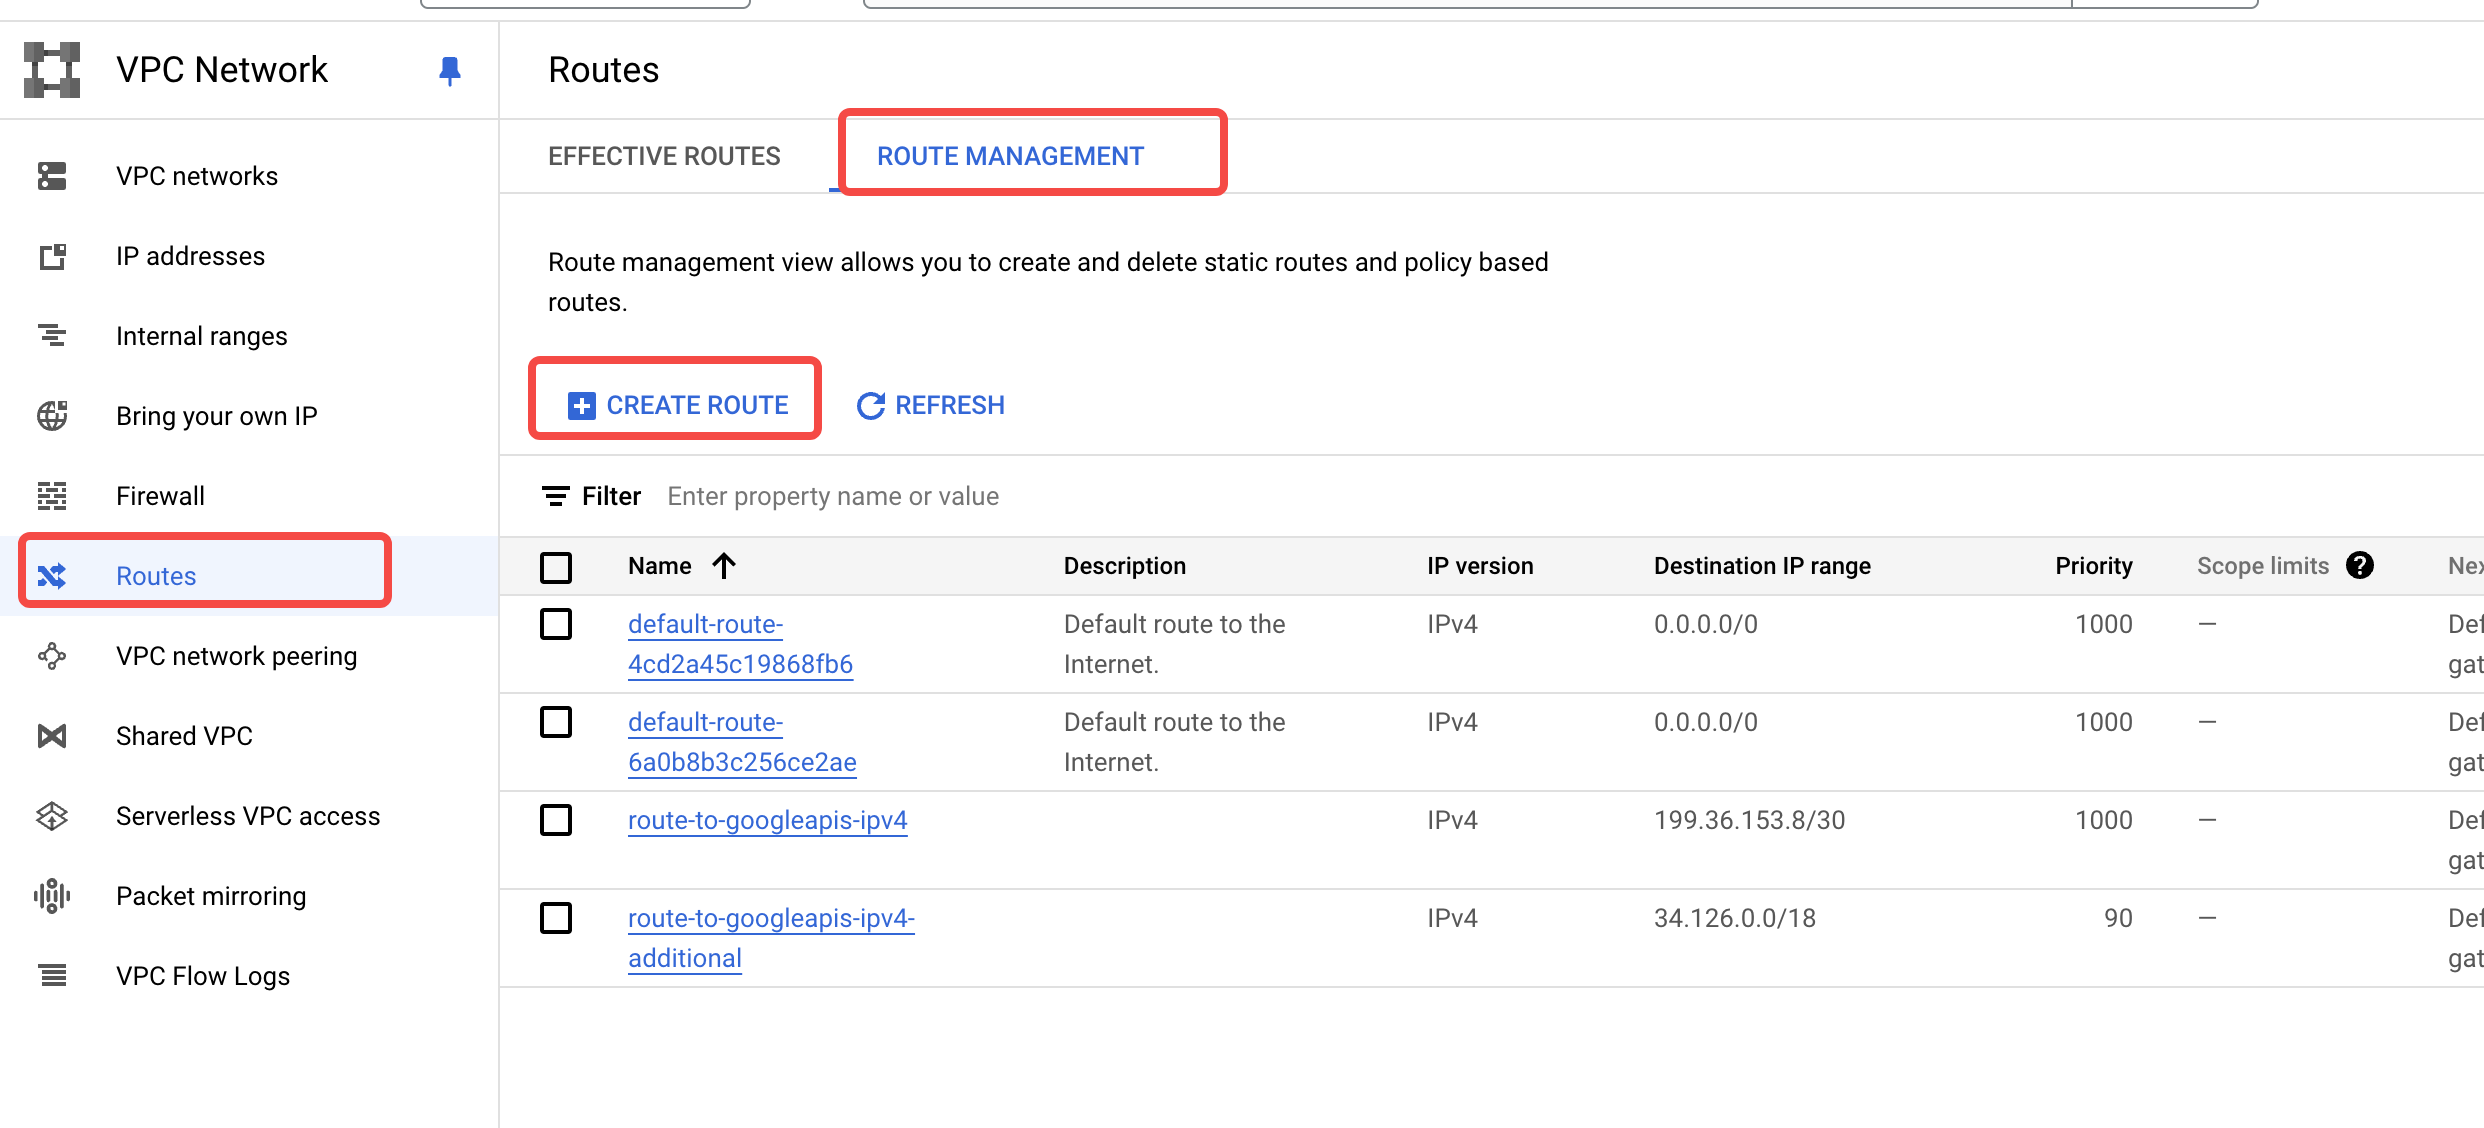
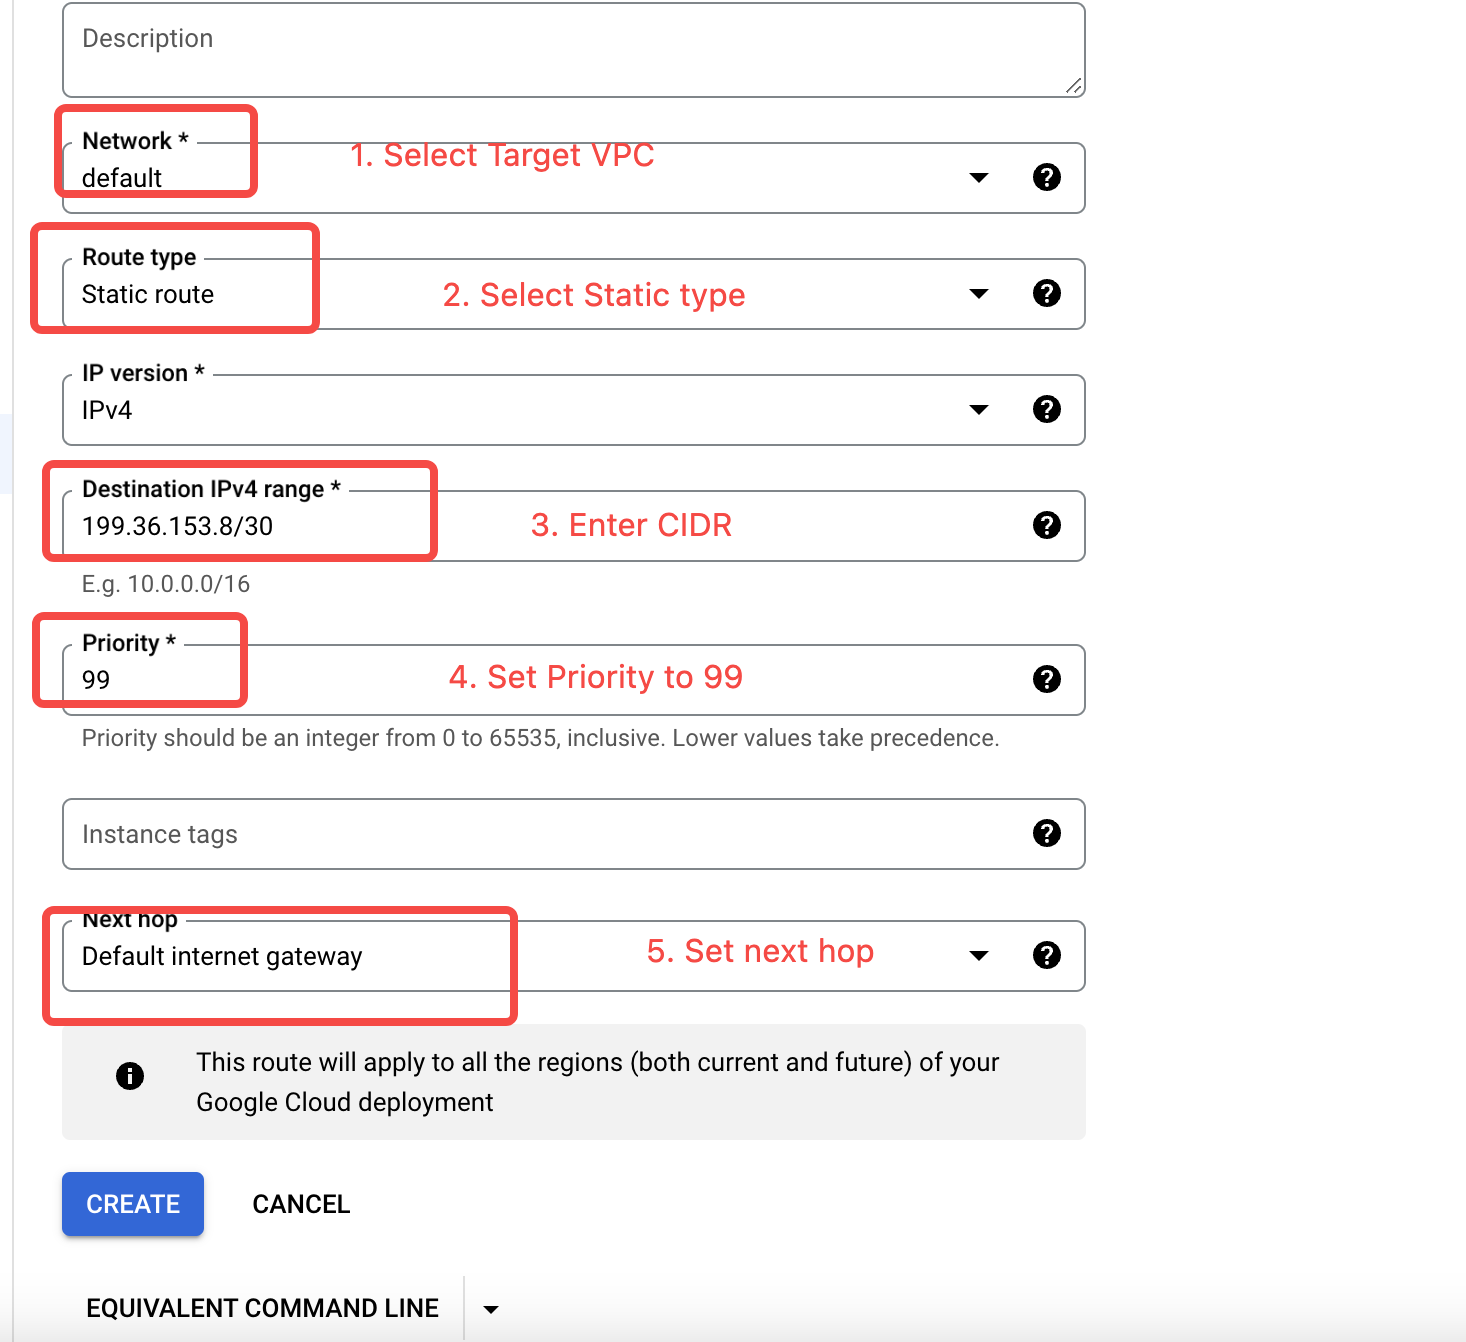
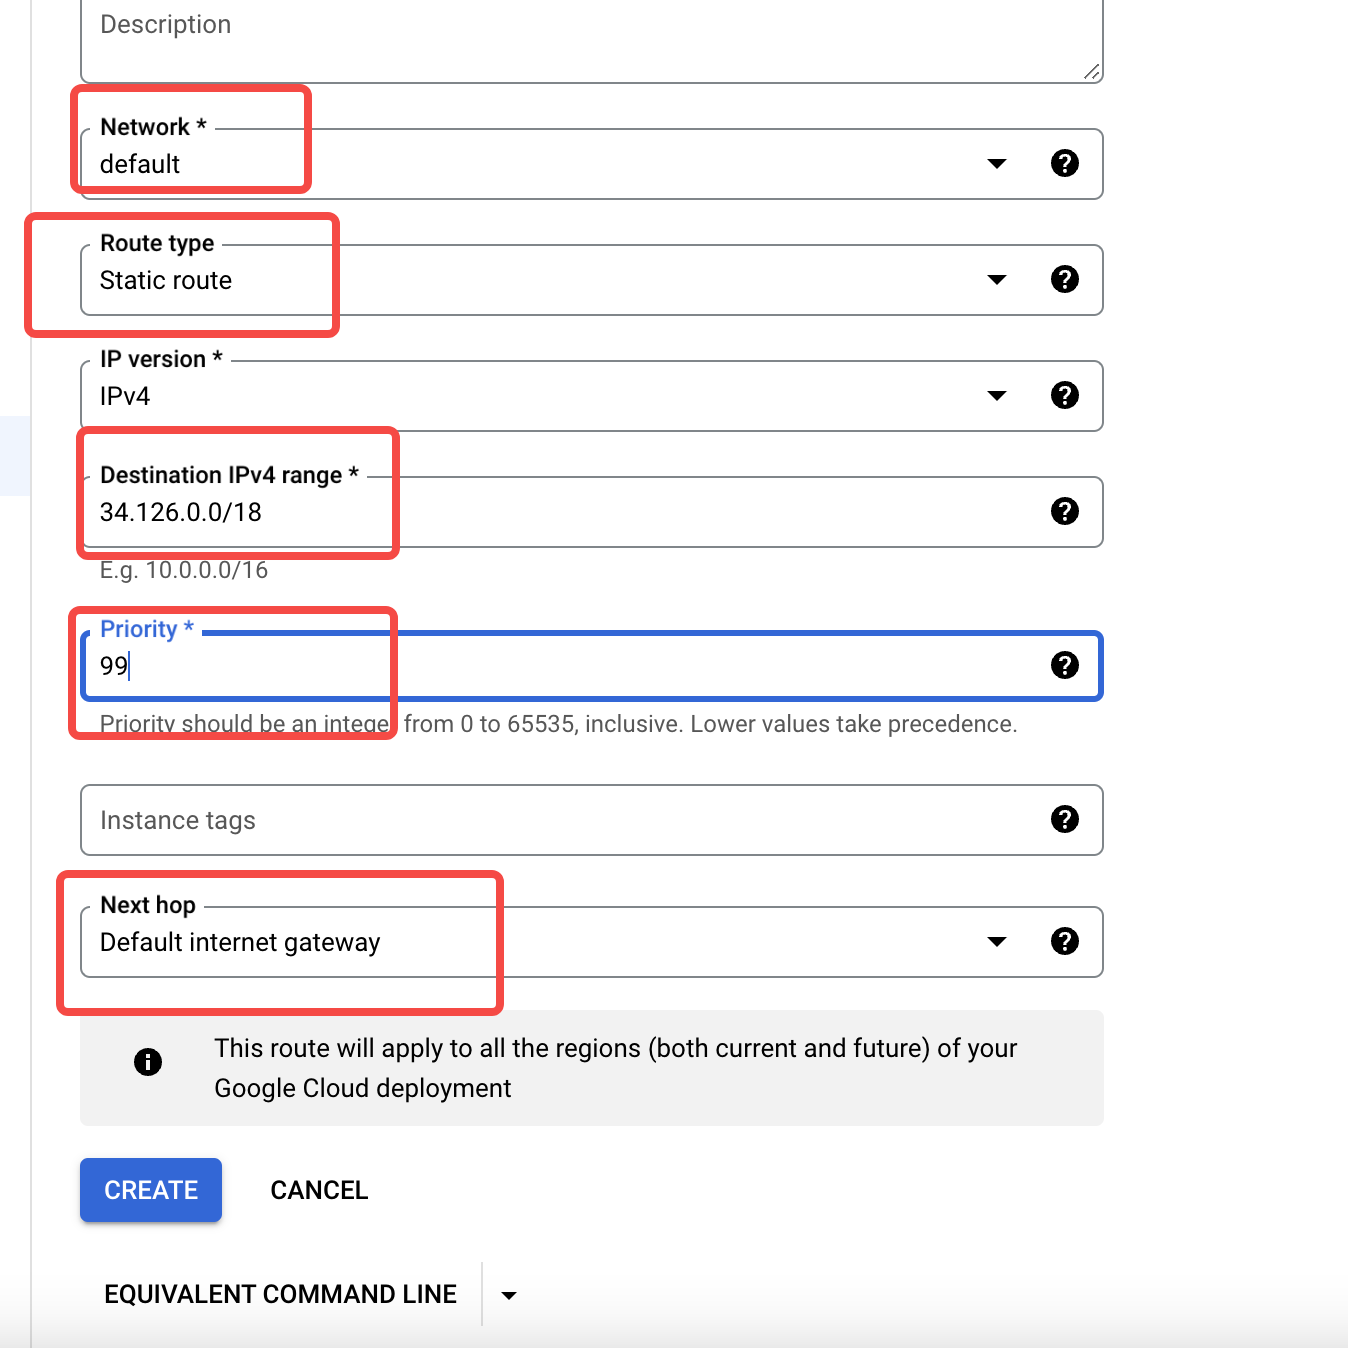
- Add firewall rules. After adding VPC routes, you need to add firewall rules within the VPC to allow subnets
199.36.153.8/30and34.126.0.0/18.

- Enter the virtual machine within the VPC, test access to GCS and other cloud services, check the access address, and confirm it has taken effect as the private network address configured in the previous steps.